EasyManua.ls Logo

Intermatic ET90115C User Manual

Intermatic ET90115C
48 pages
To Next Page IconTo Next Page
Page #1 background imageLoading...
Page #1 background image
www.intermatic.com
7777 Winn Road
Spring Grove, IL 60081
Manual No. 158--01050-REVA
ET90000 Series
Electronic Timer
Installation and Programming Guide
• Do not attempt to install or use your Intermatic product until you have read the safety instructions in this section. Save this
document and keep it in an easily accessible place.
• To avoid fire, shock, or death, turn off power at circuit breaker and test that power is off before wiring.
• Observe all national and local electrical and safety codes.
• Disconnect power when servicing or changing loads.
• Alterations or modifications to the device will create a hazard.
• Use copper conductors only. Use 10 AWG wire, minimum 105°C for 30 Amp loads.
• For outdoor locations, rainproof or wet location conduit hubs that comply with the requirements of UL 514B Conduit, Tubing,
and Cable Fittings for outdoor use, must be used.
Risk of Fire or Electric Shock
WARNING
Question and Answer IconNeed help?

Do you have a question about the Intermatic ET90115C and is the answer not in the manual?

Intermatic ET90115C Specifications

General IconGeneral
BrandIntermatic
ModelET90115C
CategoryTimer
LanguageEnglish

Summary

Safety Information

Warning and Caution Levels

Defines the meaning of Warning (death/serious injury) and Caution (minor/moderate injury) indicators.

Quick Start Guide

Mount Unit

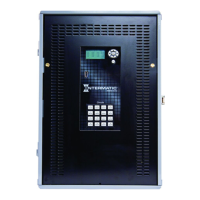
Mount the unit to a stable surface as required.

Connect to Power

Turn off power at circuit breaker before wiring and connect unit to power.

Install Wiring

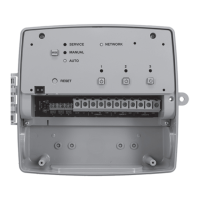
Wire applications to device as required.

Program Basic Information

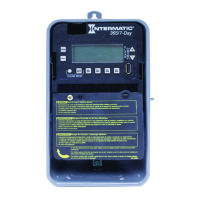
Input current date and time. Program an event to begin using an application.

Power Ratings

Installation Procedures

Mounting 1 & 2 Circuit Units

Step-by-step guide for mounting 1 and 2 circuit enclosures, including knockout usage.

Mounting 4, 8, 12 & 16 Circuit Units

Instructions for mounting 4, 8, 12, and 16 circuit enclosures using separate mounting brackets.

Connecting to Power

Power Connection Safety Warnings

Critical warnings about turning off power, testing absence of voltage, and ensuring proper wire insulation and tightening.

Install Wiring

Wiring Safety Precautions

Warnings regarding conductor ampacity, over current protection, circuit breaker usage, and copper conductors only.

Adding Relay Boards

Relay Board Installation

Steps for installing additional four-circuit relay boards to expand system capacity.

Controls and Interface

Programming

Initial Setup

Guides through setting the current date, time, and daylight saving time preferences.

Programming Events

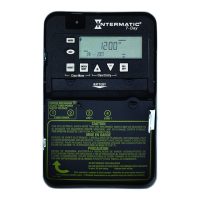
Steps for creating events, including choosing dates, times, circuit types, and naming.

Circuit Type Selection

Choosing between fixed ON/OFF or pulse ON/OFF for programmed events.

Naming and Controlling Circuits

Assigning names to events and selecting which circuits the event controls.

Advanced Programming Options

Advanced Options Menu

Date/Time Configuration

Options for configuring date, time, daylight saving time (DST), and astronomic zones.

Circuit and Zone Management

Holiday and Event Configuration

System Configuration

Related product manuals