EasyManua.ls Logo

Intermatic ETW2CP

Intermatic ETW2CP
8 pages
To Next Page IconTo Next Page
Loading...
INITIAL SETUP- CREATING AN INTERMATIC
CONNECT ACCOUNT
Follow these instructions to download, open and register the Intermatic Connect app.
1. Download the Intermatic Connect App from the Apple Store or Google Play Store.
2. Open the app and select “Create Account”.
3. Enter your email and password, select agree to terms and then select “Continue”.
4. Check your email for the 6 digit access code and input in the app when prompted.
ADDING A DEVICE
Follow these instructions to install the timer switch.
1. From Home screen, select the “+” symbol in the upper right of the home
screen then select the “General Purpose Timer” icon on the Device
Setup screen/page.
2. Displayed will be the timer name, type of timer and the type of connection.
Within Bluetooth range of the timer, verify communication by selecting the
Wink button on the app and the Mode light will briefly flash yellow.
(typically around 20 - 30 feet)
Intermatic Connect 365-Day
Programmable Smart Wi-Fi Timer
Programming Guide
Models ETW2CP, ETW3CP
INTERMATIC INCORPORATED | 1950 Innovation Way, Suite 300 | Libertyville, Illinois 60048 | www.intermatic.com 1

Other manuals for Intermatic ETW2CP

Question and Answer IconNeed help?

Do you have a question about the Intermatic ETW2CP and is the answer not in the manual?

Intermatic ETW2CP Specifications

General IconGeneral
BrandIntermatic
CategoryTimer
Voltage120V
Amperage15A
Horsepower1/2 HP
Control TypeDigital
DisplayLCD
Number of Programs7
ColorWhite
Battery BackupYes
EnclosurePlastic
Shortest ON/OFF Time1 minute
TypeElectronic
Load TypeResistive, Inductive
MountingWall

Summary

Initial Setup: Intermatic Connect Account

Download and Create Account

Steps to download the Intermatic Connect app and create a new user account.

Adding a Device to the App

Install and Verify Timer Switch

Instructions for installing the timer switch and verifying its Bluetooth connection.

Device Configuration

Configure Outputs

Setting up output configurations, including circuit combinations for different voltages.

Configure Inputs

Setting up input configurations for override types like switch, sensor, and photocontrol.

Network Connectivity and Scheduling

Connect to Wi-Fi and Cloud

Connecting the timer to a Wi-Fi network and completing the cloud setup process.

Basic Scheduling Functions

Programming basic schedules with event actions, days, time, and output selections.

Advanced Scheduling and Backup

Advanced Scheduling Options

Utilizing ON/OFF schedules, relative/specific dates, and holiday events for advanced programming.

Schedule Backup and Restore

Procedures for saving, applying, and managing schedule backups on the device.

Schedule Management and Settings

Deleting and Sharing Schedules

Procedures for deleting saved schedules and sharing them via the app.

Device Settings

Adjusting system settings like blink warnings, Wi-Fi configurations, and device information.

Device Reset and Communications

Full Unit Reset and Communications

Performing a factory reset and understanding the device's communication interfaces.

Schedule Example and Diagram

Illustrative Schedule Override Example

Demonstrating schedule overrides using a business lighting scenario with photocontrol.

Device Modes and Overrides

Switching Device Modes

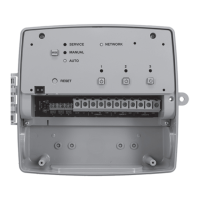
Navigating between Manual, Auto, and Service modes using the physical Mode button.

Understanding Overrides

Defining and explaining manual output overrides and their time limits for timers.

Advanced Override and Firmware

Types of Overrides and Inputs

Details on Normal and Extended override types, and discrete input configurations.

Firmware Upgrade and Support

Managing firmware upgrades (OTA) and listing supported mobile devices.

Related product manuals