INTERMATIC INCORPORATED | 1950 Innovation Way, Suite 300 | Libertyville, Illinois 60048 | www.intermatic.com4
Intermatic Connect 365-Day Programmable Smart Wi-Fi TimerProgramming Guide: Models ETW2CP, ETW3CP
Advanced Scheduling Functions
ON/OFF Schedules: This allows for programming the output state of the relays
for each Circuit. ON events will be associated to the Normally Open (NO) contacts,
while OFF events will be associated to the Normally Closed (NC) contacts.
A. Basic: This allows for typical 24 hour, 7-Day, or 7-Day Astronomic programming.
B. Advanced: This allows for Relative and Specific Dates to be programmed.
i. Relative: Select the occurrences in which these events will operate:
Available Options:
1
st
- 366
th
Monday - Sunday January - December
Each Week Year
Last Weekday Month
Weekend
Day
Examples: 4
th
Thursday of November, last Sunday of month, 1
st
day of year.
ii. Specific: Select the date and month in which these events will operate:
Available Options:
1
st
– 31
st
January - December
Example: 25
th
of December, 1
st
of January, 31
st
of May
iii. Holiday Schedules: If the need to have events take place outside of
the normal schedule that is in place, you can do this by utilizing Holiday
Scheduling. These events can be programmed using the same relative and
specific options that are available in section B. Advanced.
C. Saving Schedules: You can create as many schedules as you would like on
your app, but it is important to remember the control itself is limited to 256 ON or
OFF events with 64 holiday exceptions.
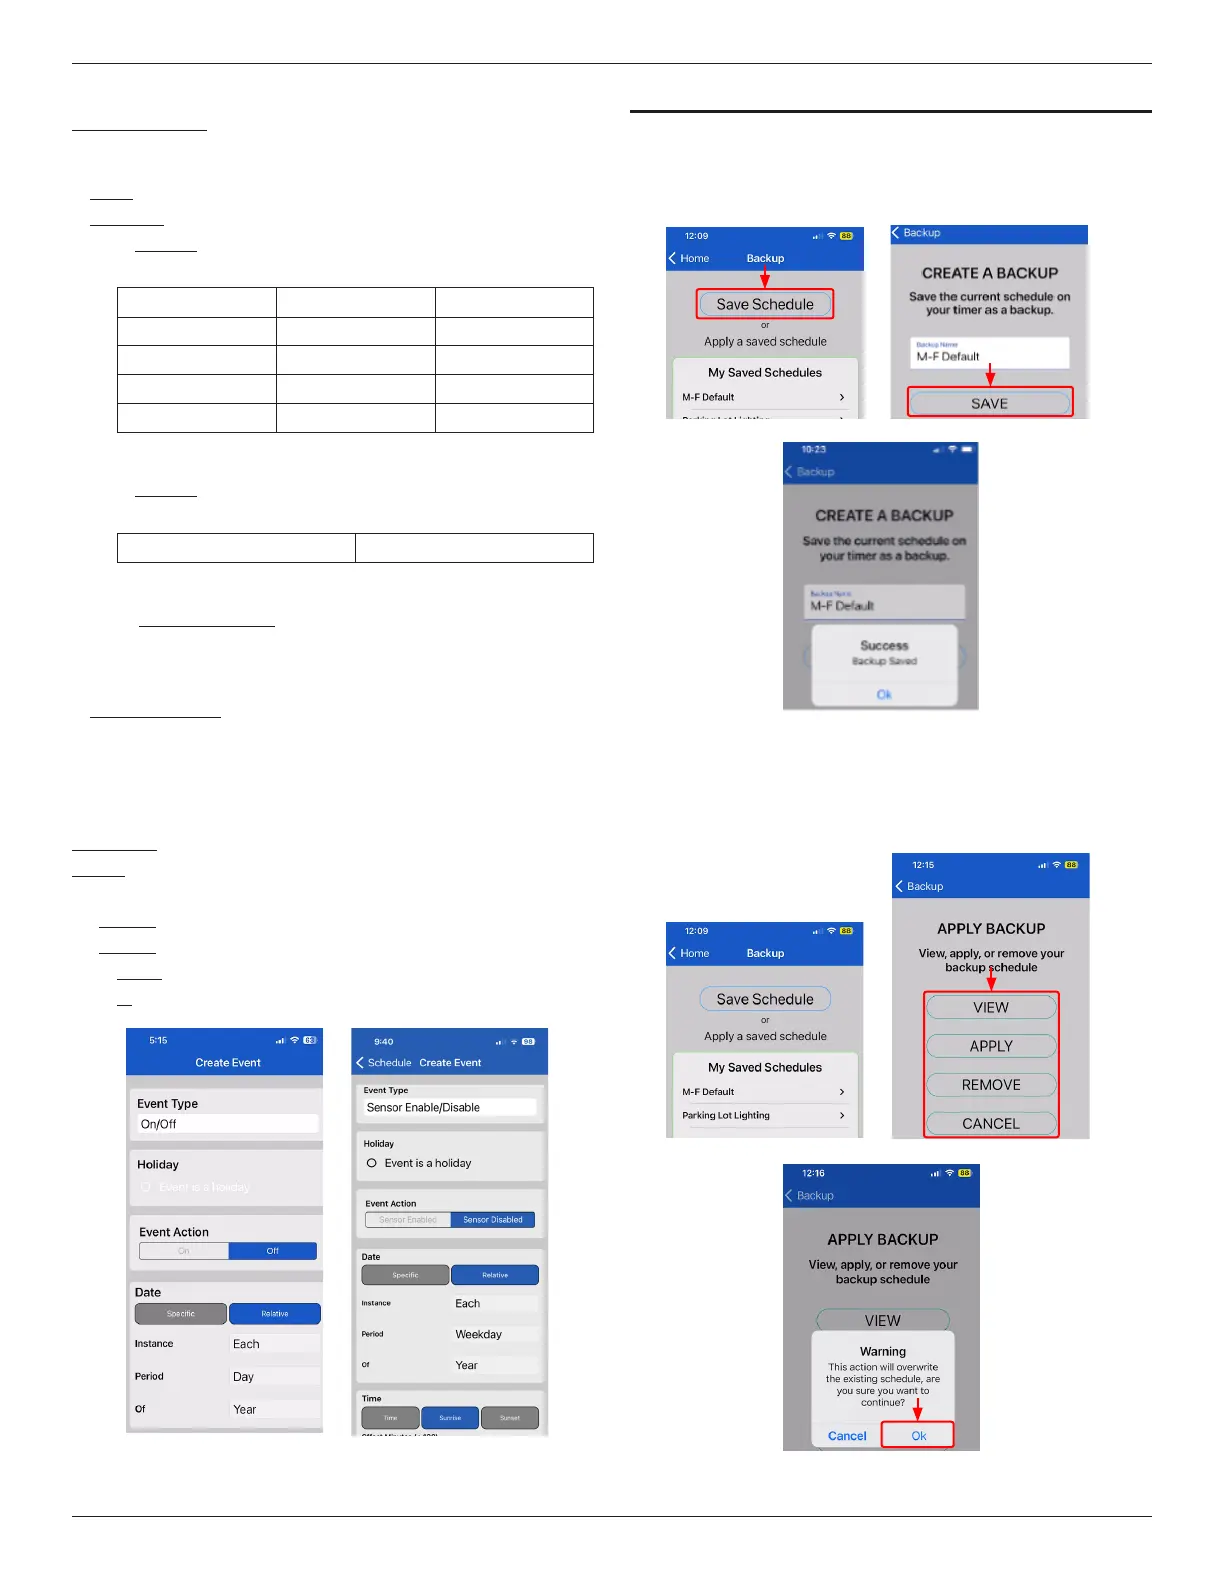
Additional Functions
Event Types: ON/OFF or Sensor Enable/Disable for remote inputs.
Holiday: When a Holiday Event is active, all non-Holiday Events are ignored.
Date
A. Specific: Allows Specific Start and End dates.
B. Relative: Options for instances of Last, Each and 1
st
to 366
th
.
i. Period: Options for Day, Weekend, Weekday, or each Day of the week.
ii. Of: Options for Year, Month or Specific Month.
Advanced Schedule
BACKUP
The Backup feature is used to save your current schedule, recall or delete other
saved schedules.
In the Schedule page, after creating a schedule, select “Backup” and “Save
Schedule” and name it, then Press “Save”.
Apply a Saved Schedule and View
In the Schedule page, select “Backup”, Select the desired schedule to
view, apply, or remove schedules.
Select “OK” and the current Schedule page loads.