...do not permit small children to operate the control or use the Pool/Spa unless they are closely supervised at all times.
...test GROUND FAULT protection regularly. If it fails to reset, DO NOT USE THE POOL or SPA!
Contact a qualified service technician.
...always disconnect electricity before servicing this Control or the equipment connected to it.
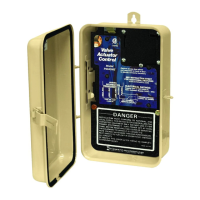
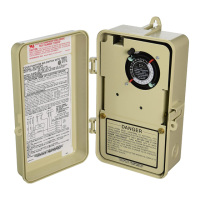
POOL/SPA CONTROL
ACCESSORIES
INSTALLATION
OPERATION &
SERVICE MANUAL
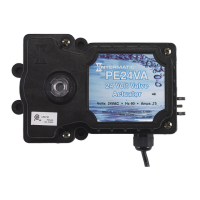
MODEL PE24VA VALVE ACTUATOR
Suitable for Pool / SPA Equipment Applications
ELECTRICAL RATINGS: 24 Volts, 60 Hz, 0.75 Amps.
TO BE CONNECTED TO A CLASS 2 CIRCUIT ONLY.
Normal Operation Duty Cycle: 1 minute on (Max), 8 minutes off (Min). These values may be temporarily exceeded during
installation testing and adjustment.
GENERAL INFORMATION
Valve Actuators are an important part of
pool/spa automation. They are used for
changing the water flow as required by a
pre-set program or a remote manual
control.
These Actuators mount directly on most
standard 1-1/2” or 2”, two or three port
valves and can be adapted to fit space saver
valves as well. They can be mounted in
four different positions and feature a
three-way toggle switch for ease of
synchronization.
INSTALLATION
Mounting Options
1. Standard Plumbing of a three-port valve is
the port B (middle) being the incoming
(common) port and A and C ports are the
outlet ports (See figure 1).
2. Standard Actuator Mounting position is when the main
body of the Actuator is over port B (See figure 2).
NOTE: If the valve is plumbed as in Figure 1 and the
Actuator is mounted as in Figure 2 below, the factory set-
ting of Actuator cams need no adjustment.
3. The Actuator can be mounted on top of a valve in four
different positions
(See figure 3).
Depending on the
plumbing of the
valve and
mounting
position of the
Actuator,
the cams inside
the Actuator
have to be reset.
Remove these four
(4) screws for
Standard Position
Water flows into or
out of the valve
Port B
(Common Port)
Port A
Port C
1
Figure 1. Standard Plumbing.
Figure 2. Standard Mounting.
Port A
Port B
(Common Port)
Port C
DANGER
To Reduce the Risk of Injury
READ, FOLLOW & SAVE THIS INSTRUCTION MANUAL
http://waterheatertimer.org/Digital-control-centers-and-manuals.html#PE24