6. UP button
12. Use the UP or DOWN button to highlight the desired option, then press
the ENTER
• When viewing the “thumbnails” screen, scrolls up (backwards) through the
available photos.
button.
• If you select Yes, a status message displays while the photo(s)/file(s) are being
downloaded. When the download is complete, the status message and Setup
Menu close automatically.
• When in “Setup” mode, scrolls backwards through the available menu options.
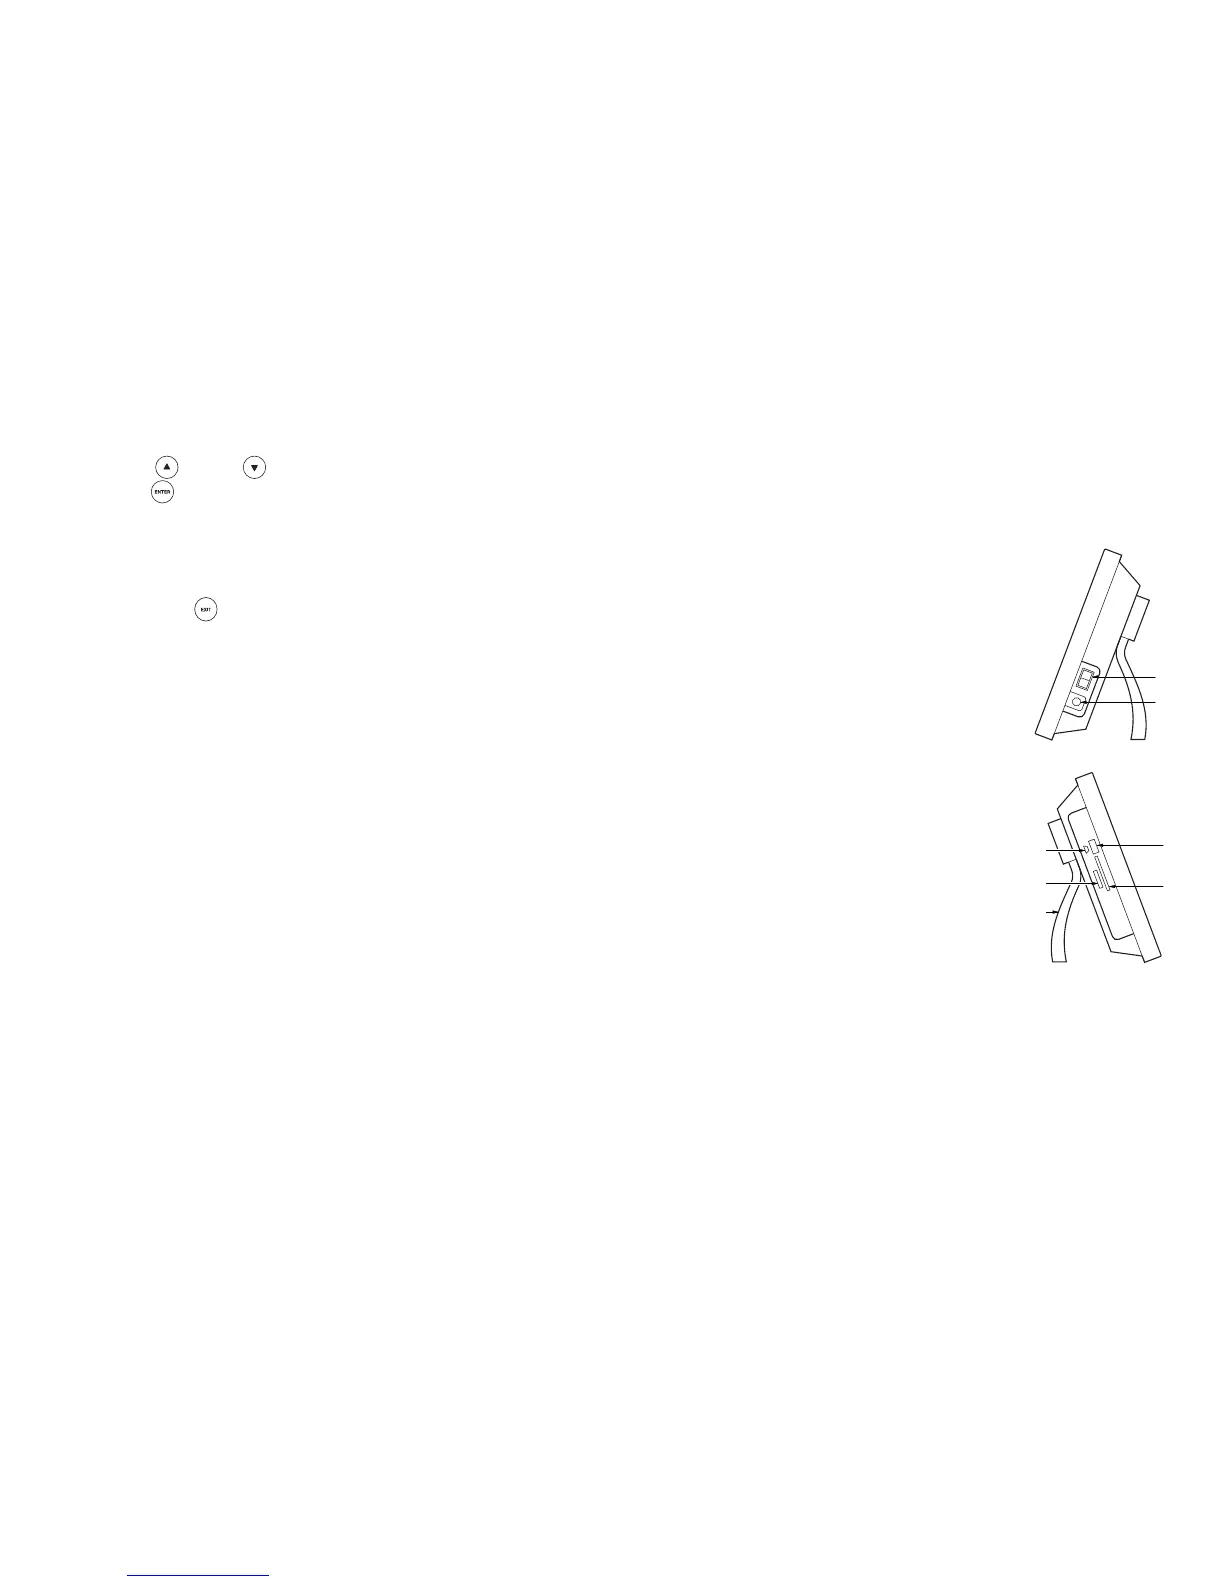
7. POWER switch
• If you select No, the photo/file is not downloaded to the frame’s internal memory.
Press the EXIT
button twice to close the menu.
Downloading Files from a PC
1. Turn the Digital Picture Frame OFF.
2. Connect the Mini-B connector of the USB cable to the USB connector on the Digital
Picture Frame. Connect the remaining end of the cable to an available USB port on
your computer.
3. Turn the Digital Picture Frame ON.
• The Digital Picture Frame adds four removable disks to the “My Computer”
directory, one for each memory card slot, and one for the frame’s internal
memory (this is the final removable disk in the list).
4. Copy the desired photo and audio files from your PC to the internal memory using
standard practices for your PC.
5. When all desired photos/files have been copied to the internal memory folder, turn
the Digital Picture Frame OFF, and disconnect the USB cable.
• Turns power to the Digital Picture Frame on (I) and
off (O).
8. Power connector
• Power connector for the Digital Picture Frame AC
adapter.
9. Compact Flash (CF) Memory Card slots
• Card slot for inserting a CF memory card.
10. USB-A connector
• Connector slot for inserting a USB 2.0-compatible
memory stick.
11. USB Mini-B connector
Connector for inserting a USB cable to transfer •
the Digital Picture Frame.
12.
• serting the memory card from your digital
13.
• the Digital Picture Frame for tabletop
display.
files from a PC to
Memory Card slot
Slot for in
camera.
Support Bracket
Supports
7
8
O
I
9
12
10
11
13