2. Connect a Mount to the iMate
After connecting a mount and accessories, such as a camera, to the iMate via USB port, one can
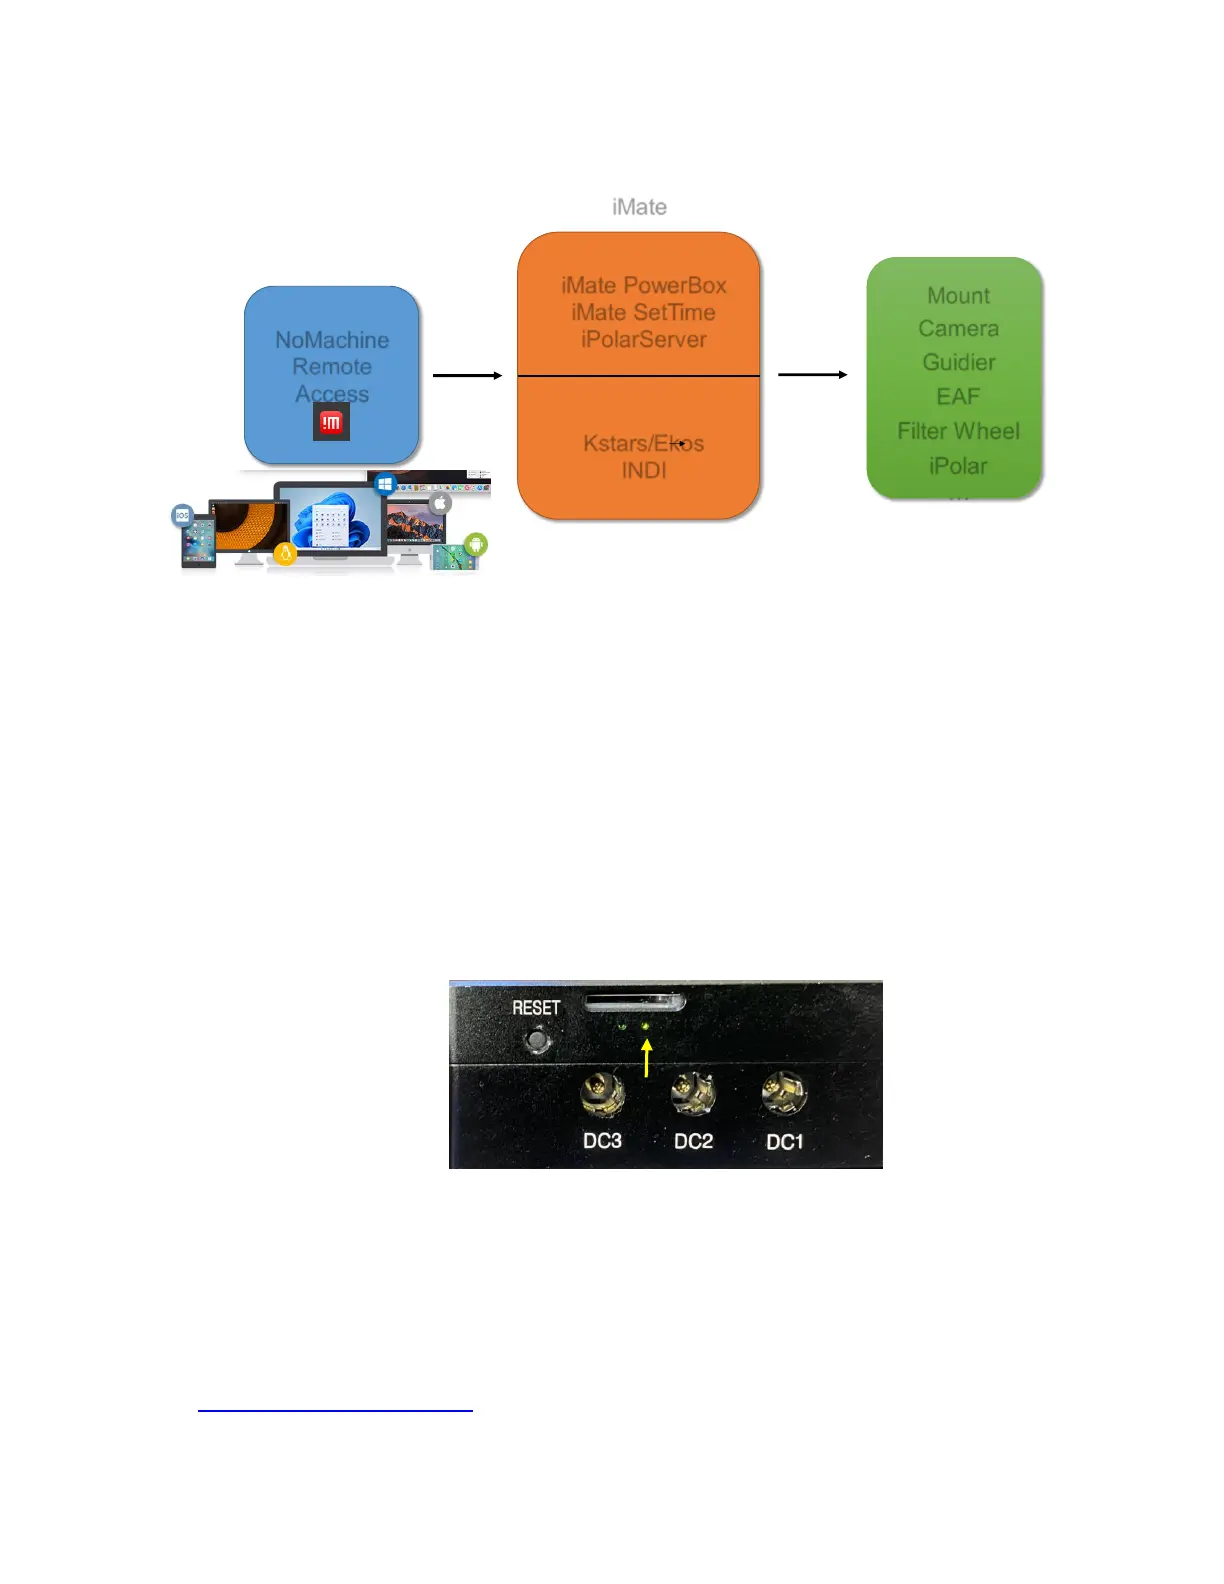
connect to the iMate via iMate Wi-Fi network and Nomachine remote software/App.
NoMachine
Remote
Access
iMate PowerBox
iMate SetTime
iPolarServer
Kstars/Ekos
INDI
Mount
iMate
Camera
Guidier
EAF
Filter Wheel
iPolar
…
Figure 1. iMate remote access connection
2.1. Connect a Mount to iMate
We use a CEM70-NUC mount and a PlayerOne camera as the setup example.
(1) Use a USB cable to connect the CEM70-NUC USB port to one of the iMate USB port;
(2) Connect camera to a USB port on the iMate or the CEM70-NUC;
(3) Connect the mount AC adapter
(4) Connect a 12V DC power (5.5/2.1mm, center positive plug) to iMate. You may also use the power
output port from the mount
(5) Turn both mount power and iMate power on. You should see a tiny green LED below the TF card
slot.
2.2. Initial Set Up iMate
If this is your first time to use the iMate, please follow the steps below for initial setup.
1. Download and install NoMachine for Windows, MacOS, Linux, iOS or Android. Here we use Windows as
an example:
(1) Goto https://www.nomachine.com to download NoMachine