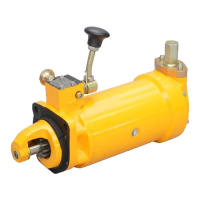
Installation
CAUTION: Do not attempt to wind and trip the starter unless it is fitted on an engine. The unit will
break if it is held in a vice energised and released. The warranty will NOT BE VALID.
The IPU Starter is easy to install and operate. It requires no special skills or tools. You should,
however, still read the following step-by-step instructions before fitting or operating the starter.
Rotation
The starter ranges are designed for anticlockwise rotation engines only, viewed from the flywheel
end. In other words, the starter replaces clockwise rotation electrical, pneumatic or hydraulic
starters. (See Appendix II). See Appendix V for modified operation of anticlockwise starter.
Engine Space
Check that you have sufficient room on the engine crankcase to fit the starter (see Appendix I).
Replacing the Original Starter
Remove the existing electric, pneumatic or hydraulic starting device, ensuring that you retain any
spacers already present, unless the starter model that you have already has a spacer included with
it.
Make sure that while removing the old starter you do not disconnect the fuel shut-off valve. On
some applications there may be an electrical engine shut-off valve. This can either be operated by
direct supply from the battery or converted to manual shut-off.
IPU Design
You may find when replacing your current starter with the IPU Starter that there is a difference
between the numbers of teeth on the two pinions. This is a design feature adapted to make a
larger body diameter IPU Starter replaces a smaller diameter electric starter. This is achieved by
offsetting the spigot and mounting holes of the starter from its centreline and increasing the
number of teeth to compensate for this.