IPU 40108
Page 11 of 29
3.4.7 Menu Operation and Functions
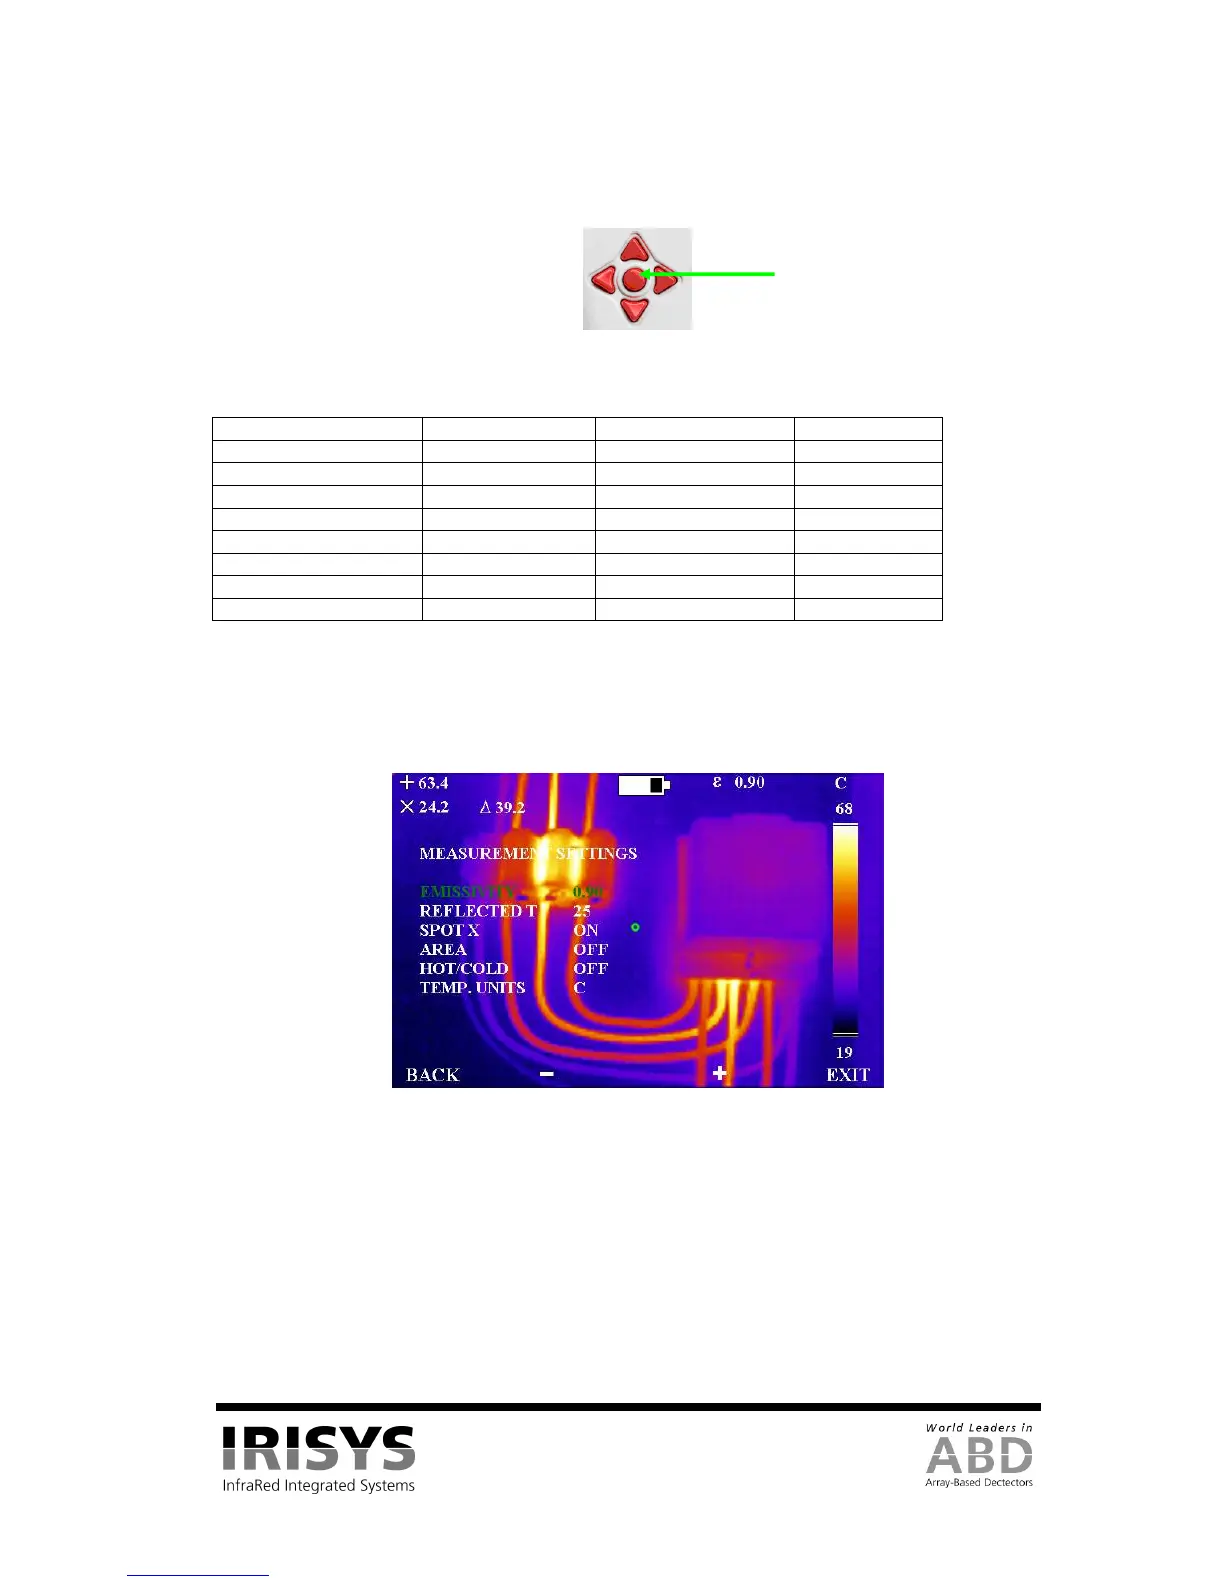
The main menu structure is opened by pressing the menu button in the centre of the directional buttons.
Figure 15: Menu Button
There are four sub-menus, which contain the functions listed in Table 1.
Measurement Settings Camera Settings Image Browser Clock/Calendar
Emissivity Colour Palette View Year
Reflected Temperature Auto Power Delete Month
Spot X Factory Settings Day
Temperature Units Image Only Hour
Area B - C Minute
Cursor Reset Date Format
Time Format
Table 1: Menu Functions
The menu functions are selected by moving the highlighted cursor using the up and down directional buttons.
Menu items are edited using hot buttons 2 & 3 which are labelled + and -. Hot button 1 is always available to
take you “back” one menu sub-level, whilst hot button 4 is always available to “exit” the menus completely.
Figure 16 shows an example screenshot from the Measurement Settings menu, with the highlighted cursor on
the emissivity adjustor.
Figure 16: Menu Operation
3.4.7.1 Measurement Settings
• Emissivity – The user can select the emissivity for the material being imaged. To achieve
correct temperature measurement the emissivity value must be set correctly. An emissivity
lookup table is included in Section 6.
NOTE: Caution should be observed in using the emissivity control – the user should explore
the effect on the observed temperature of an object when different emissivities are
selected. Low values of emissivity should be used only with extreme caution as large
errors in temperature readings may be obtained with only small errors in emissivity.
Care should also be taken to avoid reflections from hot/cold objects in the vicinity.


 To Next Page