Do you have a question about the ISCO GLS and is the answer not in the manual?
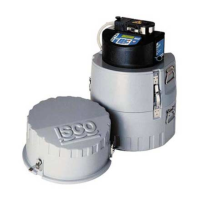
Overview of the pocket guide's content and its purpose regarding sampler installation.
A step-by-step guide to prepare the GLS sampler for each use, ensuring proper setup.
Instructions on how to visually inspect the pump tube for cracks and ensure proper functioning before running a program.
Details the specifications and proper routing of the discharge tube for accurate sample collection.
Guides on how to install various types of bottles into the GLS base section for sample collection.
Methods and capacity for cooling collected samples using ice or gel packs within the sampler's base.
Procedures for connecting compatible 12-Volt DC power sources, including batteries and power packs.
Information on selecting, preparing, and connecting the suction line and strainer for efficient liquid transfer.
How to connect external devices for sampler pacing and inhibiting, controlling sample collection rates.
Key considerations for selecting a safe and suitable installation site, including surface, support, and environmental factors.
Instructions on how to secure the GLS sampler by placing a padlock on the carrying handle for tamper prevention.
Description of each button on the GLS sampler's keypad and their functions during operation and programming.
Overview of the two methods for programming the GLS sampler: One-button and Standard Programming.
How to quickly load stored program settings and run the sampling routine using a simple button sequence.
Step-by-step guide to program the GLS sampler settings, including pacing, volume, and timing.
Instructions on how to save current program settings as the default "Stored Program" for later recall.
Procedure for setting the internal clock and date on the GLS sampler for accurate scheduling.
Steps to calibrate sample volumes for improved accuracy, involving suction line settings and volume checks.
How to initiate the programmed sampling sequence using the Go button or the one-button sequence.
Explains the various display messages indicating the sampler's status during operation, such as collecting or waiting.
Describes the conditions under which a programmed sampling routine will end, such as completion or errors.
Outlines essential tasks after sampling, including recovering the sampler, preparing bottles, and viewing logs.
Details common errors the GLS sampler may encounter, their causes, and how they are logged for troubleshooting.
Instructions for collecting a single sample on demand, independent of the programmed routine.
A guide on how to replace the pump tube, including warnings and step-by-step procedures for maintenance.
| Engine Type | Gasoline |
|---|---|
| Engine Displacement | 190cc |
| Power Output | 6.5 HP |
| Cutting Width | 21 inches |
| Warranty | 2 years |