59
Commissioning operating mode B (D series only)
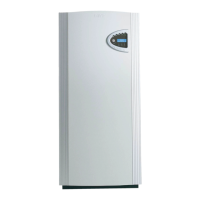
Connect the mains voltage to the heat pump and press the ON/OFF button on the control panel.
Rego600 measures the phase sequence so that the compressor does not go the wrong way, so if you
receive a phase sequence alarm the main supply is cut to the heat pump and two of the phases are
shifted.
Press “Menu” for 10 seconds to come into the Installer / service menu. I/S should be visible at the top
right hand corner.
Go into display 5.1 and choose operating mode B. This is described further down in the text.
Heating setting Heating incr/decr can temporarily be set at max. So as to avoid waiting for the heat
pump restart timer you can go in to display 5.6 and quick start the heat pump. If the pump does not
start press Info to see what the reason is. When the heat pump starts, check the sight glass in the heat
pump. On starting there may be bubbles in the sight glass for a minute or so, after which they should
disappear. Bubbles present all the time the heat pump is running are a fault symptom. They are prob-
ably due to air in the collector hose or insufficient heat transfer fluid.
Check that the operational condition of the heat pump corresponds to the information supplied in the
Info menu.
There are always som settings youhave to check or adjust and some you might need to change if they
require another setting than the factory setting.
Displays you must always check
Choose operating mode B so that Rego600 memorises the
operation with oil-fired boiler and mixing valve.
If you have connected any of the external sensors GT3, GT4
or GT5 you must Ackn then so that Rego600 memorises
them.
When you use a mixing valve to the oil-fired boiler it is
important to set the running time of the motor. The time it
takes for the mixing valve to go from closed to fully open. It
is often marked on the mixing valve motor.
Mixed add. heat
Setting of
SV1 runtime 8.3.6
Return Select
Commiss./Service
Select operation
mode A B C 5.1
Return Select
Commiss./Service
Connected extra
sensor in op. 5.13
Return Select
 Loading...