GB-8
JACOBSEN AR3
NARROW WIDTH OF CUT FIELD KIT
FITTING INSTRUCTIONS
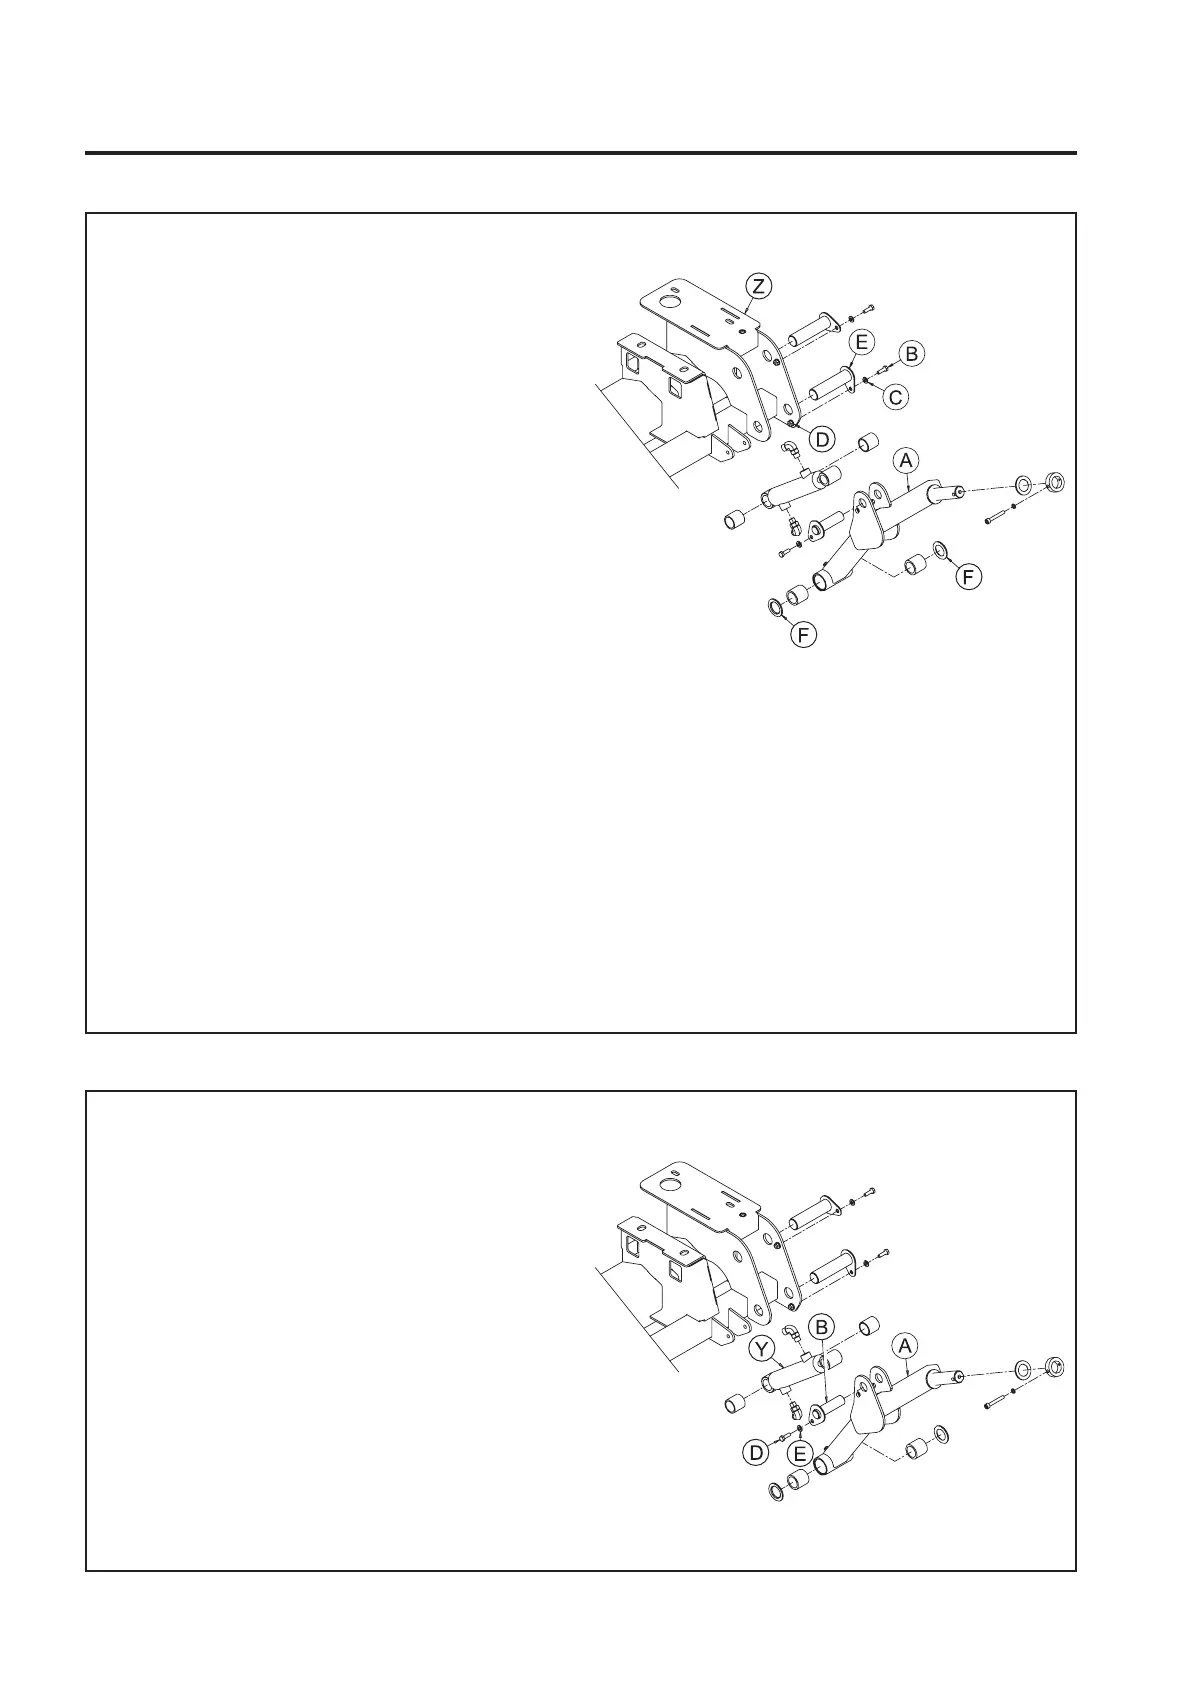
4.4 ASSEMBLE NEW LIFT ARM TO FRONT
AXLE
1. Smear bore of new Lift Arm (A) bushes with
Shell Darina R2 grease (or equivalent).
2. Clean surface of Lift Arm Pivot Pin (E) (removed
in Step 4.3.2) to remove old grease residue.
3. Smear surface of Lift Arm Pivot Pin (E) with
Shell Darina R2 grease (or equivalent).
4. Fit new Lift Arm (A) to Front Axle (Z) fitting
Nylon Washers (F) between the Front Axle (Z)
Plates and the Lift Arm (A) Pivot Housing.
5. Align holes in Lift Arm (A), Nylon Washers (F)
and Front Axle (Z).
6. Fit Lift Arm Pivot Pin (E) through Front Axle (Z),
Nylon Washers (F) and Lift Arm (A) Pivot
Housing.
Note - Lift Arm Pivot Pin (E) is assembled so
that the flange plate is on the outside of the
machine.
7. Align hole in Lift Arm Pivot Pin (E) Flange Plate
with hole in Front Axle (Z) Plate.
8. Reassemble hardware (B, C and D) (removed in
Step 4.3.1) to Lift Arm Pivot Pin (E) and Front
Axle (Z).
4 FRONT LH LIFT ARM
4.5 RECONNECT LIFT RAM TO LIFT ARM
1. Align holes in Lift Ram (Y) and Lift Arm (A).
2. Clean surface of Ram Pin (B) (removed in Step
4.2.1) to remove old grease residue.
3. Smear surface of Ram Pin (B) with Shell Darina
R2 grease (or equivalent).
Note - Ram Pin (B) is assembled so that the
flange plate is on the inside of the Lift Arm (A).
4. Align holes in Ram Pin (B) with slot in Lift Arm
(A) Plate.
 Loading...