Page 8
2.3 Basic Plumbing
2.3.1 PlumbingforPoolandSpaCombination
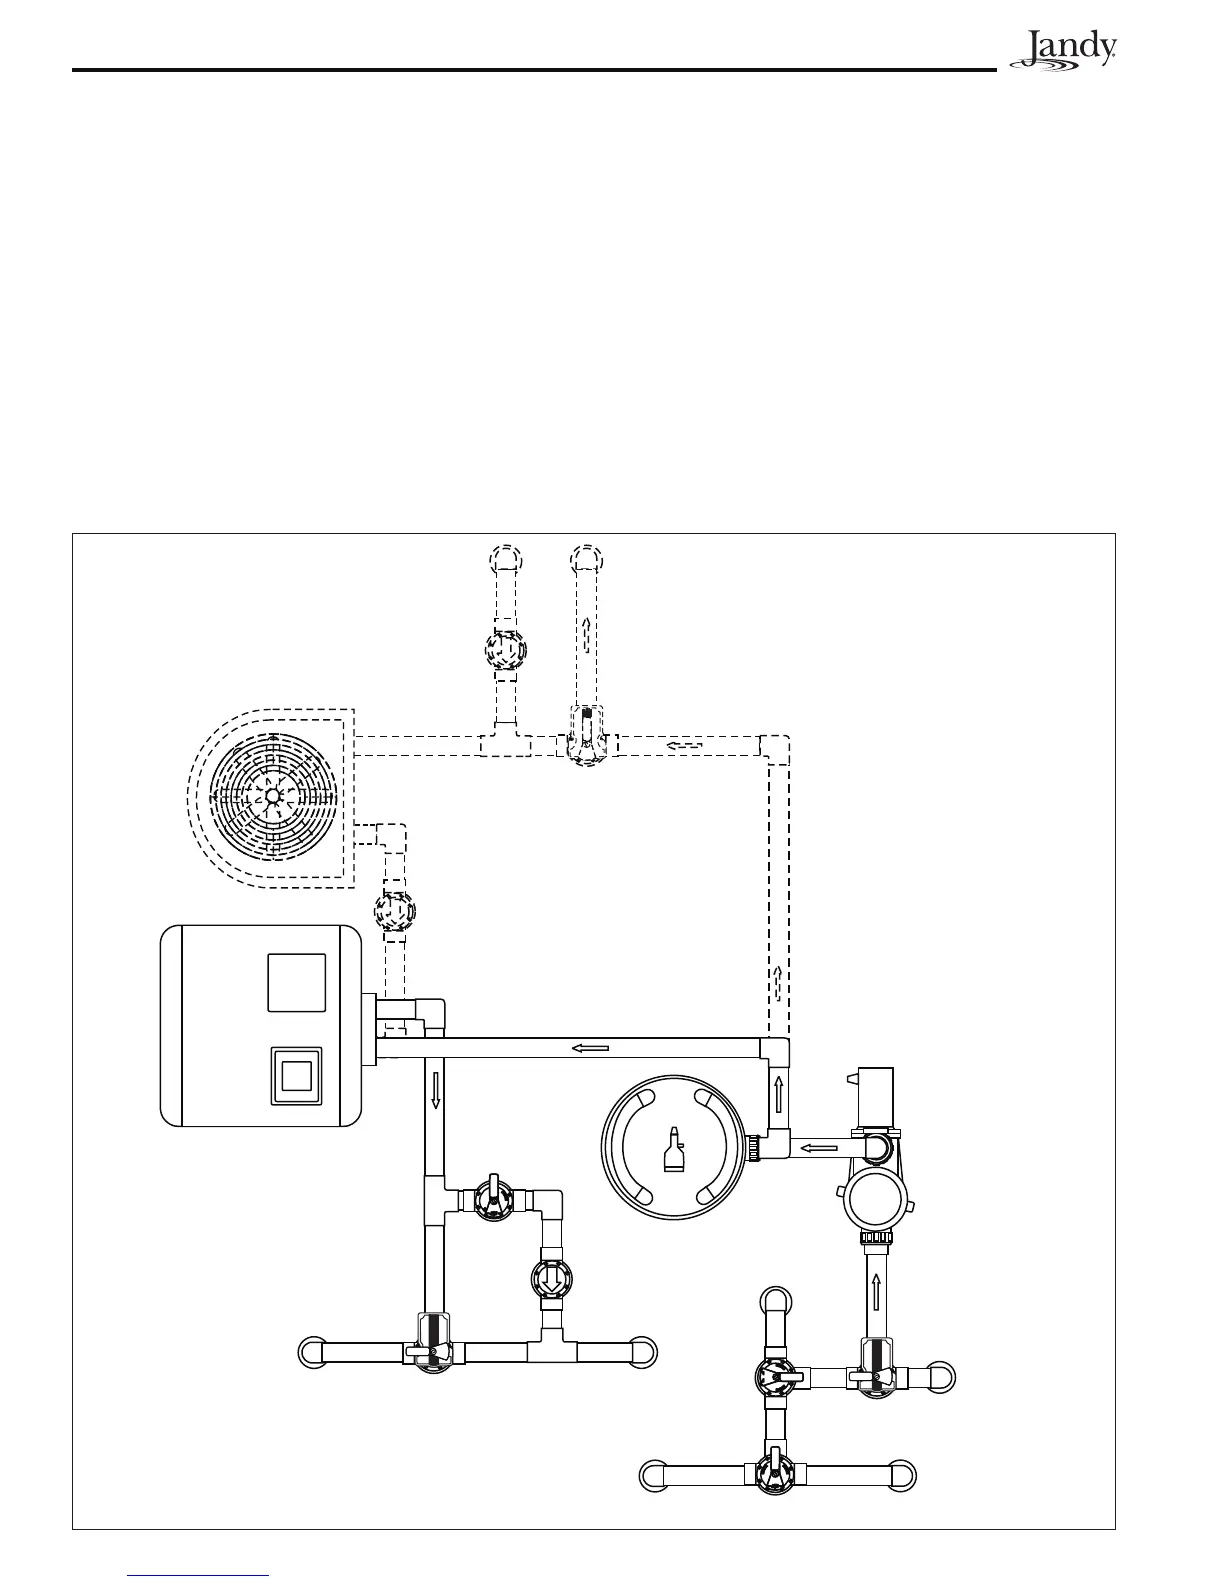
The following plumbing diagrams illustrate
simplified versions of standard plumbing setups
for a pool and spa that share the same filter pump,
filter, and heater. The intake and return JVA’s
turn simultaneously so when the Spa button
is pressed on the AquaLink RS Control Panel,
water circulation switches between pool and spa
(consult the Jandy Valve Actuator Installation and
Operation Manual to ensure that the JVA’s are
synchronized and rotate properly). Please consult
the Jandy Valve Plumbing Manual for further
examples of pool/spa plumbing.
Heater
Filter
Filter
Pump
Pool Drain
Spa Drain
Spa ReturnPool Return
Check
Valve
Spa
Make-up
Check
Valve
Heat Pump
SkimmersSkimmers
From Solar
To Solar
For Pool Only/Spa Only or Dual Equipment
plumbing, please refer to the Jandy Valve Plumbing
Manual for further examples.
NOTE When the filter system is shared (a Pool/Spa
Combo), the spa water must be able to overflow
back to the pool.
 Loading...