Page 12
Jandy
®
Pro Series, WaterColors LED Lights
|
Installation Manual
Always
installanewlensgasketwheneverdisassemblingthe
light(JandyColorLightGasketP/NR0451101forlarge
lightandP/NR0400501forsmalllight).Failuretodo
somaypermitwatertoleakintotheassembly,which
couldcause:
(a)Anelectricalhazardresultingindeathorserious
injurytopoolorspausers,installers,orothersdueto
electricalshock,or
(b)AmalfunctionoftheJandyWaterColorsLight,
whichlikewisecouldresultinseriousinjurytopoolor
spausers,installers,orbystanders,orindamageto
property.
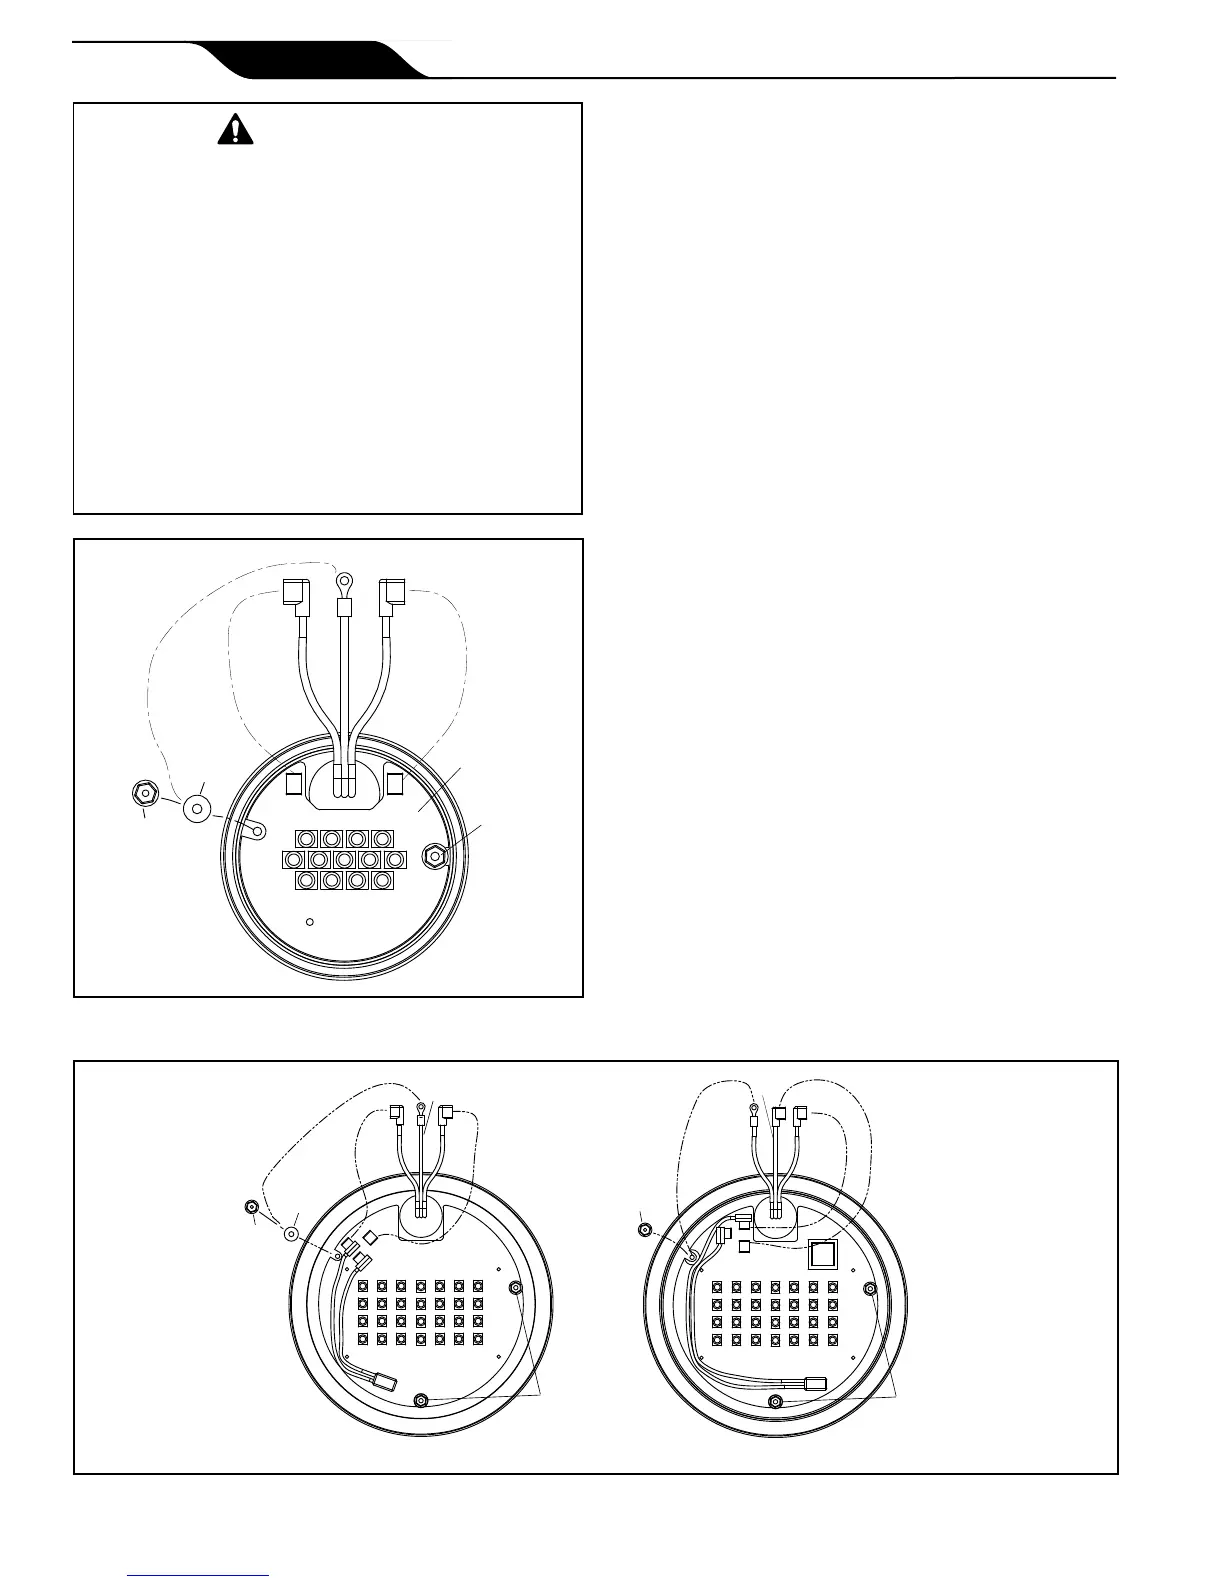
AC1 AC2
Black (12V)
Blue (120V)
White (12V)
Red (120V)
Green
Nylon
Washer
Nut
Light
Engine
Secure
First
120V Wiring12V Wiring
White
Green
Black
J6
J2
J3
J2
White
Green
Black
Nylon
Washer
Nut
Nut
Secure
First
Secure
First
b. While holding the xture upright, place the glass
lens with the gasket on top of the xture. Please
note that the lens gasket is not symmetrical.
Therefore, it must be installed correctly so that
the lens can seal to the xture housing. Place the
gasket on the lens so that the thick molded side
of the gasket will mate with the housing when
the lens is installed, see Figure 10. On the small
light, replace the diverger by tucking the tabs
between the lens and gasket.
Besuretofacethedullsideofthedivergerdown
towardsthePCB.
c. Position the lens and gasket on the xture. Place
the face ring assembly over the lens and align
the pilot screw with the small arrow mark on the
face of the lens. Note that the small arrow mark
on the face of the lens and the pilot screw of the
face ring must be aligned with the arrow located
on xture label that reads, “Arrow on this label
must line up with the pilot screw on the Face
Ring”. See Figure 9.
d. While holding the aligned face ring assembly
and xture together, turn the assembly upside
down and set it on the old gasket, using the old
gasket as an assembly xture. This will keep the
lens and gasket assembly from being pushed out
of the face ring while you secure it to the light
xture.
e. Spread the bottom clamp over the electrical cord
and slide it onto the back of xture to the top
clamp.
f. Tighten the Phillips head screws (eight (8) for
large light and six (6) for small light) on the
light in alternating cross-pattern. Torque screws
to approximately 20 in-lbs. Do not over-tighten.
g. Discard the old gasket.
 Loading...