8
q
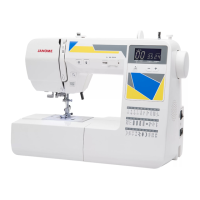
LCD Display
The LCD display shows following information when the
machine is turned on.
q Identication letter of the recommended foot
w Stitch pattern number
e Cursors
r Stitch width
t Stitch length
Function Keys
Mode key
Each time you press the mode key q, the cursor will shift
and the mode will change in the following order:
(1) Pattern selection mode (rst and second digits)
(2) Pattern selection mode (second digit)
(3) Stitch width adjustment mode
(4) Stitch length adjustment mode
Value set key
Press the value set keys w to alter the value above the
cursor(s).
Press “+” to increase the value.
Press “–” to decrease the value.
Selecting the patterns
(1) Pattern selection mode (rst and second digits)
The cursors appear under the pattern number for both
rst and second digits.
The stitch pattern number will increase or decrease by 1
each time you press the value set keys w.
Change the stitch pattern number until the pattern
number of the desired pattern is indicated.
Stitch pattern numbers and their stitch images are shown
on the stitch chart under the function keys.
(2) Pattern selection mode (second digit)
Press the mode key q.
The cursor appears under the second digit of the pattern
number.
The stitch pattern number will increase or decrease by 10
each time you press the value set keys w.
(3) Stitch width adjustment mode
Press the mode key q.
The cursor appears under the stitch width value.
To alter the stitch width, press the value set keys w.
w
r t
e
(4) Stitch length adjustment mode
Press the mode key q.
The cursor appears under the stitch length value.
To alter the stitch length, press the value set keys w.
Press the mode key q to return to the pattern selection
mode (rst and second digits).
q
w