14
OPERATION - TIG
Before starng any welding acvity ensure that you have suitable eye protecon and
protecve clothing. Also take the necessary steps to protect any persons within the welding
area.
TIG welding
Insert the cable plug with the work clamp into the
“+” socket on the front panel of the welding
machine and ghten clockwise.
Insert the cables plug of the TIG torch into the “-”
socket on the front panel of the machine and
ghten clockwise.
Connect the TIG torch gas hose to the owmeter
that is connected to the regulator which is located
on the shield gas cylinder.
Before starng any welding acvity ensure that you
have suitable eye protecon and protecve clothing.
Also take the necessary steps to protect any persons within the area.
Aer connecng the welding leads as detailed you will need to switch the power switch on the back panel
to “ON”. Select Li TIG by switching to TIG on the MMA/TIG welding mode switch. (Note, there is voltage
output at both output terminals).
Set the amperage on the machine suitable for the electrode being used. (For a guide to tungsten sizes,
please refer to the table below). Ensure you have adequate welding current according to the thickness
of the work and weld prep being carried out and ller wire being used.
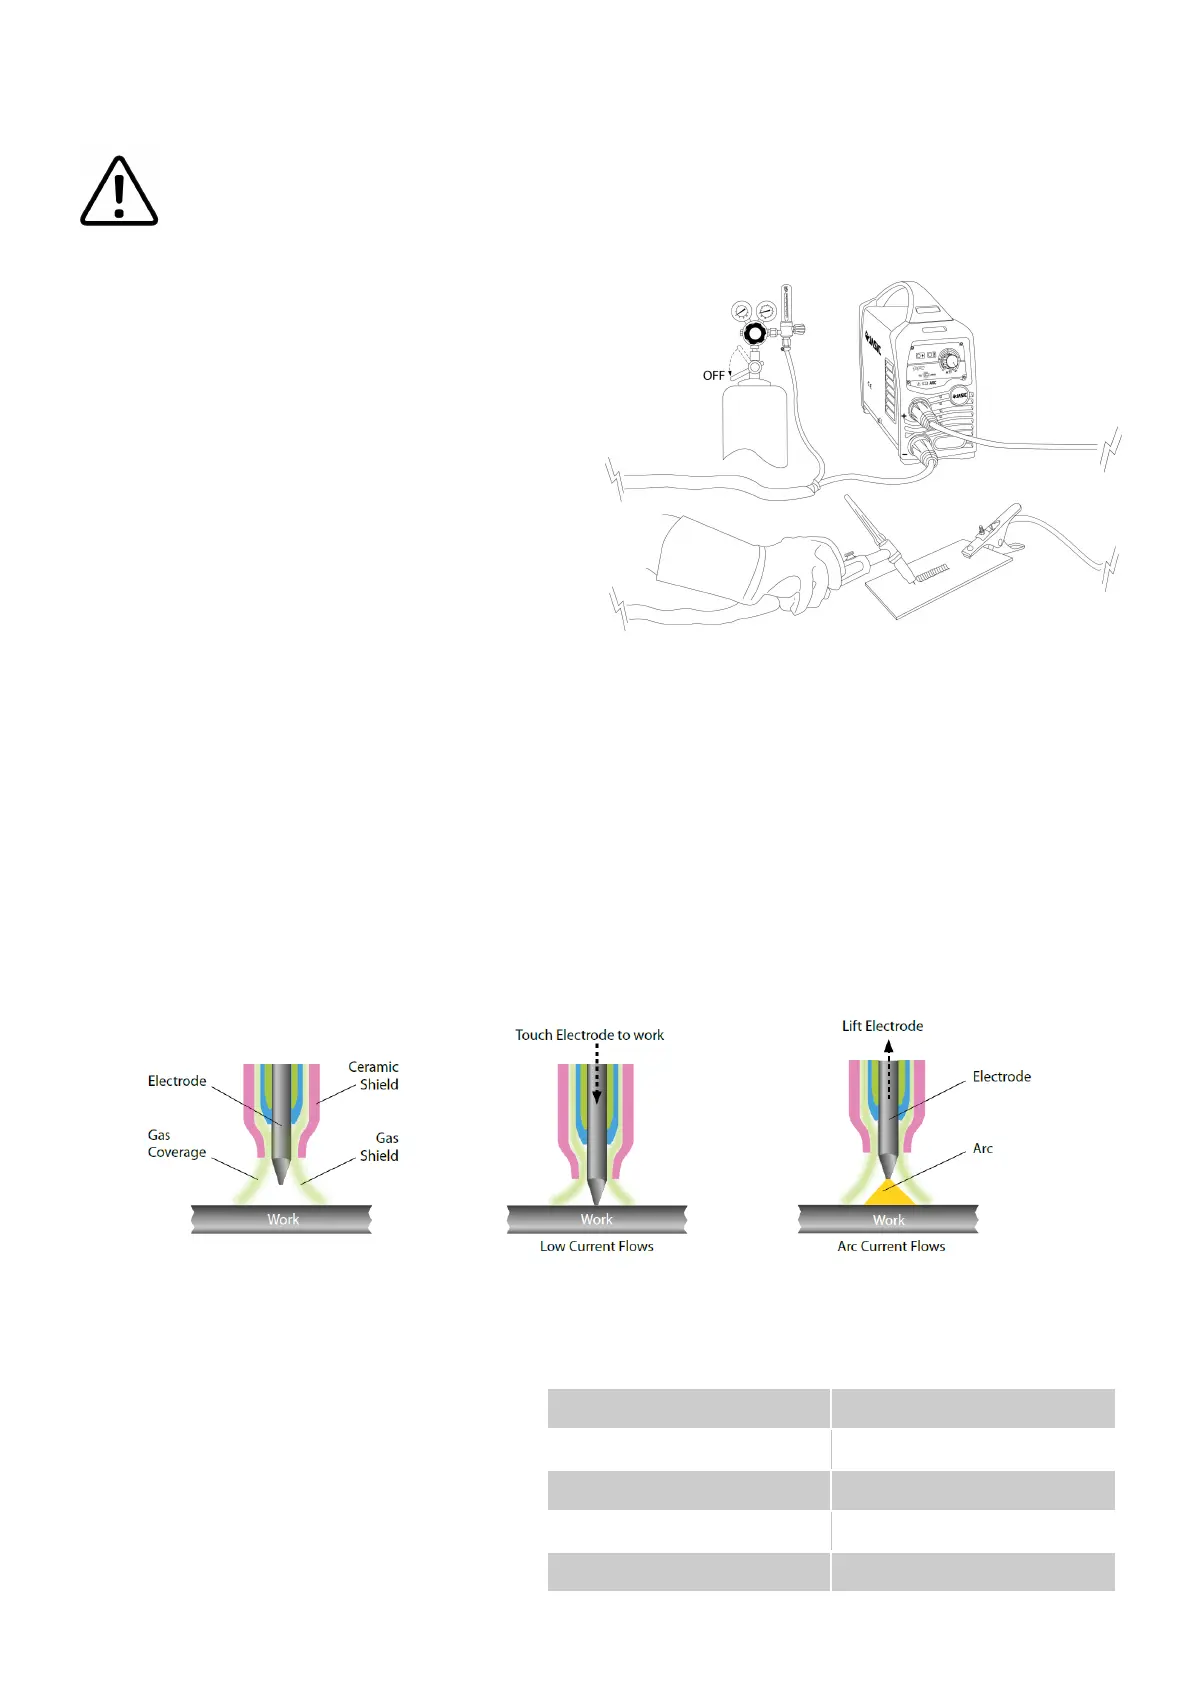
Li TIG descripon
Open the gas valve of the cylinder and adjust the gas regulator to obtain the desired ow rate.
Open the gas torch valve located close to the torch head and the gas will ow.
The Jasic ARC range allows the tungsten to be in direct contact with the work piece with minimal current
so as not to leave tungsten deposits. Once contact has been made the tungsten can then be lied away
2-4mm from the work piece and the welding arc is then established.
Once welding is complete pull the torch away
to disengage the welding arc but ensure you
leave the torch in place to shield the weld with
gas for a few seconds and then turn o the gas
at the valve on the torch head.
Tungsten Size DC – Electrode Negave
1.0mm 15 – 80A
1.6mm 70 – 150A
2.4mm 150 – 250A
3.2mm 250A – 400A
 Loading...