JAYCO HARD WALL MODELS SECTION 14 – SETUP & MAINTENANCE
SCT HS 14-11
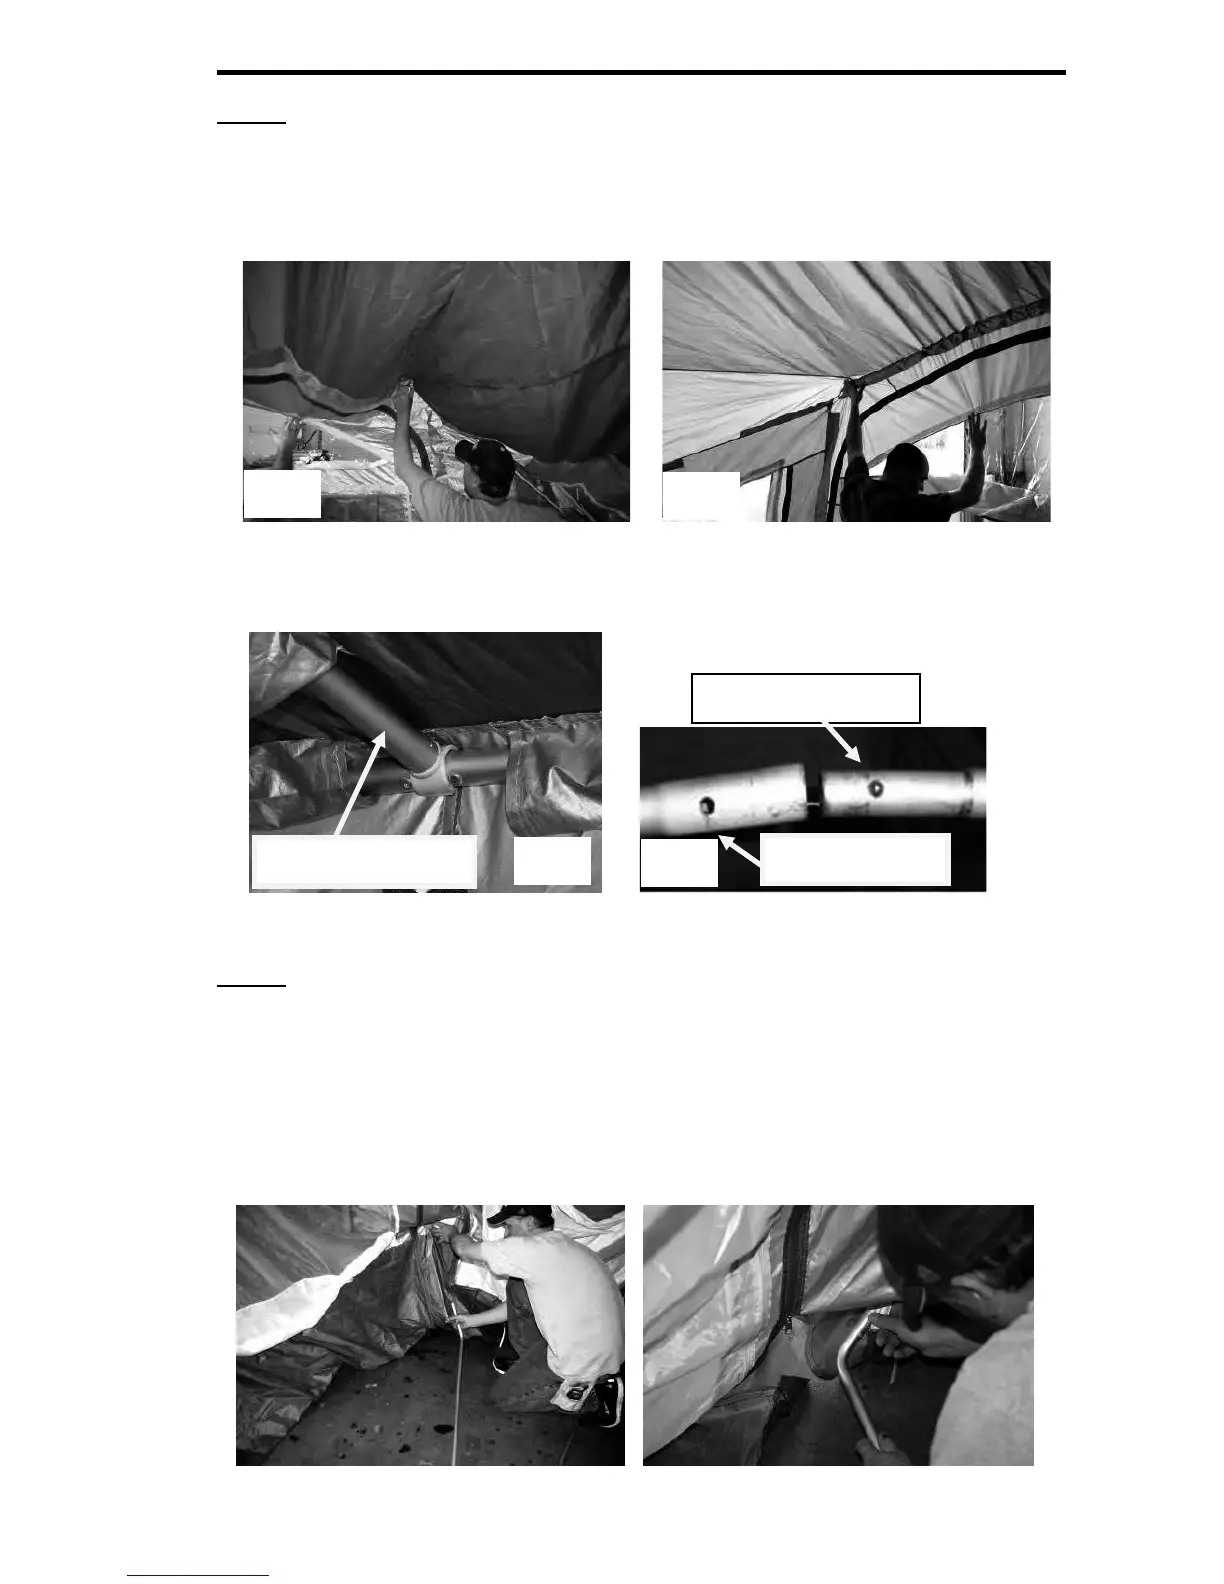
Step 5
Assemble the 3-piece Arch Pole. Feed the Arch Pole through the sleeves at the
top of the front of the canopy (Pics A & B). Be very careful not to let the fabric
bunch or bind on the pole. The holes for snap buttons (Pic D) at each end of the
Arch Pole should be facing in towards the room.
When the Arch Pole has been inserted in the sleeves across the front of the
canopy, attach the claw end of the Central Roof Pole between the rivets in the
center of the Arch Pole as shown in Pic C.
Step 6
Assemble the Vertical Corner Poles. These poles are bent at one end, with a black
plastic cap on the other end. There are two of these poles and each pole has 2
sections. Insert each pole, bent end first from inside the room at the bottom
corner of the front wall/sidewall, through the vertical sleeve and up to the Arch
Pole at the top. Be very careful when pushing this pole up through the sleeve so
you don’t tear it or the canopy fabric.