3
INSTALLATION
Before you Begin
Disconnect the negative battery terminal
Important Notes
Before final installation, test the wiring connections to make sure the unit is connected
properly and the system works.
Consult with your nearest dealer if installation requires the drilling of holes, addition of a
mounting kit, or other modifications to your vehicle.
Install the unit where it does not interfere with driving
If the installation angle exceeds 30° from horizontal, the unit might not give optimum
performance.
Installation Method
NOTE: Use existing factory side brackets and hardware to mount the radio.
1. Place the radio in front of the dashboard opening so the wiring can be brought through the
opening
2. Follow the wiring diagram carefully and make certain all connections are secure and
insulated with crimp connectors to ensure proper operation. In typical factory replacement,
simply connect the 23-pin black connector from the motorcycle into the radio.
3. After completing the wiring connections, turn the unit on to confirm operation (vehicle
accessory switch must be on). If the unit does not operate, recheck all wiring until the
problem is corrected. Once proper operation is achieved, turn the accessory switch off
and proceed with final mounting of the chassis.
4. Ensure that the unit is supported and secured on the sides; failure to do so may allow the
unit to move during while riding, causing damage to the mounting area.
5. Test radio operation by referring to the operating instructions for the unit.
Removing the Unit
To remove the radio after installation, remove mounting hardware securing unit to the vehicle
and then pull the radio out.
Reconnect Battery
When wiring is complete, reconnect the battery negative terminal.
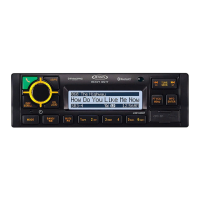
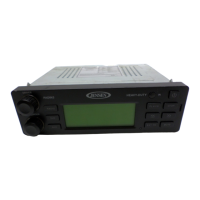
Replacing Harley-Davidson
®
Factory Radio
Installation Instructions
1. Remove 40 Amp ignition fuse from fuse box before beginning the removal and installation.
2. Remove front fairing.
3. Unplug the clip on the bottom of the factory radio for the ignition wire harness before
pulling the radio out. DO NOT PULL ON HARNESS; ONLY UNCLIP FROM RADIO.
4. Carefully grasp antenna base (use of pliers suggested) and remove antenna from factory
radio. DO NOT PULL BY CABLE.
5. Disconnect all plugs from rear of factory radio.
6. Remove 4 bolts (2 per side) and save for new installation.
7. Pull factory radio out toward the front of the motorcycle, through fairing.
8. Insert HD1BT from driver’s side of fairing until mounting holes match up with the mounting
holes on motorcycle.
9. Carefully insert same mounting bolts into new radio, may require pliers to hold bolt for
installation. NOTE: LINE UP CAREFLLY AS TO NOT CROSS THREAD BOLTS.
10. If factory radio harness has a Black and a Gray connector, be sure to attach black
connector to black plug receptacle on back of HD1BT.
11. Rear Speakers
a. For factory installed rear speakers use the included pigtail to connect. Note the left
rear and right rear wires on the gray harness to connect to the pigtail.
b. For addition of second set (rear) speakers, connect speaker wires to included
pigtail and connect to corresponding waterproof connector on radio.
12. Use of a USB extension cable run to a windshield bag or waterproof panel mount input
(JENAUX) is suggested. If mounting in fairing, carefully consider mounting location to
allow sufficient clearance when turning handlebars.
13. Tie up any and all loose wires with zip ties to clean up installation and avoid pinching wires
when reassembling.