EasyManua.ls Logo

JEOL 6060LV - User Manual

Default Icon
14 pages
Print Icon
To Next Page IconTo Next Page
Loading...
BASIC Step-by-Step Instructions for JEOL 6060LV
Version 4/13/11
General Operation
1. Check System: Pumps running and EVAC light green (main panel near key switch)?
If not notify a staff member.
2. If the SEM software is not running, start SEM Software (SEM Main Menu icon). It
takes several minutes to start, be patient. If you need to log into computer use the
account (USER:jeol;PASSWORD:jeol). Please do not log into other accounts. Use
portable media, ftp, or UIUC NetFiles to transfer your data.
3. Prepare your samples before venting! Please keep the area clean, organized, and wear
GLOVES!! Anything that goes in the vacuum should be clean and handled only with
gloves or tweezers; keep the vacuum clean.
4. Press the Sample button on toolbar.
5. Press the Vent button; it takes a couple minutes to vent.
6. When Vent light stops blinking (main panel near key switch), slide open stage
drawer.
Question and Answer IconNeed help?

Do you have a question about the JEOL 6060LV and is the answer not in the manual?

Summary

General Operation

Initial System Checks and Software Start

Verify system status and launch the SEM software.

Sample Preparation and Handling

Guidelines for clean sample handling and preparation before venting.

Specimen Chamber Venting

Steps for venting the chamber and initiating the exchange process.

Stage Drawer Operation

How to operate the stage drawer after venting the specimen chamber.

Sample Loading and Working Distance

Sample Holder Loading

Loading the sample holder onto the stage dovetail correctly.

Working Distance Adjustment

Setting the sample height or Working Distance using a height gauge.

Specimen Tilting Limits

Understanding specimen tilting limitations based on working distance.

Beam and Image Setup

IR Chamber-Scope Operation

How to operate the IR chamber-scope for sample adjustment.

Stage Drawer Closing and Evacuation

Closing the stage drawer and initiating the evacuation process.

Accelerating Voltage and High Voltage Activation

Selecting and setting the accelerating voltage and activating High Voltage.

Signal Selection and Gun Alignment

Choosing detector signal and performing electron gun alignment.

Image Optimization and Controls

Objective Aperture Alignment

Procedure to align the objective aperture if the image shifts during focus.

Astigmatism Correction

Manually correcting astigmatism for a clear, sharp image.

Brightness and Contrast Adjustment

Manually adjusting image brightness and contrast using controls or ACB.

Spot Size Selection

Choosing the appropriate spot size for desired resolution and signal.

Image Signal Selection

Selecting the detector signal (SEI, BEIW) for image acquisition.

Advanced Operations and Modes

Operating Voltage Selection

Choosing the best accelerating voltage based on sample and information needs.

Changing Vacuum Mode (HV to LV)

Switching between High Vacuum (HV) and Low Vacuum (LV) modes.

Improving Depth of Focus

Techniques to improve depth of focus or obtain lower magnifications.

Session Management and Troubleshooting

Ending Your Session

Steps to safely turn off the SEM and complete the session.

Troubleshooting Common Issues

Procedures for resolving software unresponsiveness or computer lock-ups.

JEOL 6060 LV GUI Overview

Interface Elements

Description of the main GUI components: menu bar, icons, and display areas.

Overview

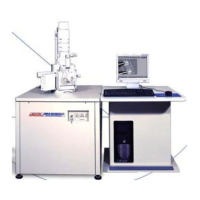
This document outlines the operational procedures and features of the JEOL 6060LV Scanning Electron Microscope (SEM).

Function Description

The JEOL 6060LV SEM is designed for observing and analyzing samples at high magnifications. It utilizes an electron beam to generate images, offering various imaging modes and analytical capabilities. The device supports both High Vacuum (HV) and Low Vacuum (LV) modes, making it versatile for a wide range of samples, including non-conducting materials without the need for a conductive coating in LV mode. It can be used for general observation, sample tilting, Z adjustment, and elemental analysis (EDS).

Important Technical Specifications

  • Accelerating Voltage: Up to 30 kV. The optimal voltage depends on the sample and desired information. Lower voltages (1-5 kV) are suitable for low-density or low-atomic-number surfaces, while higher voltages (20-30 kV) provide different image characteristics.
  • Working Distance (WD): The EDS working distance is 10 mm. Working distances up to 48 mm can be used for lower magnifications (as low as 5x) and/or better depth of focus. Working distances shorter than 8 mm should never be used. A barrier is installed to prevent inserting a sample too high.
  • Spot Size: Usable range is approximately 10-75. A spot size around 10 @ 30 kV provides the best resolution (100 kX possible), though it can result in a noisy image. Very high (large) spot sizes (>60) generally lead to poorer resolution and may damage the sample. Large spot sizes increase electron current, signal, and noise, while decreasing resolution. Small spot sizes decrease electron current, signal, and noise, while improving resolution.
  • Vacuum Modes:
    • High Vacuum (HV): Standard mode for conducting samples or coated non-conducting samples.
    • Low Vacuum (LV): Used for observing and analyzing non-conducting samples without a conductive coating, or for wet/out-gassing samples. Operating pressure can be selected from 1 to 270 Pa (2 torr). Increasing pressure in LV mode decreases signal and resolution.
  • Image Resolution: A SEM image of 640x480 pixels can be displayed. Saved images are typically 1280 x 960 pixels (Scan3) or 640 x 480 pixels (Scan4).
  • Detectors:
    • Secondary Electron Imaging (SEI): Standard imaging mode.
    • Backscattered Electron Imaging (BEIW): Offers three modes: COMPO (compositional contrast), TOPO (topographical image), and SHADOW (image with strong oblique component, similar to SEI but with BSE, needed for LV mode). BEIW detectors are delicate and can be damaged by sample contact. The solid-state BSE detector is "slow," leading to blurred images at fast scan speeds.

Usage Features

  • Start-up Procedure:
    1. Check system status: Pumps running, EVAC light green, no staff member notification.
    2. Start SEM software (SEM Main Menu icon).
    3. Prepare samples, ensuring they are clean and handled with gloves.
    4. Press the "Sample" button on the toolbar.
    5. Press the "Vent" button to vent the chamber (takes a couple of minutes).
    6. When the "Vent" light stops blinking, slide open the stage drawer.
    7. Slide the sample holder onto the stage dovetail, ensuring correct orientation.
    8. Adjust sample height (Working Distance) using a height gauge, typically to 10 mm for EDS.
    9. Specimen tilting and Z adjustment are limited by working distance and specimen diameter. The IR chamber-scope must be used to verify safe clearance (at least 5mm distance on LCD monitor).
    10. Turn on the IR chamber-scope and adjust illumination.
    11. Carefully slide the stage drawer closed and press the "EVAC" button. Hold the door until pumping starts.
    12. Wait for the HT icon to turn "HT ready" (approx. 1.5 minutes), then wait at least 2 more minutes.
    13. Select the desired accelerating voltage (up to 30 kV) by double-clicking the value.
    14. Set the working distance (usually 10 mm).
    15. Set the Signal to SEI (can be changed to BEIW later).
    16. Click the "HT Ready" icon to turn on High Voltage. Some intensity should be seen; if not, press "View" and "ACB."
    17. Click the "Gun" icon to open the electron gun and alignment dialog. Manually perform gun alignment and filament saturation check. Adjust Tilt X and Y for maximum average image brightness at low spot size (<=20), then at high spot size (=>60). Iterate to optimize.
    18. Select a spot size (initially 30-40, usable range 10-75).
    19. (Optional) Choose a pre-defined "Recipe" to set microscope conditions.
    20. Click "View" to set fast scan at low magnification (30X). Move stage to the area of interest.
    21. Click "ACB" (auto contrast brightness).
    22. Focus and check objective aperture centering.
    23. Fine focus and correct astigmatism manually or use "Auto Focus" and "Auto Stigma." Manual adjustment is often needed, especially at higher magnifications.
    24. Observe the sample. Align the objective aperture if the image shifts during focusing. Correct astigmatism if the image focuses asymmetrically or with streaks.
    25. If the image is not sharp, decrease spot size and verify WD (8-10mm). Lower kV may yield poorer resolution.
  • Manual Brightness and Contrast Adjustment: Deselect "Stig," use rotary controls, or mouse. Use "ACB" for coarse adjustment.
  • Image Acquisition:
    • "Scan4" (80 seconds) automatically freezes at the end of the frame to save the image.
    • "Scan3" (10 or 20 seconds) freezes at the end of the frame if "freeze" is clicked.
    • "Photo" (160 seconds) can be used to decrease noise and get the best possible quality.
    • Saved images are 1280 x 960 pixels (Scan3) or 640 x 480 pixels (Scan4).
    • In the "Save Image" dialog box, check "Merge Text" to embed data.
    • Displayed images are 640 x 480. Zoom on frozen images to see full resolution (1024 x 768) or (1280 x 960).
    • Measuring functions are available under the Image menu.
    • "Snap shot image area" pastes file images or current images, allowing stage movement via right-click.
  • Troubleshooting:
    • If SEM software is unresponsive, close and restart PC-SEM.
    • If the computer is locked up, reboot it (START Menu or power button).
    • Do not cycle power on the entire system (key switch) unless instructed by staff.

Maintenance Features

  • Filament Life: Avoid using "Auto filament heating" or "Auto Gun Control" as they may shorten filament life.
  • Detector Protection: The Backscatter detector and SE detector are very delicate and expensive to repair. Extreme care must be taken to avoid contact with samples.
  • Chamber-Scope Use: Always use the IR chamber-scope for tilt and Z adjustment to ensure safe clearance. Turn off chamber-scope illumination for BEIW modes and EDS operation.
  • Log Book: Fill out the instrument log after each session.
  • Shutdown Procedure:
    1. Turn off High Voltage (click "HT On" to change to "HT ready").
    2. Wait 2 minutes.
    3. Press the "Sample" button on the toolbar.
    4. Press the "Vent" button (takes a couple of minutes).
    5. When the "Vent" light stops blinking, slide open the stage drawer.
    6. If changing samples, go to step 7 of general operation.
    7. Change vacuum mode to HV (if in LV mode).
    8. Carefully slide the stage drawer closed. Press "EVAC" button. Hold the door until pumping starts.
    9. Fill out the instrument log.
    10. Wait for the HT icon to turn "HT ready" (approx. 1 min. 30 sec).
    11. Lock the door and turn off lights.

JEOL 6060LV Specifications

General IconGeneral
BrandJEOL
Model6060LV
CategoryMicroscope
LanguageEnglish

Related product manuals