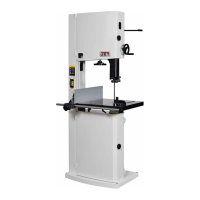
10
Fig 19
Start the machine with precaution.
7.7 Blade tilt 45° and 90° positive
stop adjustment
The blade tilt positive stops can be
adjusted with an allen key (Fig 20).
Fig 20
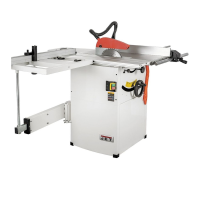
7.8 Crosscut table setup
Crosscut table setup shall never be
performed when the machine is
running.
Lift the crosscut table (R, Fig 21) onto
telescopic arm and slide onto sliding
table T-groove and lock in place).
Fig 21
Crosscut table and telescopic arm are
rough aligned ex works (The table
surface must be in level with the
sliding table).
Telescopic arm adjustment:
Mount the crosscut table at the rear of
the sliding table.
Move the sliding table to the rear and
align the crosscut table height with hex
nuts (S).
Use crosscut fence profile (U) to
check.
Move the sliding table forward.
For example: if the crosscut table falls,
tighten the left adjust screw (T, Fig 22)
until the crosscut table does not move
in height during sliding table travel.
Loosen and tighten the adjust screws
and lock nuts as needed.
Fig 22
Finish alignment by setting crosscut
table and machine table in level with
nuts (S).
Lock the nuts (S, Fig 21) against each
other.
Start the machine with care.
7.9 Crosscut fence setup
Crosscut fence setup shall never be
performed when the machine is
running.
The cross-cut table has 2 precision
holes, allowing the crosscut fence to
be put in 2 positions:
At the back and front of the crosscut
table.
Simply put the fence onto the cross-
cut table and lock it in position using
the supplied knobs.
The 90° adjustable stops (R, Fig 21)
are factory set.
The fence scale is factory set.
Adjustment can be made by moving
the pivot point along the T-grove.
Confirm by test cuts.
When, after some time, the plastic
protection cap at the front on the
cross-cut fence is cut away, a new one
has to be installed
(part no.: JTS600-178).
8. Maintenance and inspection
General notes:
Maintenance, cleaning and repair
work may only be carried out after
the machine is protected against
accidental starting by pulling the
mains plug.
Repair and maintenance work on the
electrical system may only be carried
out by a qualified electrician.
Inspect the proper function of the dust
extraction daily.
Keep the inside of the cabinet clear of
sawdust and wood chips. Make sure
the motor fan and fan cover are also
kept clear of sawdust.
All protective and safety devices must
be re-attached immediately after
completed cleaning, repair and
maintenance work.
Defective safety devices must be
replaced immediately.
A worn table insert must be replaced.
Removal of dust chute blockage:
Cut off pieces can block off the chip
flow in the lower saw guard.
Disconnect the machine form the
power source, pull mains plug.
Remove the front cabinet cover.
Remove the lock knob (GG, Fig 23)
and lower the dust port (BB).
Fig 23
Remove blocking parts.
Reinstall the dust port and front
cabinet cover immediately.
 Loading...