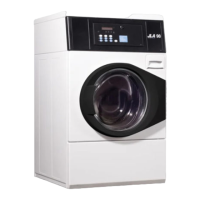
Terminal Block Wired For 230 Volt Single-Phase As
Viewed Through Rear Access Panel
1. Black Wire
2. White Wire
3. Green/Yellow Wire
4. Earth/Ground - Power Cord
5. Neutral
6. 230 Volt
Figure 15
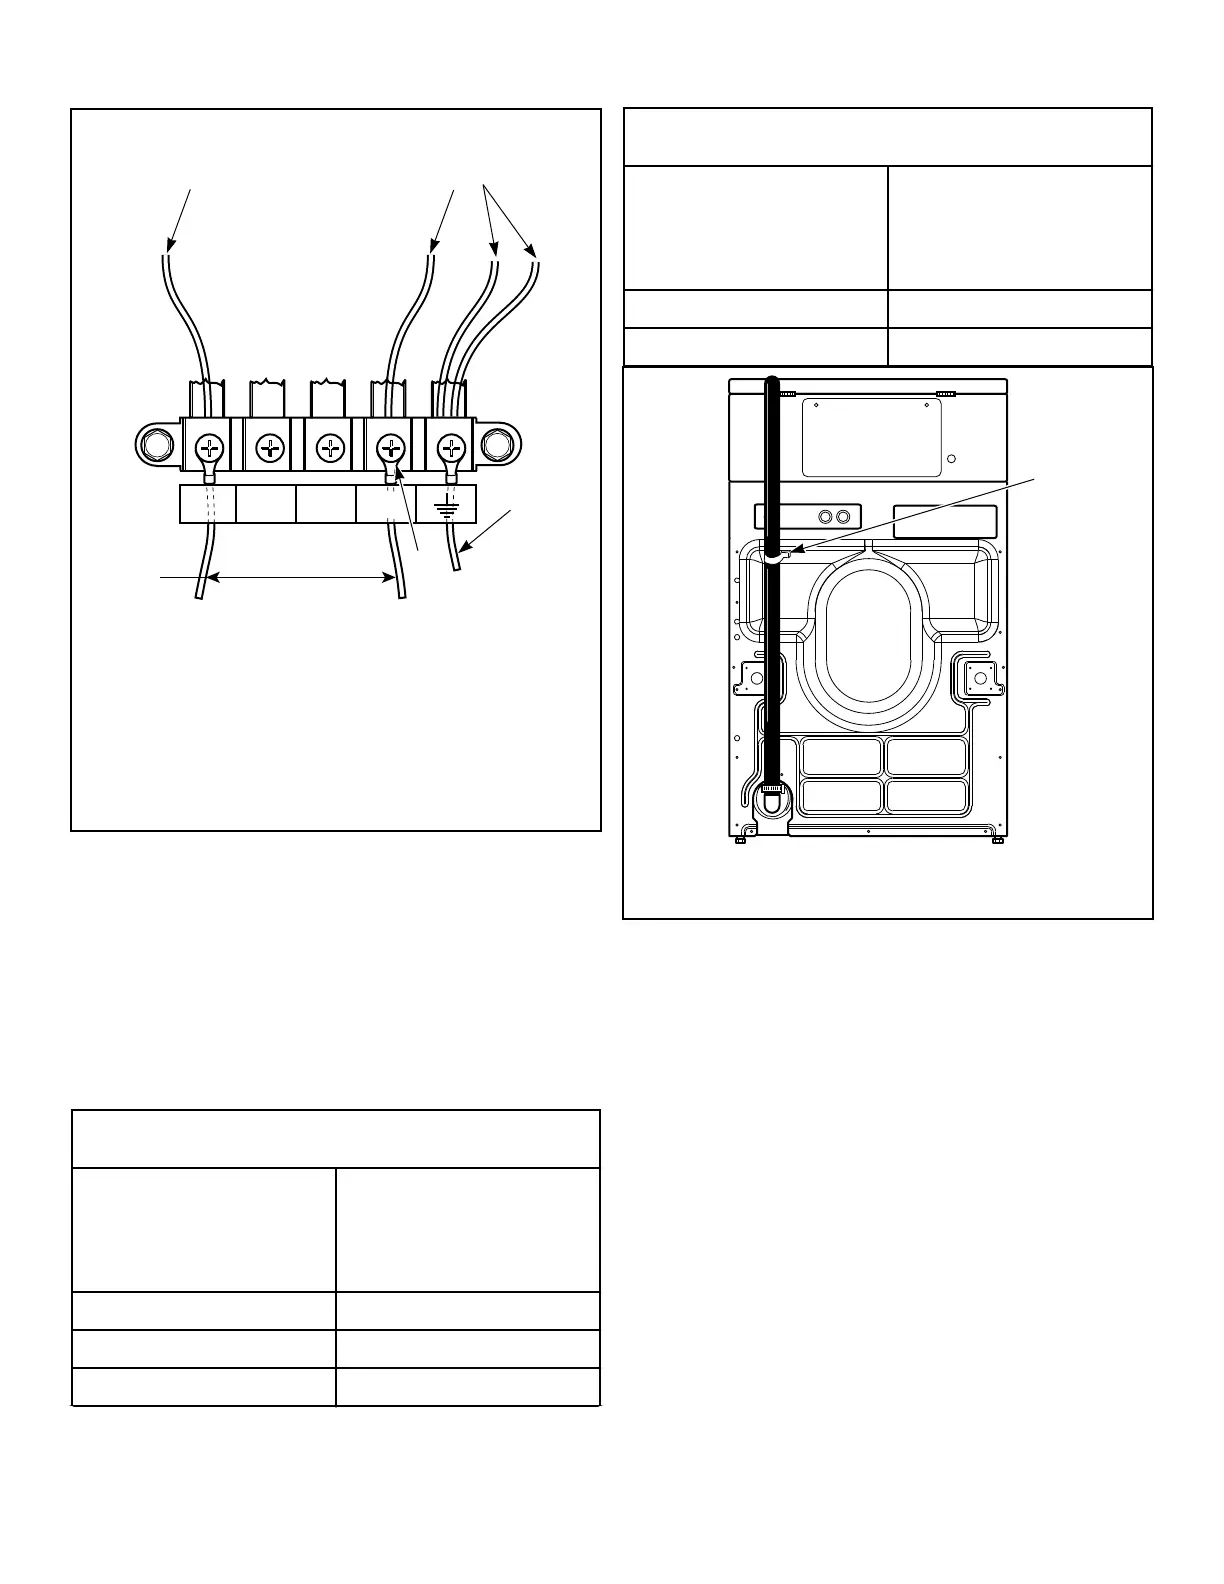
Drain Hose Models - Connect Drain
Hose to Drain Receptacle
Remove the drain hose from its shipping position on the rear of
the washer by removing the shipping tape.
IMPORTANT: Drain receptacle must be capable of han-
dling a minimum of 1-3/8 inch [35 mm] outside diame-
ter drain hose.
Drain Flow Rate
Drain Height
Flow Rate
gallons per minute [lit-
ers per minute]
3 ft. [0.9 m] 7.3 [27.7]
5 ft. [1.5 m] 4.7 [17.8]
6 ft. [1.8 m] 3.5 [13.4]
Table continues...
Drain Flow Rate
Drain Height
Flow Rate
gallons per minute [lit-
ers per minute]
7 ft. [2.1 m] 1.3 [4.8]
8 ft. [2.4 m] 0 [0]
1. Shipping Tape
Figure 16
Standpipe Installation
1. Place the drain hose into the standpipe.
2. Remove the beaded tie-down strap from accessories bag and
place around standpipe and drain hose and tighten strap to
hold hose to standpipe. Refer to Figure 17 . This will prevent
the drain hose from dislodging from drain receptacle during
use.
3. If hose does not fit securely in standpipe because it is too
long:
a. Remove hose clamp attaching it to washer.
b. Cut hose to desired length.
c. Reattach hose and hose clamp.
Installation
©
Published by permission of the copyright owner -
DO NOT COPY or TRANSMIT
17 Part No. 805412R7