Anhui JNGE Power Co,. Ltd
Address: No.99 Yonghe Road, High-Tech Zone, Hefei City Anhui Province, China Mainland
Tel:0551-65372576 http://www.hfjnge.com
- 8 -
3.3 Connect wires
Note:for installation safety, we recommend a wiring sequence;
Note:JND-X designed with a common negative electrode;
Warning
:
Do not connect the load end to the electrical equipment that exceeds the
surge power of the controller to prevent damage to the controller!
Warning: make sure all wires are fixed when you need to move them around. Virtual
connections can cause heat buildup, which can lead to fire
Step 1
:
first disconnect the controller switch(default before leaving factory is disconnect
)
Step 2:connect battery
Check battery is in normal state,install as 3-2 showing,during the process, please
disconnect the air switch for wiring。
Warning:All switches must be disconnected in the process of wiring, pay attention
to the difference between positive and negative wires;The metal part of the cable terminal
should not be exposed too long to prevent short circuit fault caused by contact with the
housing after installation.
It is strictly forbidden to connect the battery with positive and negative conductor short
circuit, and it is strictly forbidden to connect the photovoltaic array to the battery terminal
post, please be careful to operate.
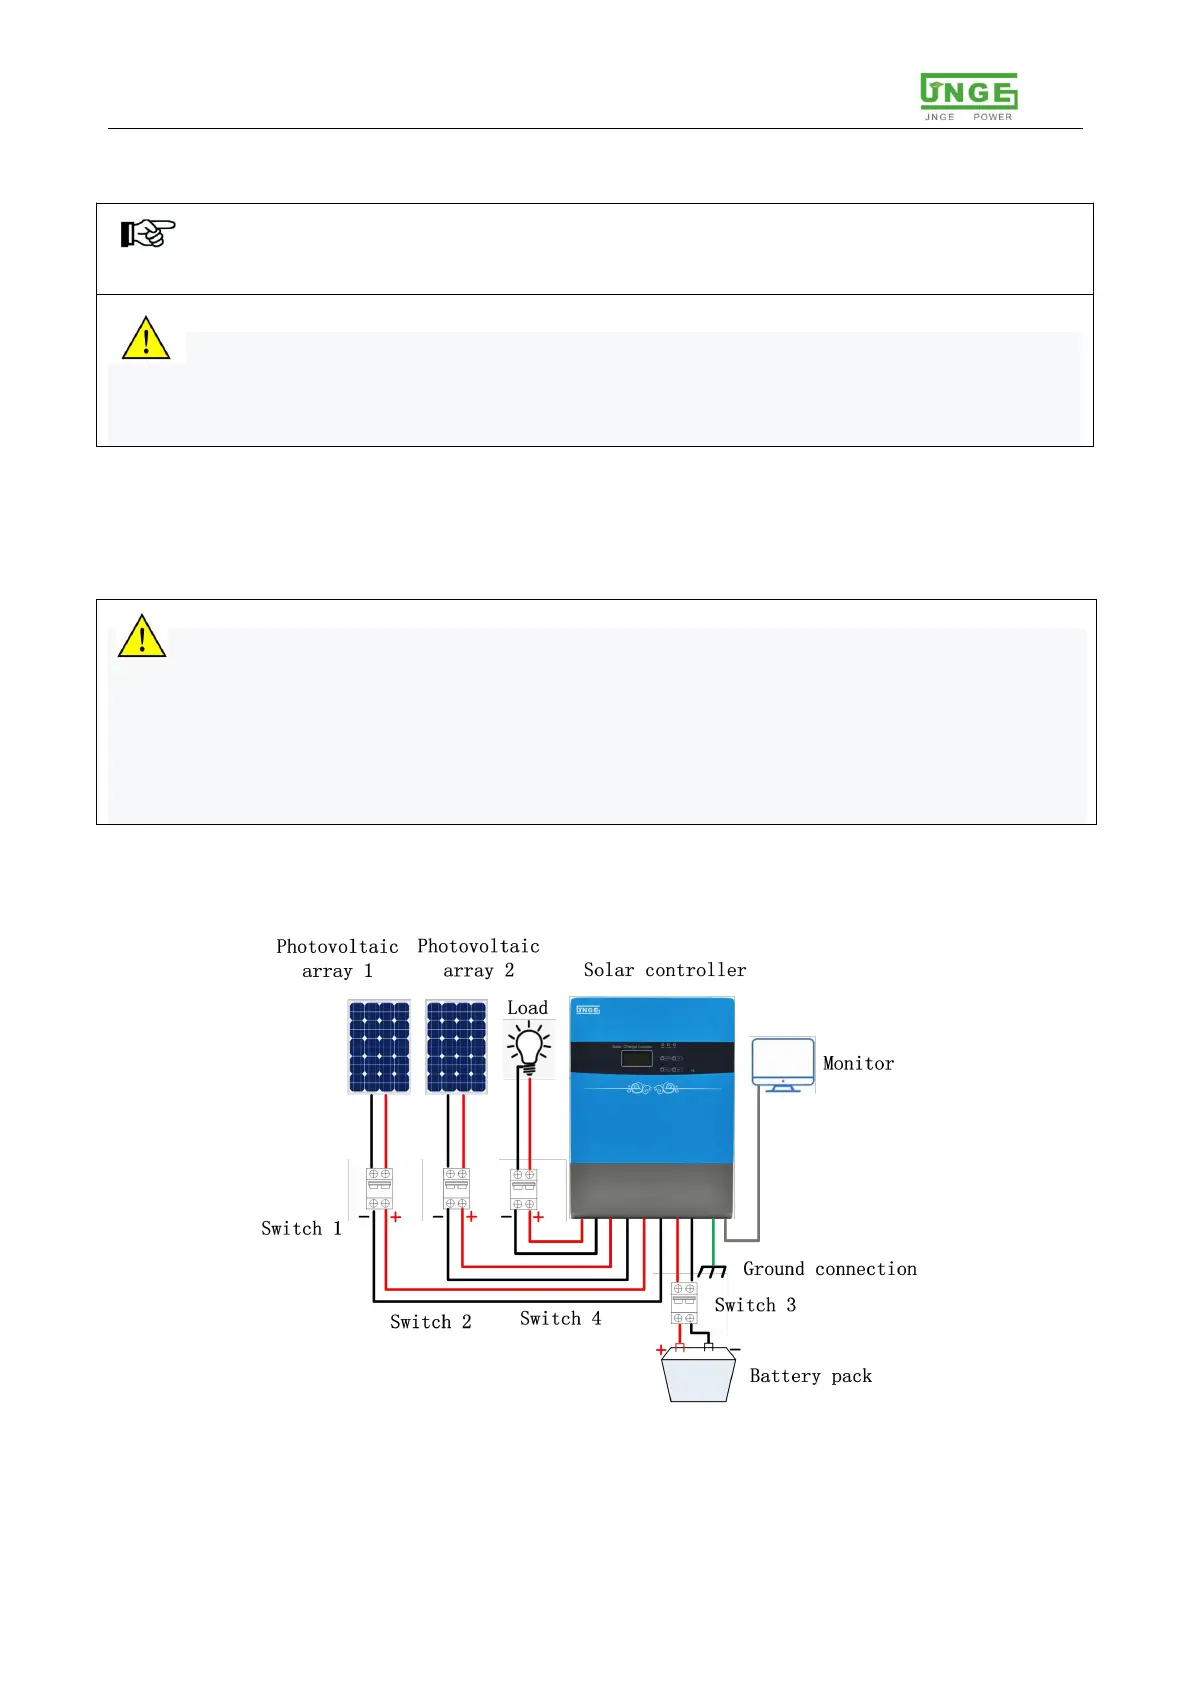
Step 3
:
connect PV, battery, loads
Open the front lower cover,do it as following picture:
Figure 3-2 Wiring diagram
 Loading...