P5417089
15
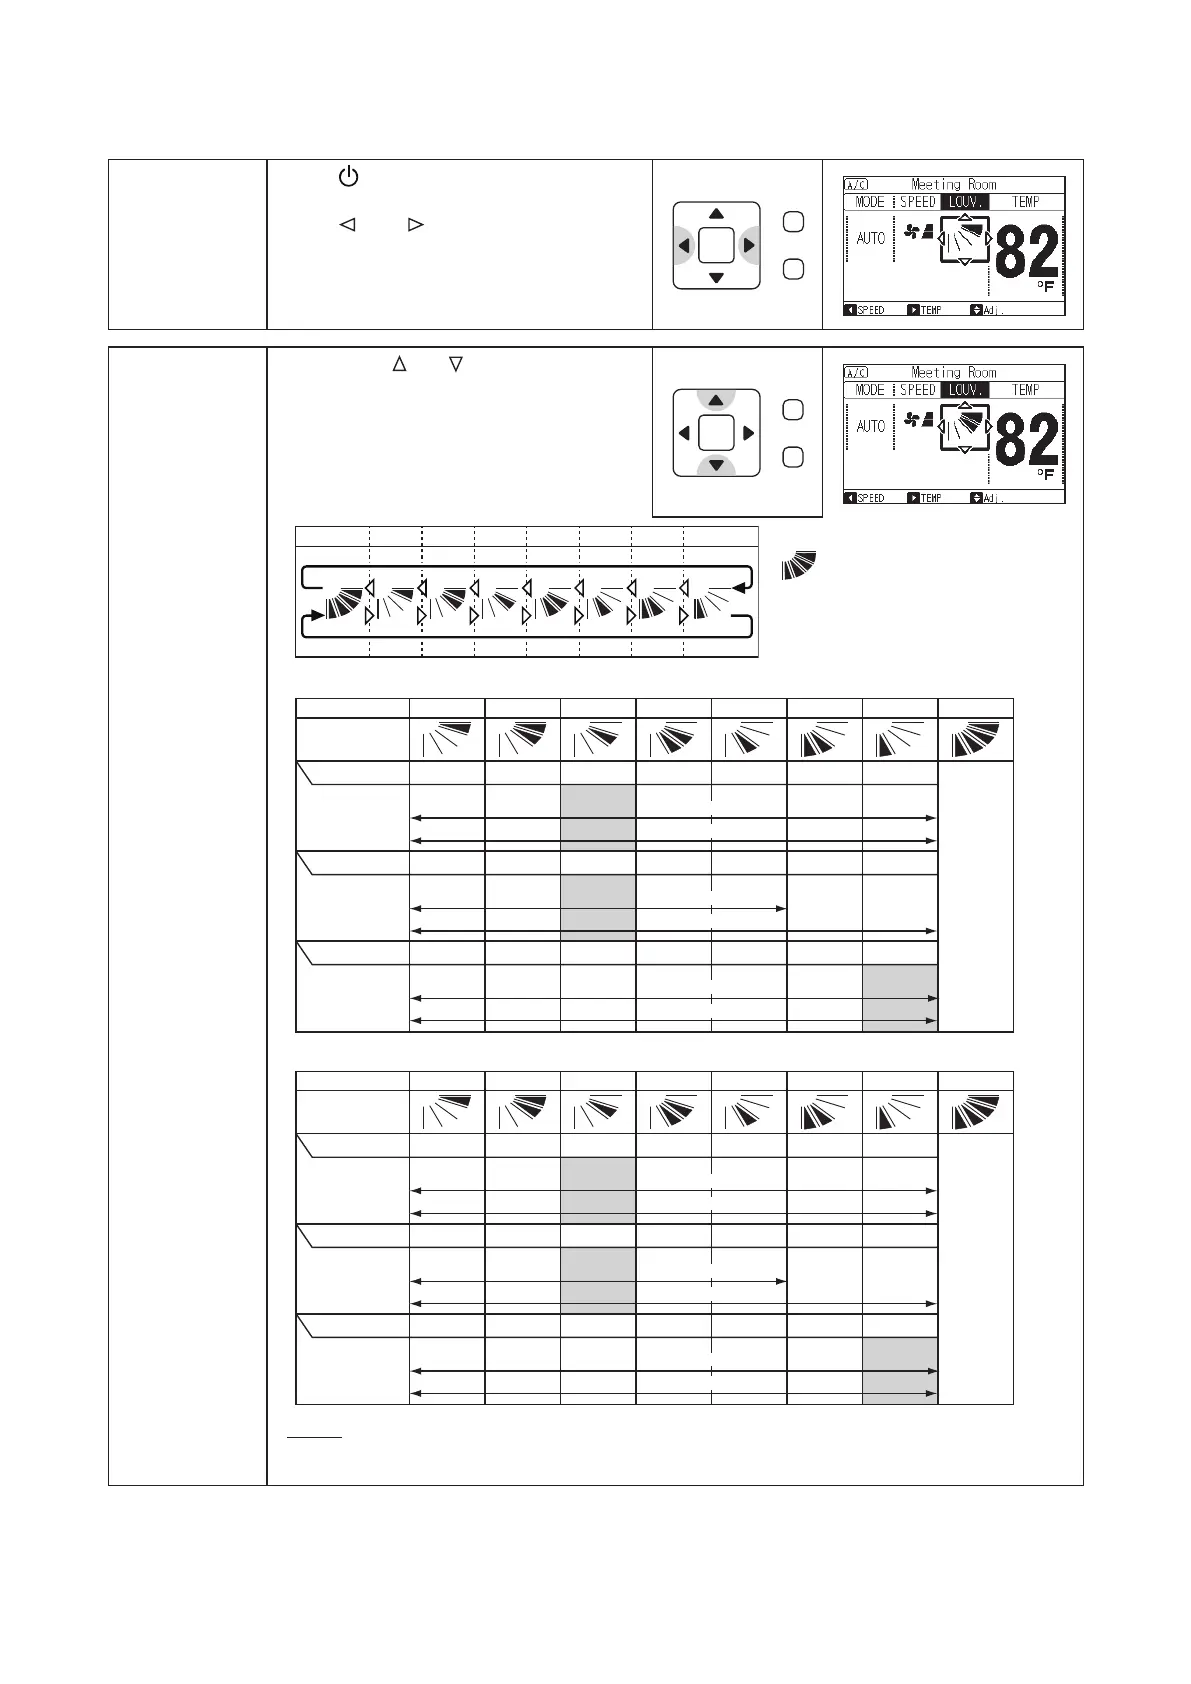
5.1.6 Louver Swing Direction
1
Press “ ” (On/Off).
Make sure that the operation is started.
Press “
” or “ ” and select “LOUV.”.
OK
Back/Hel
2
By pressing “ ” or “ ”, the louver
direction is changed as follows.
OK
Back/Hel
NOTE:
When step 6 or step 7 is selected during cooling operation and dry operation, the louver angle is
xed at step 5.
● The louver angle indicated on the LCD and the actual louver angle do not correspond precisely with each other
during the auto-swing mode operation. When the louver is xed, set the louver angle according to the louver
position indicated on the LCD.
● The louver may NOT stop immediately after the switch is pressed.
● For adjustment of vertical blade, refer to next page.
LCD Indication
Air Outlet Angle
Air Outlet Angle
COOL and DRY
FAN
Approx. 15
o
Approx. 22
o
Approx. 28
o
Approx. 35
o
Approx. 42
o
Approx. 48
o
Approx. 55
o
Recommended
Angle
HEAT
Approx. 25
o
Approx. 30
o
Approx. 35
o
Approx. 40
o
Approx. 45
o
Approx. 50
o
Approx. 55
o
Angle Range
Angle Range
Auto-Swing Range
Auto-Swing Range
Auto-Swing Range
Air Outlet Angle Approx. 15
o
Approx. 23
o
Approx. 30
o
Approx. 38
o
Approx. 45
o
Recommended
Angle
Recommended
Angle
Angle Range
Auto
Swing
Step 1 2 3 4 5 6 7 -
Auto Swing
12345
TIWM006B22S
~
TIWM012B22S
TIWM015B22S
~
TIWM030B22S
: Auto-swing operation
is started. At this time,
the louver icon swings
repeatedly on LCD.
LCD Indication
Air Outlet Angle
Air Outlet Angle
COOL and DRY
FAN
Approx. 10
o
Approx. 17
o
Approx. 23
o
Approx. 30
o
Approx. 37
o
Approx. 44
o
Approx. 50
o
Recommended
Angle
HEAT
Approx. 10
o
Approx. 17
o
Approx. 23
o
Approx. 30
o
Approx. 37
o
Approx. 44
o
Approx. 50
o
Angle Range
Angle Range
Auto-Swing Range
Auto-Swing Range
Auto-Swing Range
Air Outlet Angle Approx. 10
o
Approx. 17
o
Approx. 25
o
Approx. 32
o
Approx. 40
o
Recommended
Angle
Recommended
Angle
Angle Range
Auto
Swing
Step 1 2 3 4 5 6 7 -