JOHNSON CONTROLS
46
FORM 450.50-N1
ISSUE DATE: 08/19/2019
SECTION 6 - LON PROTONODE
INSTALLATION
The LON ProtoNode can be installed directly into the
chiller control panel of indoor and outdoor chillers.
The ambient operating range is -40°F to 167°F, 5% to
90% RH Non-Condensing. An accessory mounting kit,
P/N 371-06580-000, is used to mount the LON Proto-
Node directly into the chiller control panel.
TABLE 9 - LON PROTONODE PRODUCT CODE
NUMBERS
DESCRIPTION PART NUMBER
LON ProtoNode 025-46015-000
OptiView Panel Installation Kit 371-06580-000
Disconnect or isolate all power supplies
before making electrical connections.
More than one disconnect or isolation
may be required to completely de-energize
the equipment. Contact with components
carrying hazardous voltage can cause
electric shock and result in severe per-
sonal injury or death.
Make all wiring connections in accor-
dance with local, national, and regional
regulations. Install the wiring, so it does
not cause a hazard and is protected
against electrical and mechanical dam-
age.
To install the ProtoNode into the chiller control panel,
complete the following steps:
1. All switch and jumper settings must remain at the
factory settings shown in Table 10 and Table 11.
The unit ships with a label covering the externally
accessible switches. This label indicates the set-
tings shown below. No user settings are required
for any of the switches or jumpers and the default
settings are included only for informational pur-
poses.
TABLE 10 - JUMPER SETTINGS
Bias OFF
Termination OFF
A B Pin 1 and Pin 2
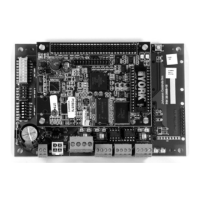
2. Attach the LON ProtoNode to the location shown
in Figure 55 using the adhesive fasteners, P/N
025-47587-000, included in the installation kit.
MICROPANEL
FIGURE 55 - OPTIVIEW LON PROTONODE
MOUNTING LOCATION
3. Connect the LON ProtoNode to the BAS port J12
on the SC-EQ using the communications cable,
P/N 571-06580-402, included in the installation
kit. Connect the wires as shown in Figure 56.
Trim the cable to the required length.
TABLE 11 - SWITCH SETTINGS
A0 A1 A2 A3 A4 A5 A6 A7 B0 B1 B2 B3 S0 S1 S2 S3
ON ON OFF OFF OFF OFF OFF OFF ON ON OFF ON OFF OFF OFF OFF
 Loading...