25
Start to use
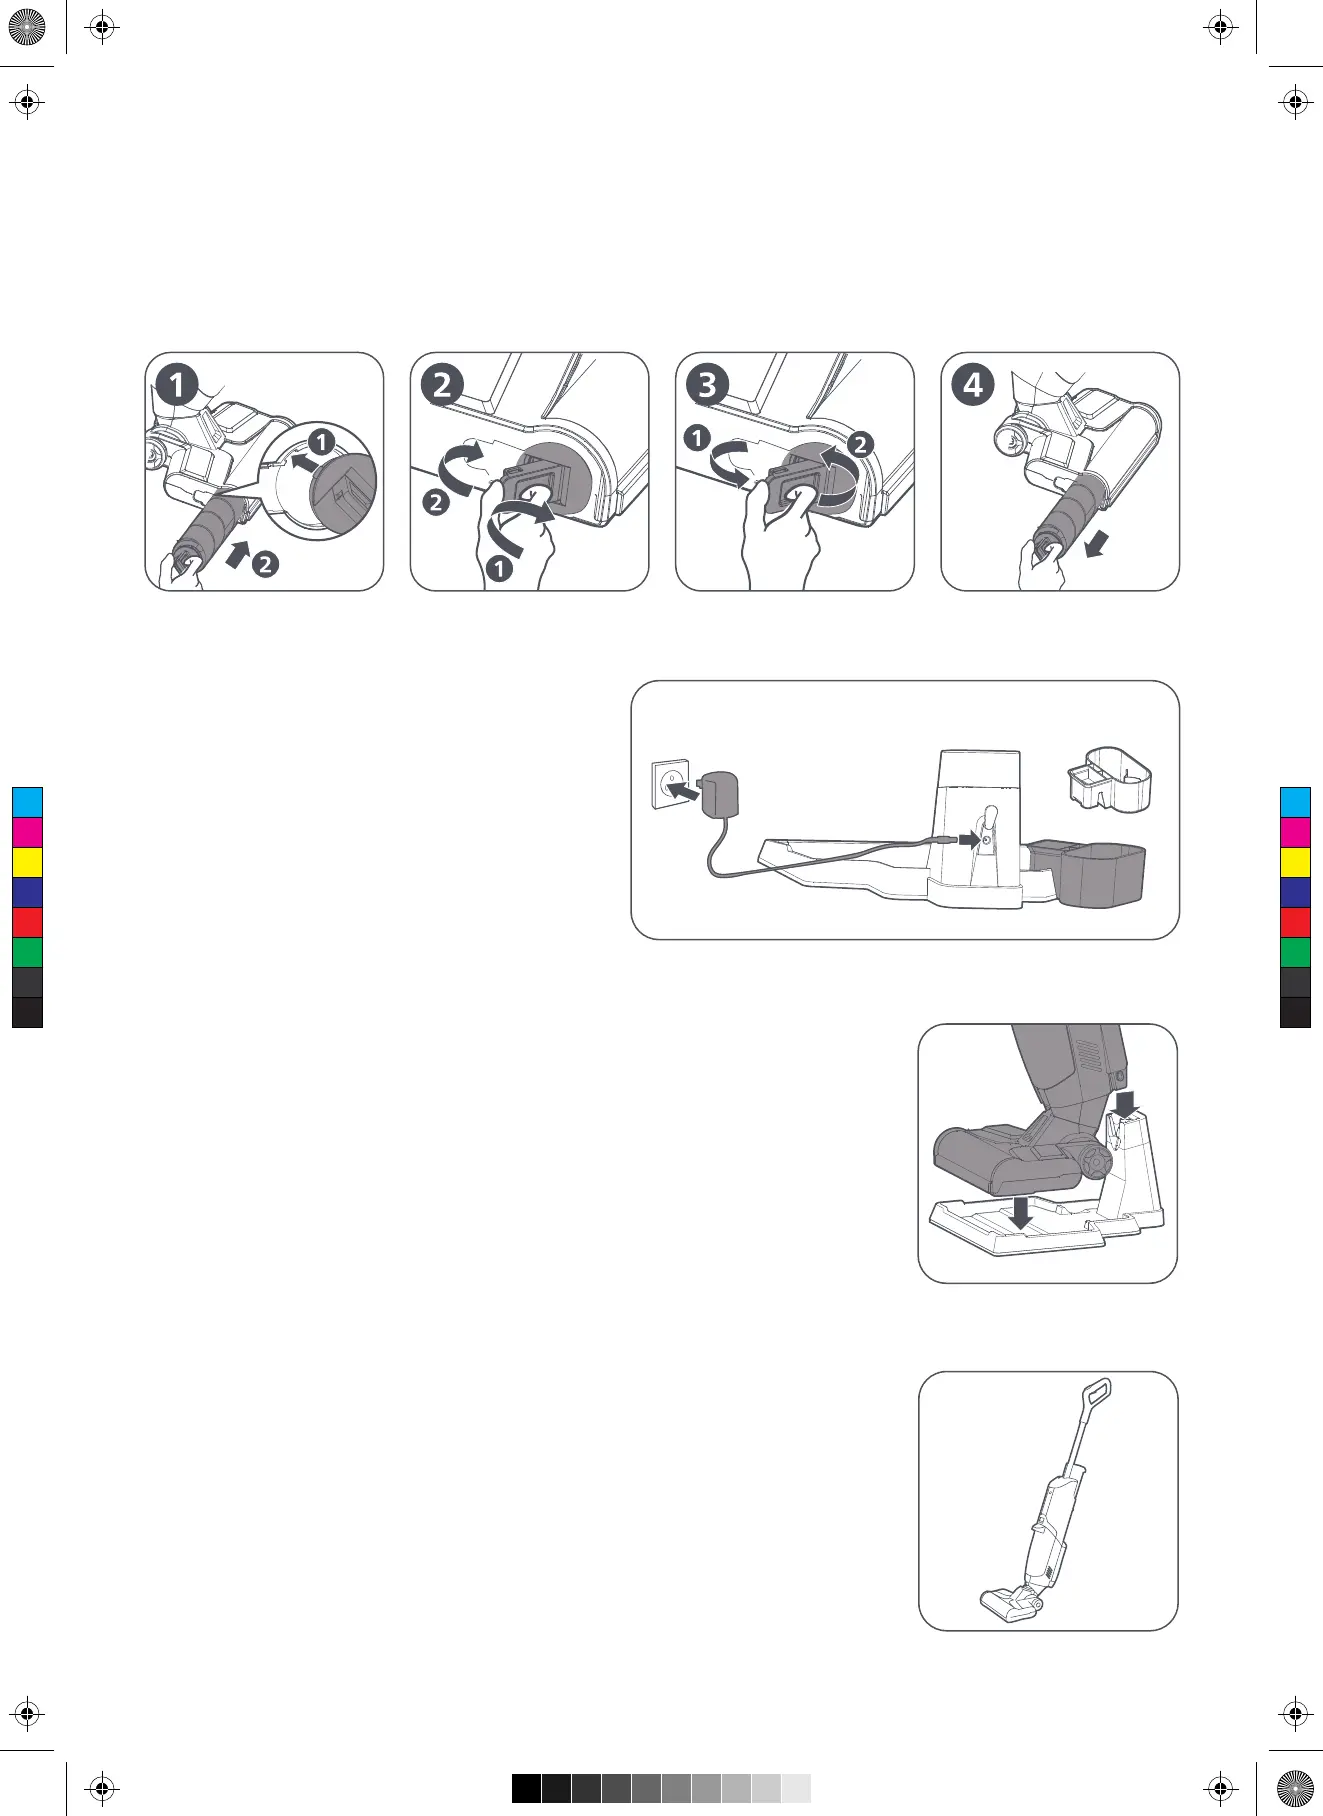
Dismantle and install the rolling brush
Installation: Align the bayonet on the rolling brush latch with the slot, push the rolling brush to the bottom to make it fully
contact the rolling brush shaft by turning it clockwise to the bottom, and close the latch. If a click sound is heard, it is
installed successfully. (as shown in Figures 1 & 2)
Dismantlement: Pull the side latch of the rolling brush outwards, hold the latch, and turn it counterclockwise to the
bottom to take it out slowly.(as shown in Figures 3 & 4)
Install the charging base
·Insert the round DC port of the adapter into the
charging socket on the back of the charging base,
and the other end of the adapter into the power
socket.
·Hang the rolling brush holder on the right side of
the charging base. (as shown in the right figure)
Charge the product
Place the product in the charging base to start charging. (as shown in the right
figure)
Tip: Please use the original power adapter for charging the product. After the
product is fully charged, it automatically powers off and enters the charging
protection mode.
Inspection before use
Check whether the handle, clean water tank, dirty water tank, battery and rolling
brush are installed properly before use. (as shown in the right figure)
Rolling Brush Holder
DC Charging Port
Clean Water
Tank
Handle
Dirty Water
Tank
Battery Pack
Rolling
Brush
C
M
Y
CM
MY
CY
CMY
K