24
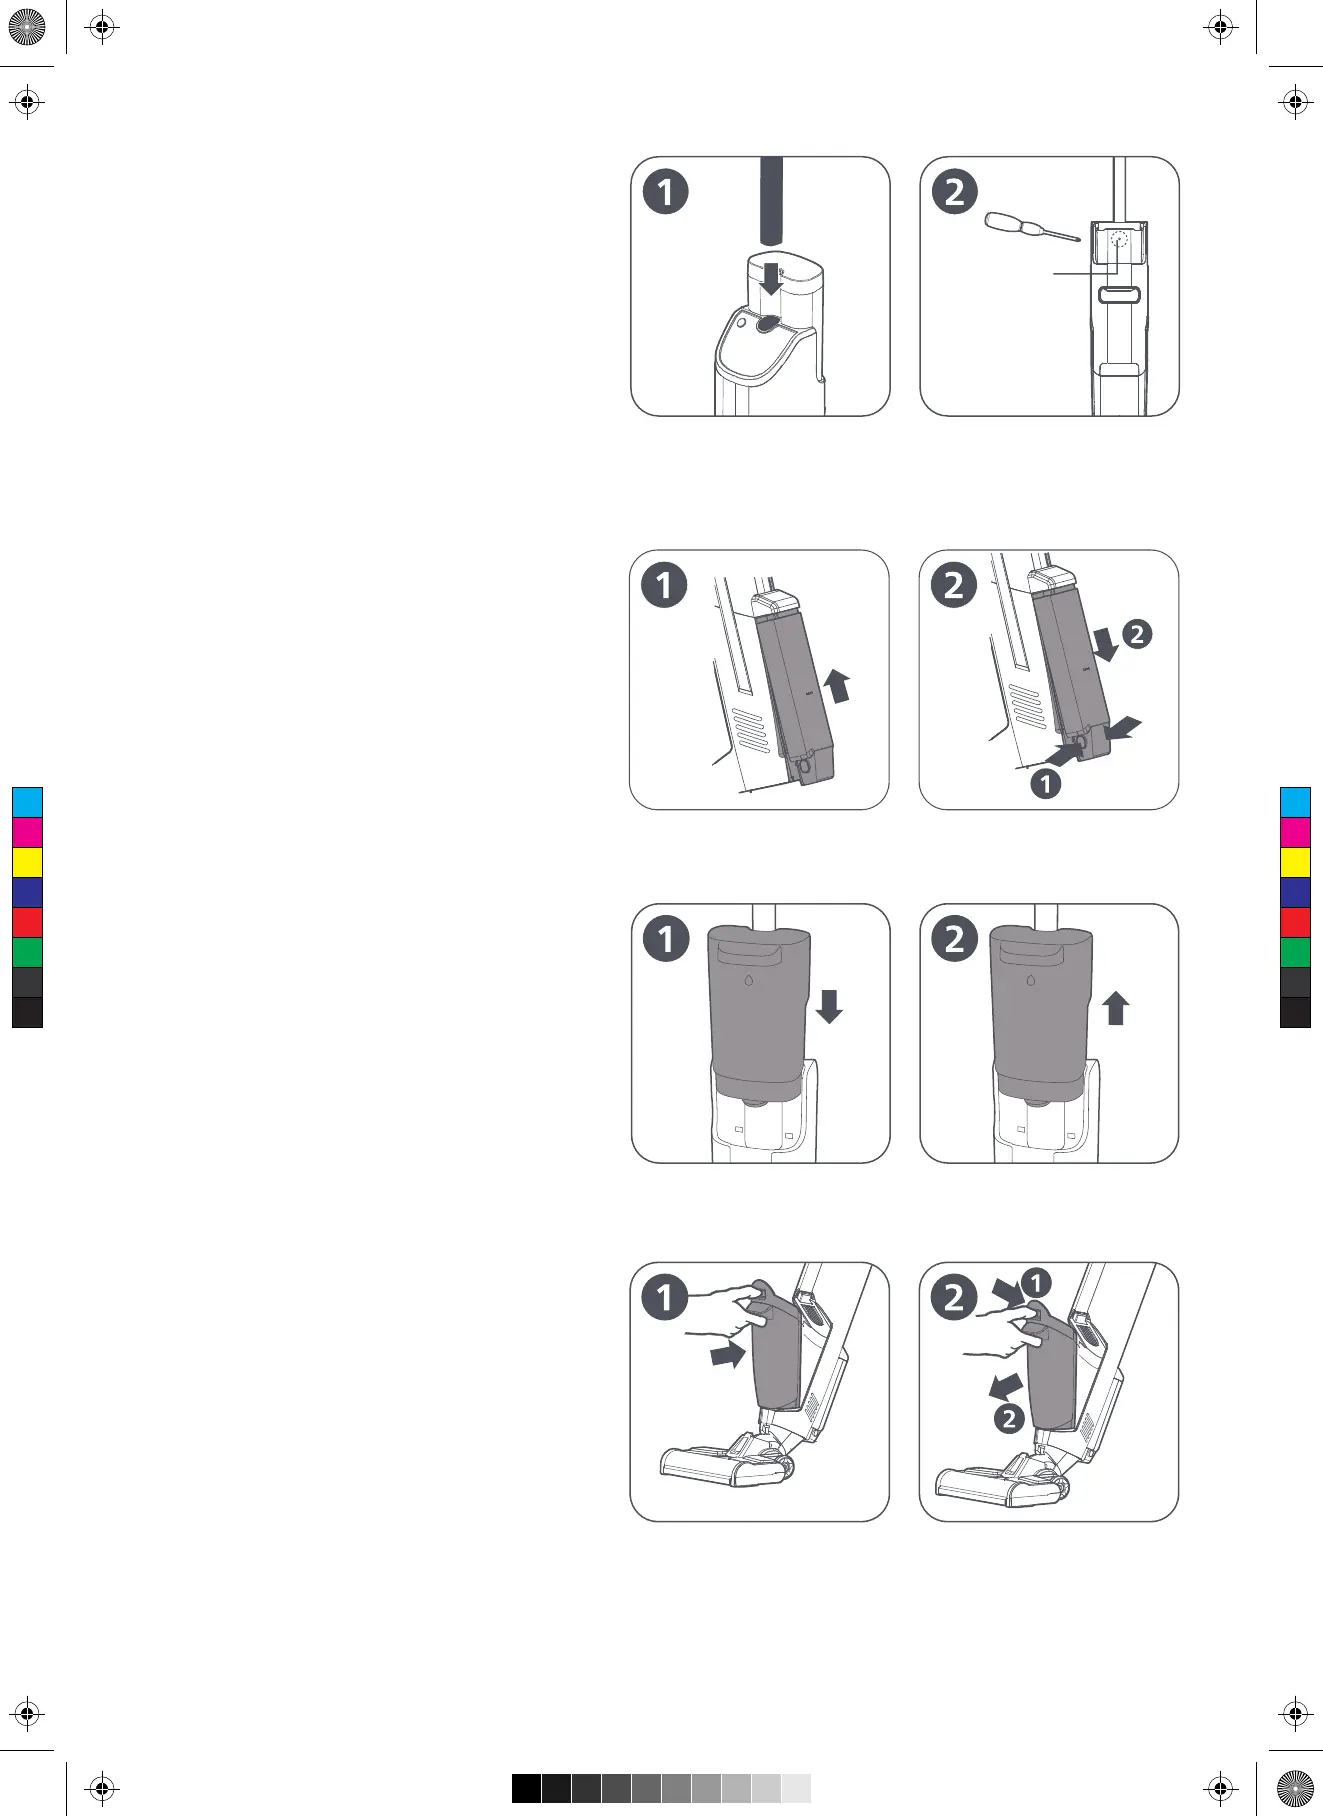
Dismantle and install the handle
Installation: Insert the handle to the corresponding
hole in the main body. If a click sound is heard, it
means the handle is properly installed. (as shown
in Figure 1)
Tip: Install the handle in a correct orientation.
Dismantlement: Insert a properly sized screwdriver
or tool into the small hole in the back of the handle
to easily remove the handle. (as shown in Figure 2)
Dismantle and install the battery pack
Installation: Place the battery pack in the battery
slot and push it upwards gently. If a click sound is
heard, it is installed successfully. (as shown in
Figure 1)
Dismantlement: Press the buttons on both sides of
the battery pack and pull the battery pack
downwards to remove it. (as shown in Figure 2)
Dismantle and install the clean water
tank
Installation: Align the limit slots on both sides of the
water tank with those of the main body, and gently
push the water tank downwards. If a click sound is
heard, it is installed successfully. (as shown in
Figure 1)
Dismantlement: Hold the main body and pull the
clean water tank upwards to remove it. (as shown
in Figure 2)
Dismantle and install the dirty water
tank
Installation: Place the bottom of the dirty water
tank with the opening of the main body, and gently
push it inwards. If a click sound is heard, it is
installed successfully. (as shown in Figure 1)
Dismantlement: Hold the main body, press down
the latch, and gently push the dirty water tank
outwards to remove it. (as shown in Figure 2)
C
M
Y
CM
MY
CY
CMY
K