Digital Bread Maker
Before First Use
Remove any labels and/or swing tickets.
In order to remove any residue
from the manufacturing process
before use, proceed as follows:
1. Follow the “Cleaning” instructions. Ensure
the parts are completely dry.
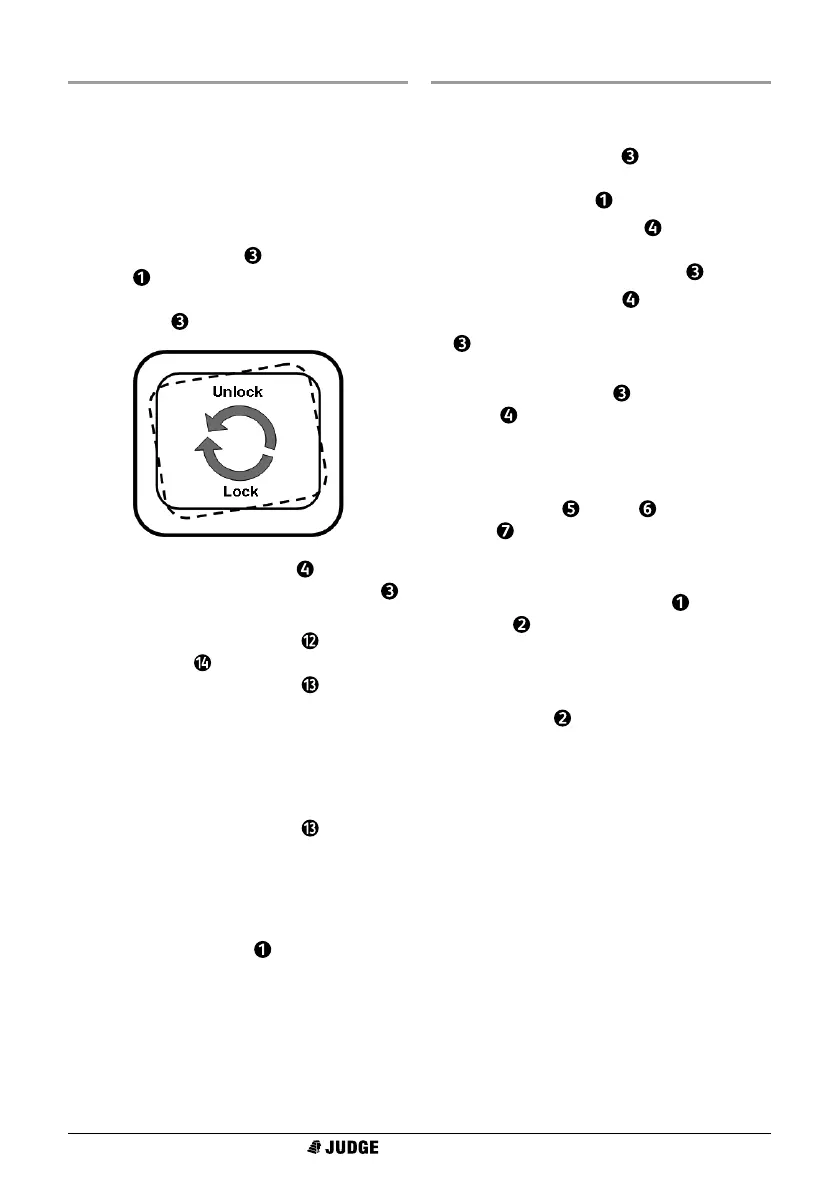
2. Place the Bread Pan in the Bread Maker
Body
at an angle (see diagram) and
adjust until it drops home. Rotate the
Bread Pan
clockwise to lock into place.
3. Locate the Kneading Blade on the
spindle in the centre of the Bread Pan
and push down until it is seated.
4. Select the Bake Programme using the
Menu Button
. Start the programme
using the Start/Stop Button
.
• It is normal for smoke and a
hot smell to be emitted during
this process; manufacturing
residues are being removed.
5. After 10 minutes, stop the programme
using the Start/Stop Button
. Allow the
machine to cool for 20 minutes.
6. Repeat steps 1 to 3 above to clean and
re-assemble the Bread Maker.
• DO NOT IMMERSE ANY PART OF THE
BREAD MAKER BODY
IN WATER
Cleaning
Disconnect the Bread Maker from the
power and allow to cool before cleaning.
1. Rotate the Bread Pan counterclockwise
to unlock (see diagram). Lift out of the
Bread Maker Body
.
2. Hold the Kneading Blade firmly and
pull upwards to remove it from the spindle
in the centre of the Bread Pan
.
• If the Kneading Blade is difficult
to remove, fill the Bread Pan
with hot water and allow to
soak for about 30 minutes.
3. Wash the Bread Pan and Kneading
Blade
in warm water and detergent or
washing-up liquid. Do not use any harsh
or abrasive cleaning materials. Both these
items are dishwasher safe.
4. Wash the Cup , Spoon and
Hook
in warm water and detergent or
washing-up liquid. Do not use any harsh
or abrasive cleaning materials.
5. Wipe the Bread Maker Body
and Lid
with a cloth, slightly dampened
with warm water and detergent. Do not
use any abrasive cleaning materials.
6. Dry all parts thoroughly before storing,
when the Lid
should be left closed.
 Loading...