– 19 –
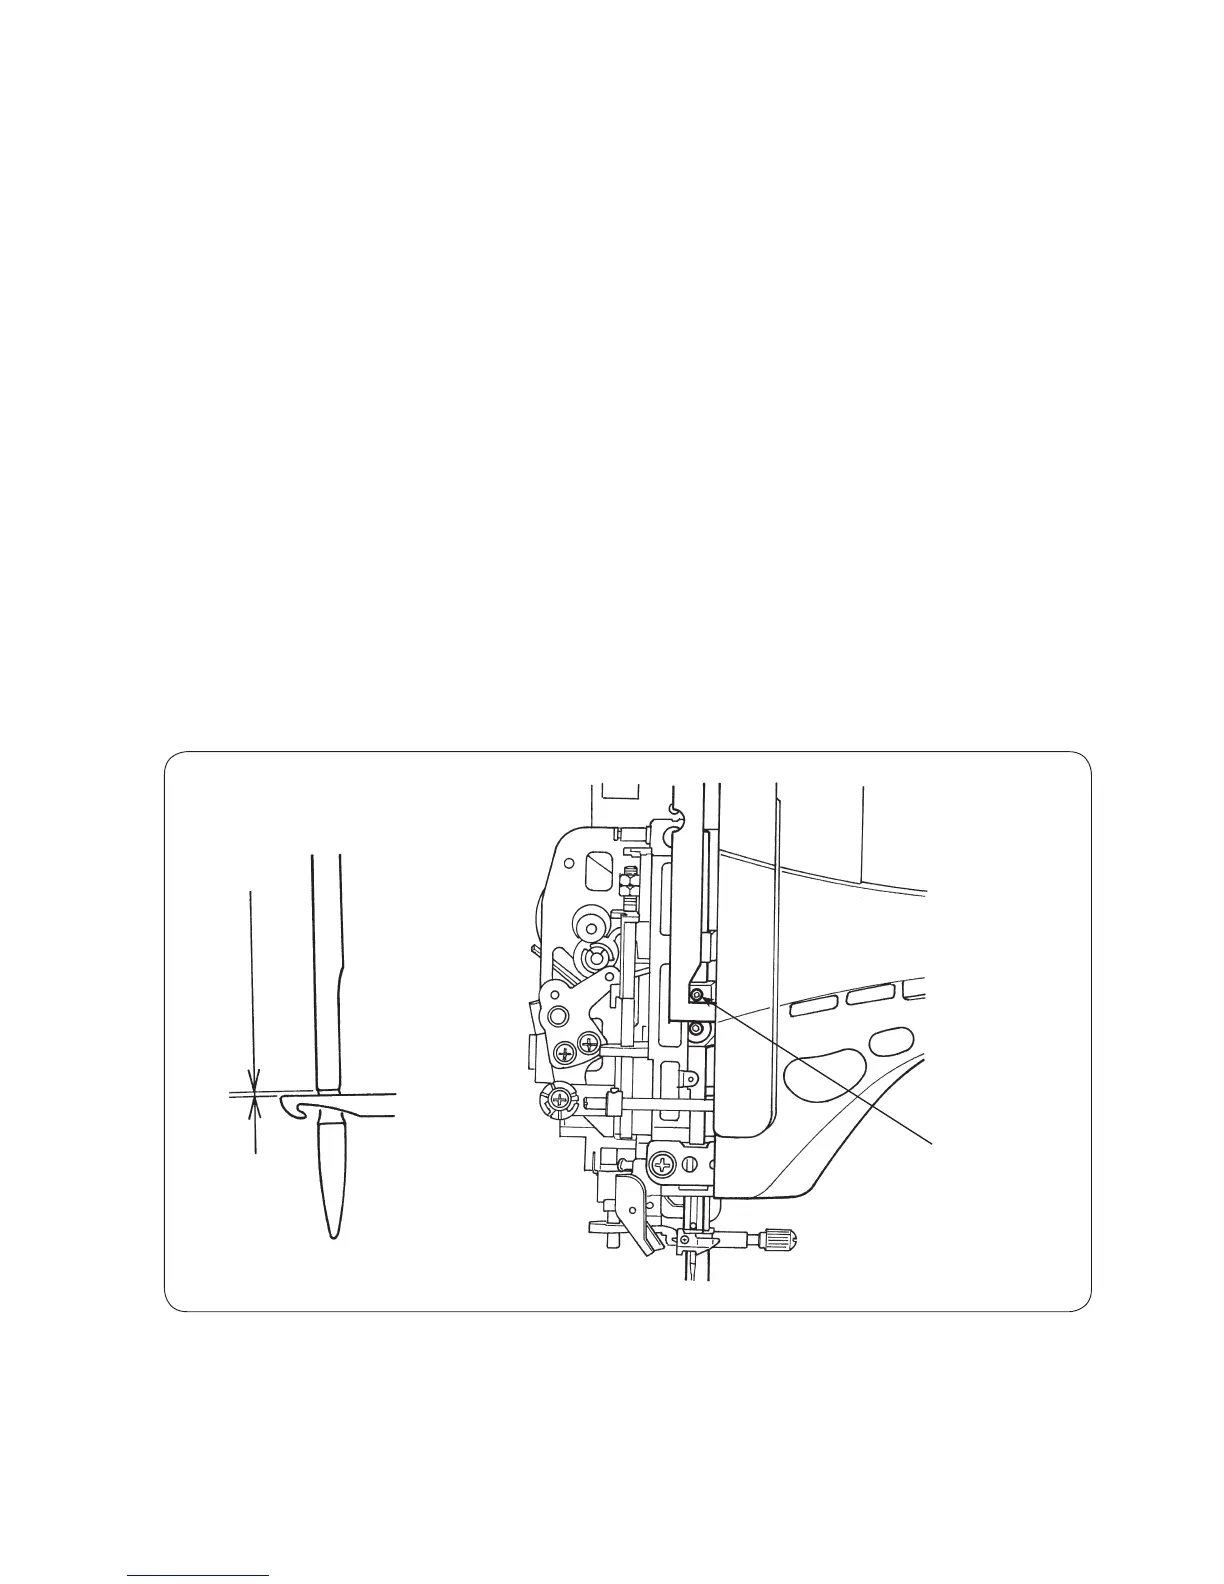
5-12 Vertical position of the needle threading hook
○
Remove the frame cover.
Adjustment procedure
1. Assemble a household HA x 1 needle #11 into the needle bar.
2. Turn the hand wheel to bring the needle bar near its highest dead point and stop the hand wheel when
the needle bar reaches the location where the setscrew in the needle bar guide is visible.
3. Lower the threading lever to its lowest dead point. Check whether a clearance of 0 to 0.1 mm is provided
between the top end of the needle threading hook and the upper end of the needle eye.
(If the clearance is not 0 to 0.1 mm, the needle may not be threaded depending on the size of
the needle used.)
4. Fit a hexagonal wrench on the needle bar guide setscrew to loosen it slightly.
If the needle threading hook position is too low -> Move the needle bar guide upward and temporarily
tighten the setscrew.
If the needle threading hook position is too high -> Move the needle bar guide downward and temporarily
tighten the setscrew.
Adjust the needle threading hook carefully, checking its position with respect to the needle eye.
When the needle threading hook enters and exits from the needle eye, the needle should never be
bent by the hook.
If the needle threading hook position deviates to the right or left, correct the bend in the needle threading
hook with the tip of a thin screwdriver or change the needle threading hook with a new one.
5. When the needle threading hook is correctly positioned, fully tighten the setscrew.
0 to
0.1 mm
Needle bar
guide setscrew

 Loading...