– 4-2 –
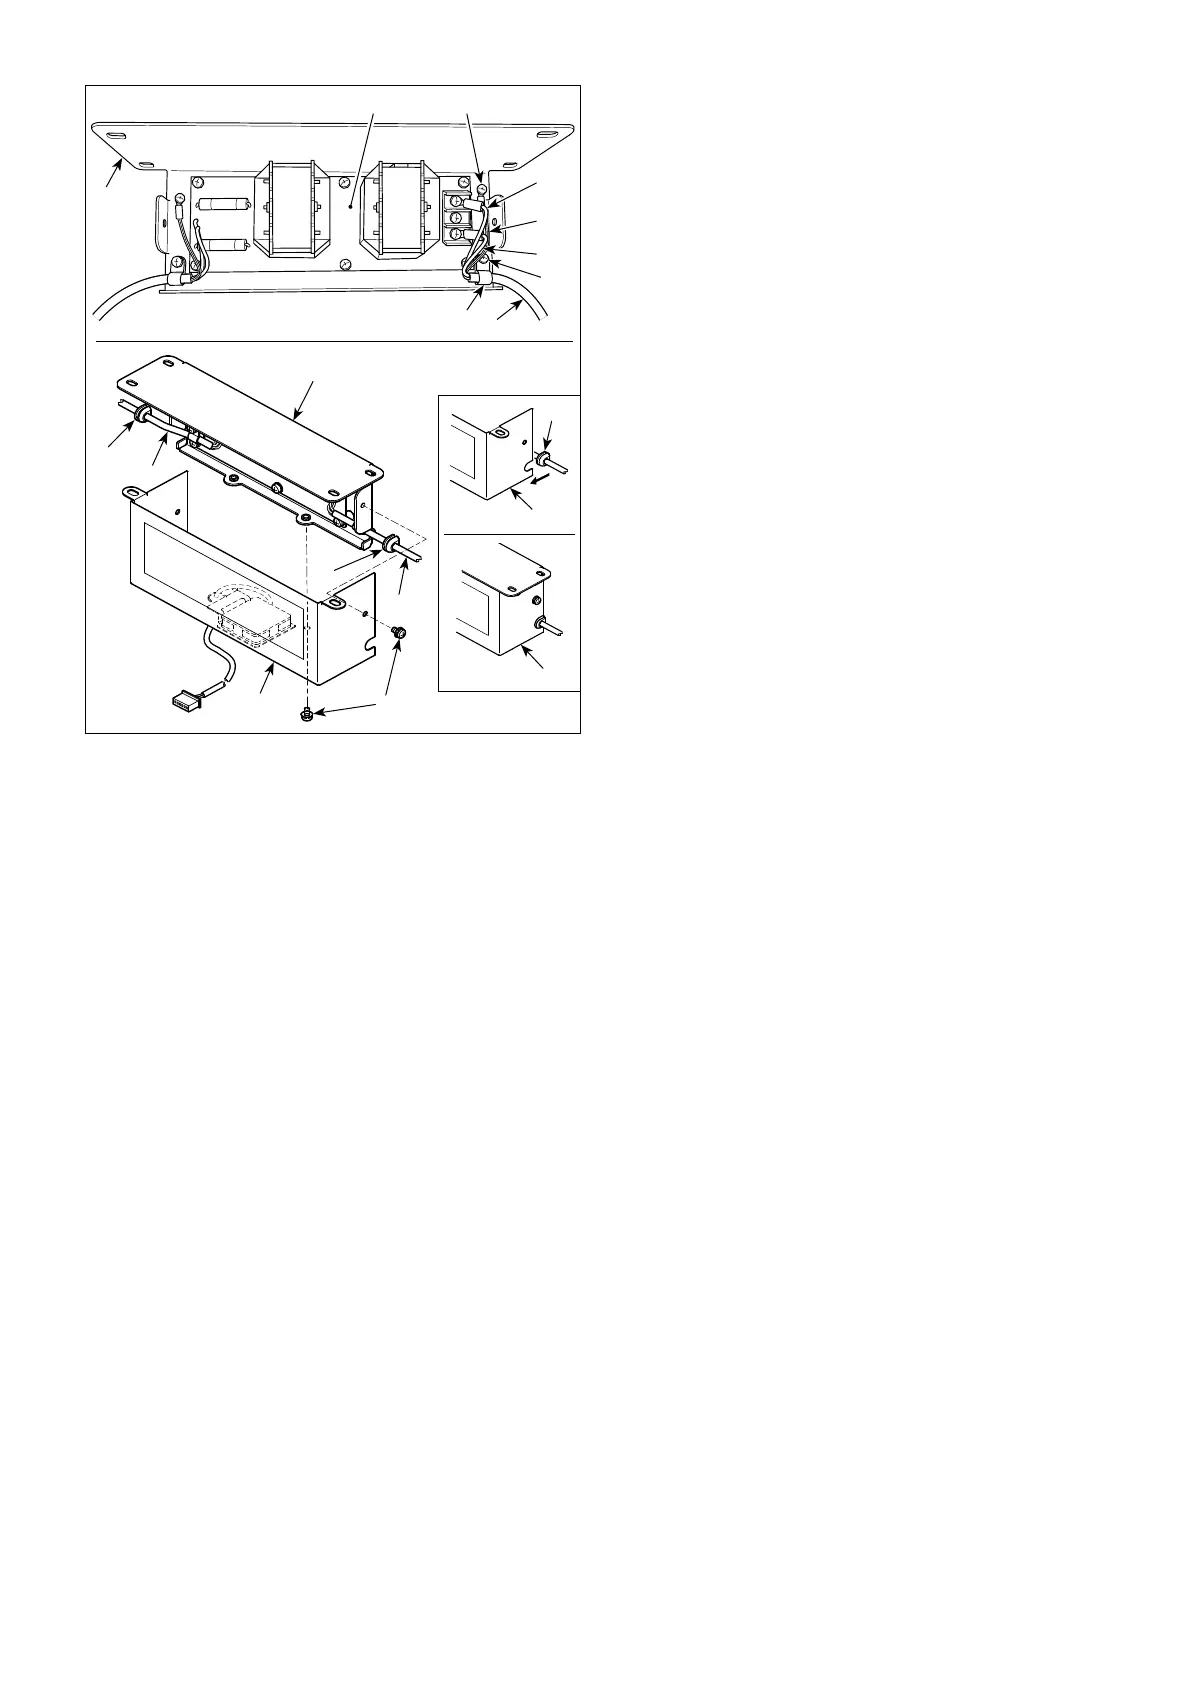
* For the EU-type models, install the reactor box
that is supplied with the sewing machine.
1) Connect the terminals of power cord of the SC-
921toreactor-boxPCBasm.andtoreactorbox
mounting plate .
Connect brown wire Atotherstconnectorand
blue wire B to the third connector respectively from
thetopofterminalblockonthereactorboxPCB
asm. using screws. Connect green/yellow wire C to
reactorboxmountingplate with earth setscrew
.
2) Attach cable clip to the power cord of SC-921.
Attach the power cord together with the cable clip
toreactorboxmountingplate with cable clip
setscrew .
3) Attach cord bushes to input/output cables and
ofthereactorbox.
4) Attachreactorboxcovertoreactorboxmounting
plate withfourreactor-boxcoversetscrews.
Atthistime,xcordbushes attached to input/
output cables and in the concave section on
reactorboxcover to eliminate a gap between
reactorbox and cover .
* Für die Modelle des EU-Typs installieren Sie den
mitderNähmaschinegeliefertenDrosselkasten.
1) Schließen Sie die Klemmen des Stromversorgungs-
kabels des SC-921 an die Drosselkasten-Plati-
neneinheit und an die Drosselkasten-Montage-
platte an.
Schließen Sie das braune Kabel A an die erste
Klemme und das blaue Kabel B an die dritte Klem-
mevonderOberseitedesKlemmenblocksjeweils
mit Schrauben an der Drosselkasten-Platinenein-
heit an. Schließen Sie das grün/gelbe Kabel C mit
einer Erdungsklemmschraube an die Drossel-
kasten-Montageplatte an.
2) Bringen Sie den Kabelbinder am Stromversor-
gungskabel des SC-921 an. Befestigen Sie das
Stromversorgungskabel zusammen mit dem Ka-
belbinder mit der Kabelbinder-Befestigungsschrau-
be an der Drosselkasten-Montageplatte .
3) Bringen Sie Kabeltüllen an den Ein-/Ausgangs-
kabeln und des Drosselkastens an.
4) Befestigen Sie die Drosselkastenabdeckung mit
vier Befestigungsschrauben an der Drosselkas-
ten-Montageplatte .
Setzen Sie dabei die an den Ein-/Ausgangskabeln
und angebrachten Kabeltüllen in die Ver-
tiefungen der Drosselkastenabdeckung ein, um
einen Spalt zwischen Drosselkasten und Abde-
ckung zu beseitigen.
*Pourlesmodèlespourl’Europe,installerlaboîte
duréacteuraccompagnantlamachineàcoudre.
1) Raccordez les connecteurs du cordon d'alimenta-
tion delaSC-921àlacartedecircuitimprimédu
boîtier de commande etàlaplatinedexation
du boîtier de commande .
RaccordezlelbrunA au premier connecteur et le
lbleuB au troisième connecteur respectivement
en partant du haut du bornier de la carte de circuit
impriméduboîtierdecommandeàl'aidedevis.
Raccordezlelvert/jauneCàlaplatinedexation
du boîtier de commande à l'aide de la vis de
terre sans tête .
2) Installez l'attache-câble sur le cordon d'alimen-
tationdelaSC-921.Fixezlecordond'alimentation
etl'attache-câbleensemblesurlaplatinedexation
du boîtier de commande avec la vis sans tête
pour attache-câble .
3) Installezlesbaguesd'étanchéité sur les câbles
d'entrée/sortie et du boîtier de commande.
4) Fixezlecouvercleduboîtierdecommande sur
laplatinedexationduboîtierdecommande à
l'aidedesquatrevisdexationsanstêtepré-
vues à cet effet.
Lorsdecetteétape,placezlesbaguesd'étanchéité
descâblesd'entrée/sortie et dans la partie
concave du couvercle du boîtier de commande
pouréliminerlejeuentreleboîtierdecommande
et le couvercle .
A
B
C
 Loading...


