– 11 –
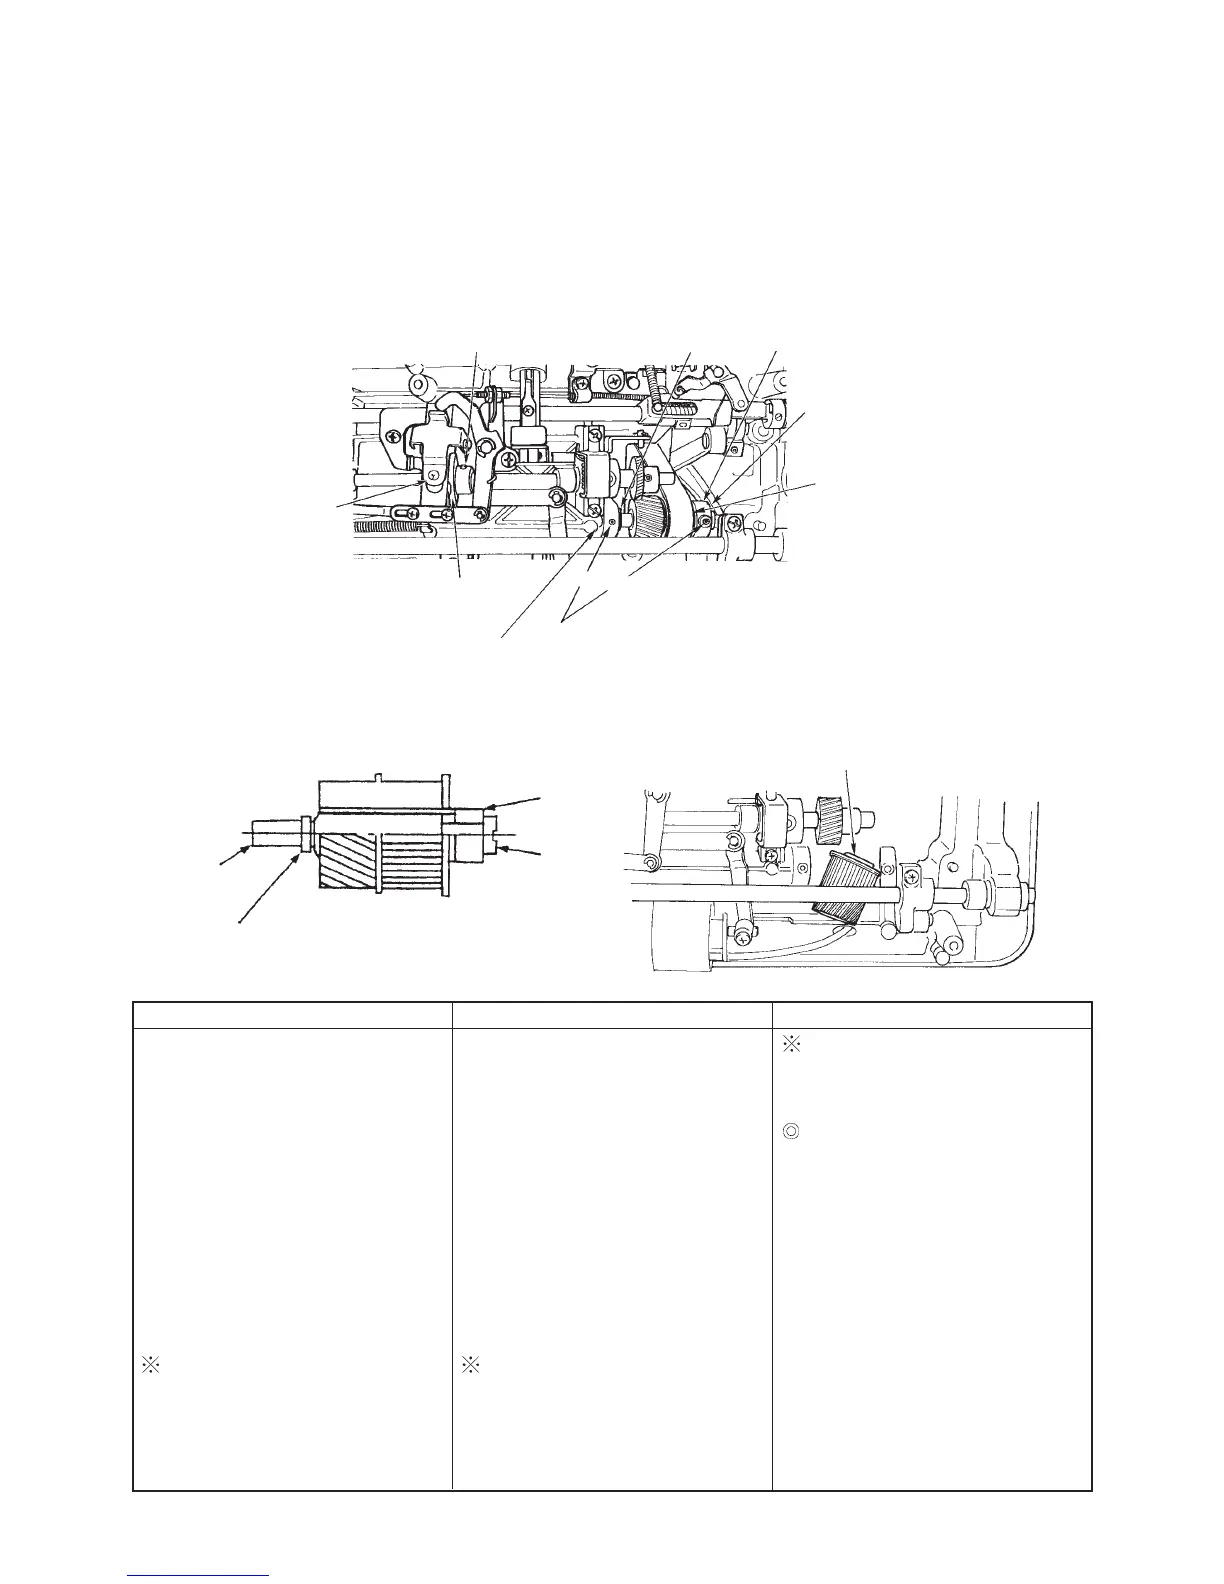
13. Hook driving shaft pulley
Preparation
™ Remove outer components.
(Excluding stop solenoid)
™ Loosen idler.
™ Remove needle.
8 E-ring groove
6
4
5
Make 7 hook driving shaft pulley
come out downward.
!0 Moving knife
roller arm
!1 Thread trimmer cam
2 Hook driving shaft pulley eccentric shaft
setscrew
SM8040602TP
Hexagon 2.0 mm
5 Hook driving shaft pulley eccentric shaft
9 Thread trimmer
cam screw No. 1
3 Hook driving shaft
pulley
E-ring (E-6)
6 Hook driving shaft pulley eccentric
shaft bushing
Slit on 4 hook driving shaft pulley
eccentric shaft
1 Timing belt
A
B
Disassembly
™ Remove timing belt from main
shaft pulley.
Remove belt of 1 and loosen two
setscrews of 2.
Remove E-6 of 3 and turn 4 to find
a place where backlash in hook
driving shaft pulley is large.
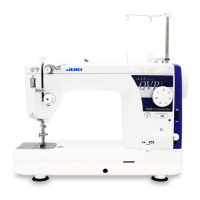
Press 5 and push out bushing of 6
to the right side.
Draw out 5 and 6, and remove 7
following the point of 7.
Do not make a flaw on E-ring
groove 8 when removing E-ring
3.
Assembly
™ Enter hook driving shaft pulley
7.
™ Enter eccentric shaft 5 and 6.
™ Set E-ring 3.
™ Remove the play in hook driving
shaft with 6 and tighten setscrew
2 B.
™ Turn shaft slit 4 to adjust
backlash in pulley and tighten
setscrew 2 A.
™ Set belt 1.
Adjust backlash in eccentric shaft
by right rotation.
Point
When setting bushing 6, do not
make a flaw on the end face of
bushing.
When setting belt onto main shaft,
refer to thread trimming timing.
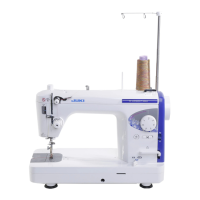
(Simple method)
™ Lower needle bar 1.93 mm from
its upper dead point.
™ Turn hook driving shaft and orient
screw No. 1 9 to this side (just
front).
™Enter contact of roller arm !0 to
groove of cam !1.
™ Turn hook driving shaft in the
reverse direction and set belt at
the position where it stops.
(Illustration of hook driving shaft pulley)