4
Quick Start Instructions
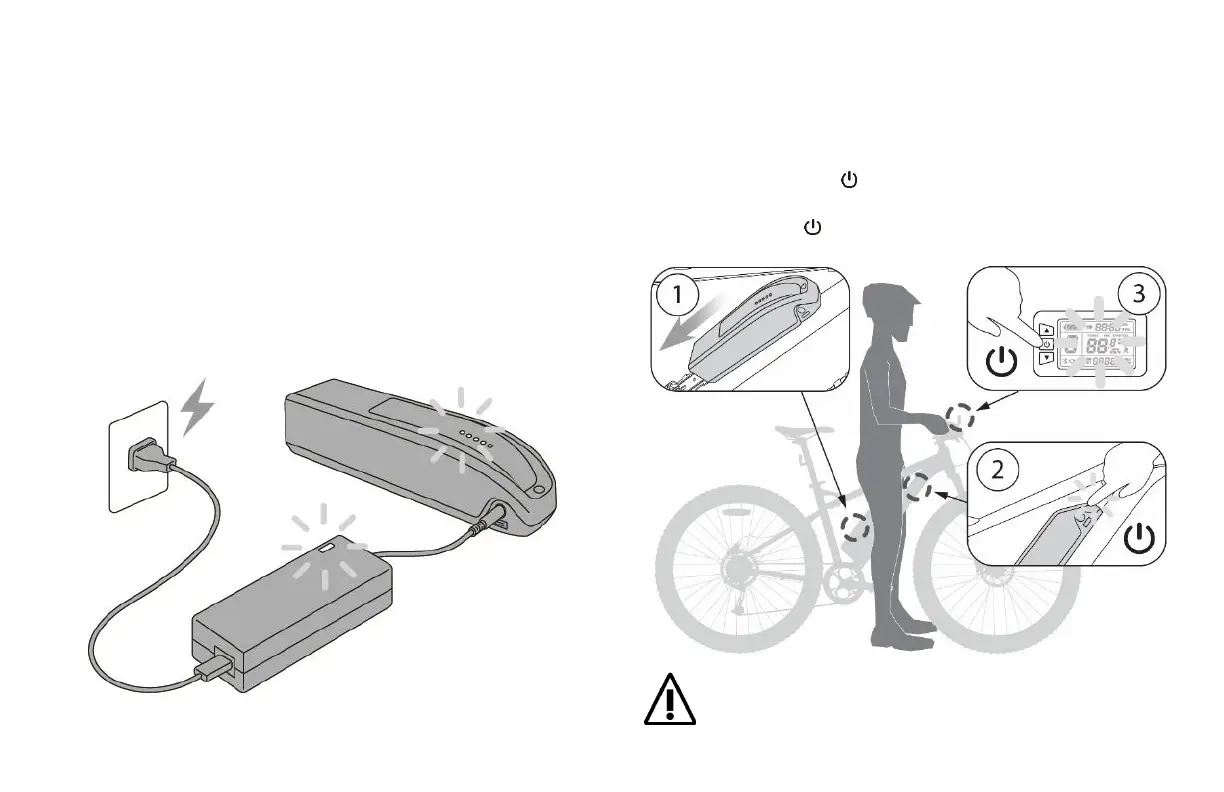
STEP 1: Charge the battery
1. Connect the AC power plug into the charger.
2. Plug the AC power plug into an electrical outlet. The LED indicator on
the charger will light up.
3. Lift the battery’s plastic protector cap and connect the charging plug
into the battery’s charging port. The LED indicators on the battery will
light up, confirming that charging is underway. Let the battery charge
until it is fully charged.
4. The light on the charger will turn green when fully charged.
5. Pull the charging plug from the battery’s charging port and replace
the plastic protector cap.
STEP 2: Turn the system on
1. Slide and lock the battery onto its support on the frame.
- Mount the bicycle and stand still over it or sit on the saddle with a foot
resting steady on the ground -
2. Press the power button on the battery. The LED indicator will light
up showing the battery is On.
3. Press and hold the button on the LCD Controller until it the screen
lights up.
It is strongly recommended not to turn the power assist system on
before having mounted the bicycle and being seated properly with at
least one foot on the ground. An unexpected ignition of the power
assistance while mounting the bicycle can result in serious injuries.