16
Using the LCD controller
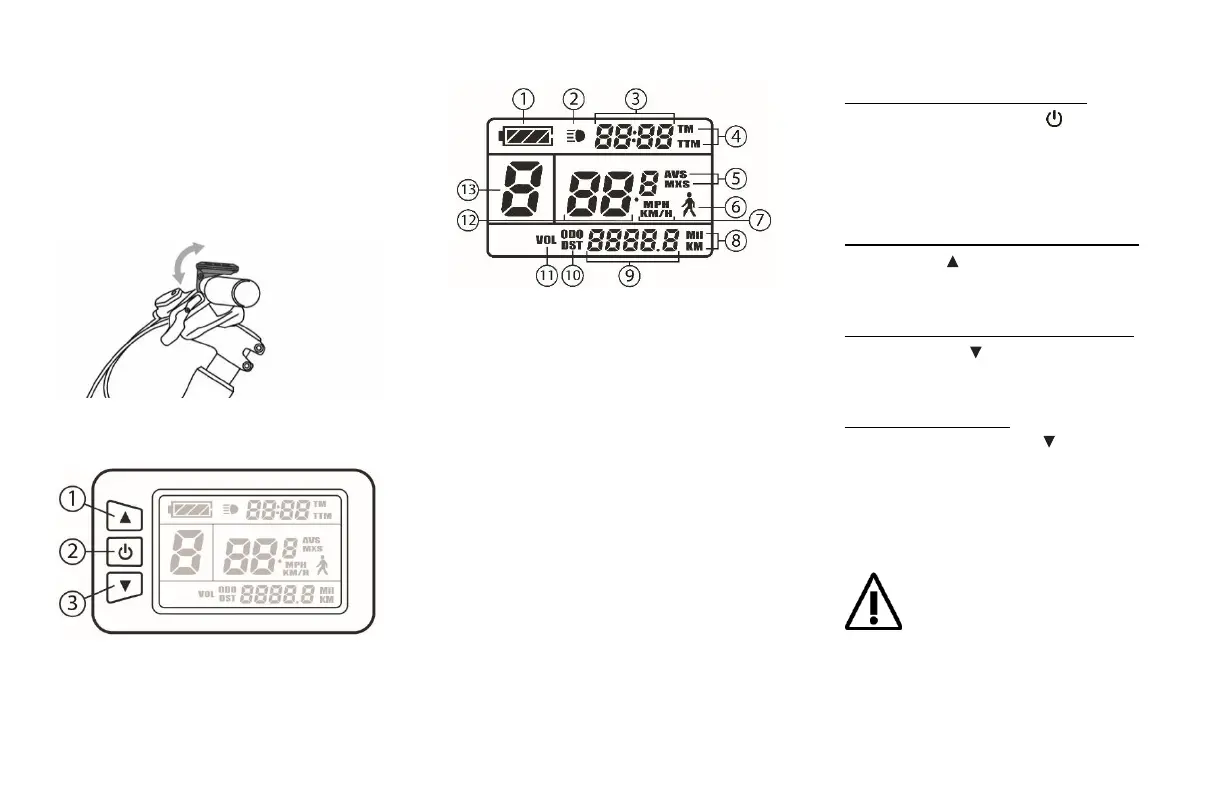
Positioning the LCD controller
Position the LCD controller on the left-
hand side of your handlebar, facing up,
slightly at angle so it’s easy to look at, and
close to your hand so you can easily reach
it while holding on to the grip.
LCD controller buttons description
1. UP button
2. POWER button
3. DOWN button
LCD screen icons description
1. Battery charge level status
2. LCD screen backlight status
3. Time display
4. Current time / Trip time displayed
5. Average speed / Maximum speed displayed
6. Walk mode activated icon
7. Current speed unit displayed
8. Current distance unit displayed
9. Distance display
10. Current trip distance / Odometer displayed
11. System voltage status
12. Speed display
13. Current power assist level
LCD controller commands
Turning the system ON or OFF:
Press and hold the Power button for 2
seconds to turn the system On or Off
(The battery power must have been
turned on before)
Switch to a higher Power Assist level:
Press the Up button to switch to a
higher Power Assist level
Switch to a lower Power Assist level:
Press the Down button to switch to a
lower Power Assist level
Activate Walk mode:
Press and hold the Down button for 2
seconds from any level to activate Walk
mode. Maintain the button pressed for
the time you need the Walk assistance.
Walk mode will instantly shut down once
you release the button.
Switching to Walk mode will instantly
ignite the motor and propel the bicycle
to a steady speed of 6 km/h even with
no pressure on the pedals. Make sure
you are holding your bicycle steadily and that the
path in front of your bicycle is clear. Walk mode
will automatically shut down once you release the
button.