EasyManuals Logo

Juniper EX4300 Manual

Juniper EX4300
9 pages
To Next Page IconTo Next Page
To Previous Page IconTo Previous Page
Page #4 background imageLoading...
Page #4 background image
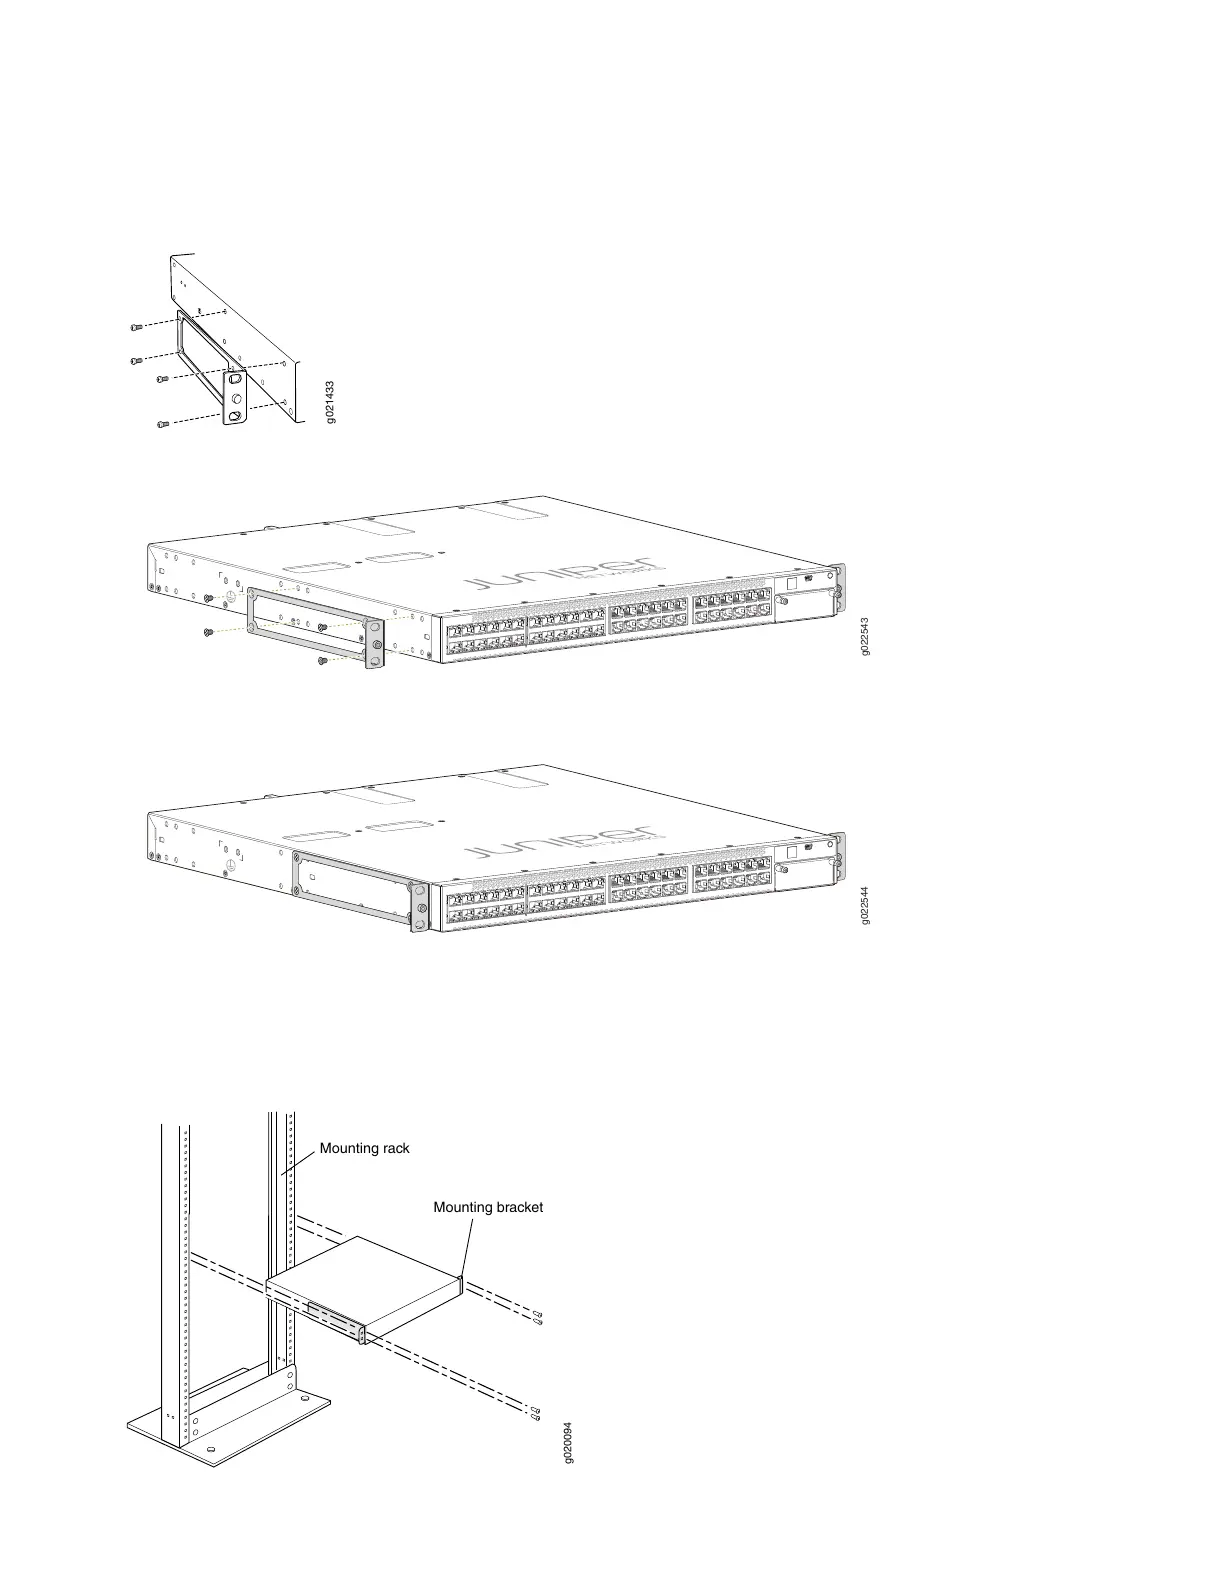
You’ll notice there are three locations on the side panel where you can attach the mounting brackets: front, center,
and rear. Attach the mounting brackets to the location that best suits where you want the EX4300 switch to sit in the
rack.
g021433
g022543
g022544
4. Lift the EX4300 switch and position it in the rack. Line up the bottom hole in each mounting bracket with a hole in
each rack rail, making sure the EX4300 switch is level.
g020094
Mounting rack
Mounting bracket
4

Other manuals for Juniper EX4300

Questions and Answers:

Question and Answer IconNeed help?

Do you have a question about the Juniper EX4300 and is the answer not in the manual?

Juniper EX4300 Specifications

General IconGeneral
ModelEX4300
Virtual ChassisYes, up to 10 members
Layer 3 RoutingYes
10GBASE SFP+ Ports4
Jumbo Frames9216 bytes
MAC Address Table Size32, 000
Operating SystemJunos OS
Uplink Ports4 x 10GBASE SFP+
Power SupplyAC or DC options
Operating Temperature0°C to 45°C (32°F to 113°F)
Input Voltage100-240V AC
Operating Relative Humidity5 to 90% RH, non-condensing
Management OptionsCLI, Web UI, Junos Space
RedundancyYes, power supply and fans
Storage Temperature-40°F to 158°F (-40°C to 70°C)
Ports24 or 48

Related product manuals