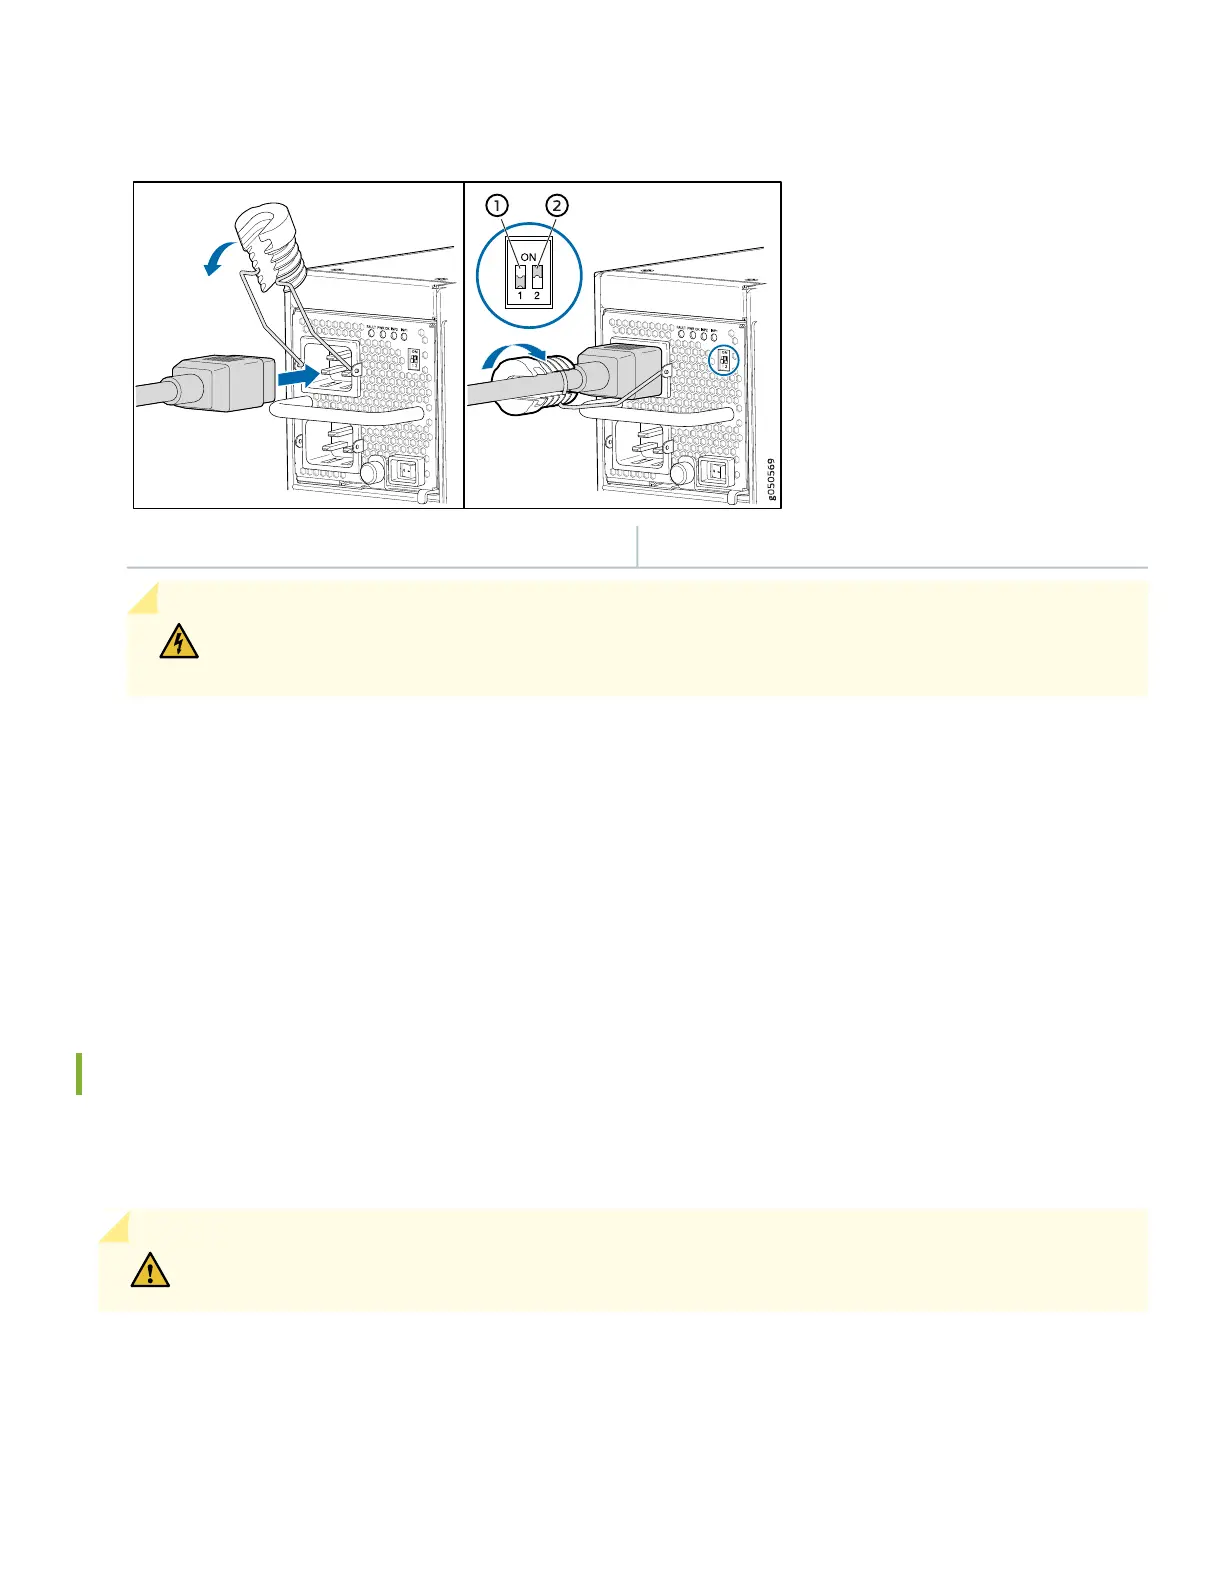
Figure 19: Power Cord and Retainer Clip
2—1— Enable router for INP2Enable router for INP1
WARNING: Ensure that the power cords do not block access to router components or drape where
people can trip on them.
16. If the AC power source outlets have a power switch, set them to the on (|) position.
17. Move the enable switches for input 1 and input 2 to the ON position.
18. Verify that the INP1 and INP2 LEDs on the power supply faceplate are lit and are on steadily.
19. Press the power switch to the on (|) position.
Install DC Power Supplies
MX10016 power supplies are hot-insertable and are field-replaceable units (FRUs). You can install up to 10 power supplies
in an MX10016. The power supplies install in the rear of the chassis in the slots provided along the left side.
CAUTION: Do not mix AC and DC power supplies in the same chassis.
1. Before you install a DC power supply in the chassis, ensure that you have followed all safety warnings and cautions:
22