About the analysis screen
Pressing the [P.ANALYZER] button on the remote control displays the analysis screen. The operation varies with the
state of the OSD.
1
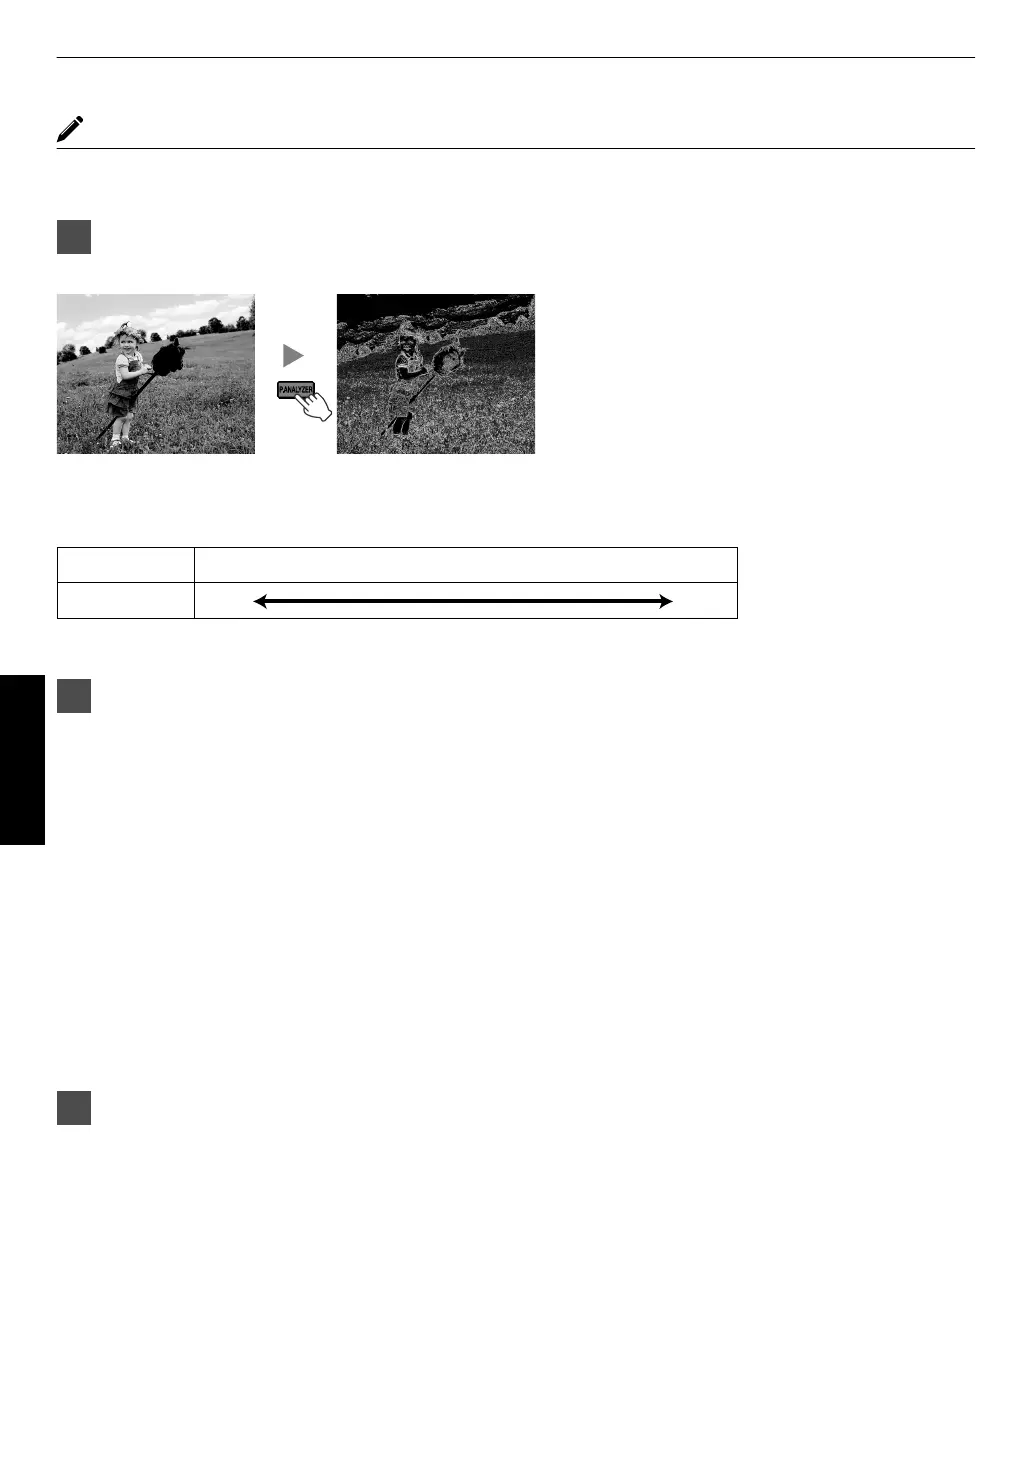
Press the [P.ANALYZER] button
The frequency components of the input image are displayed.
.
0
The frequency components are distinguished using different colors.
0
When setting the “Original Resolution” manually, select “4K” if high-frequency components constitute the majority,
and a lower resolution if there are more low-frequency components.
.
Low High
Red Yellow Green Cyan
Blue
Frequency
Orange
Purple
2
Make adjustments while looking at the analysis screen
A
Press the [MPC] button to display the adjustment menu
You can also perform setting from “Picture Adjust”"“MPC Level” in the menu.
B
Make adjustments according to your preference based on the setting of the selected “Picture Mode”*
0
With the analysis screen displayed, selecting “Enhance” displays the area in “cyan” where the “Enhance”
effect is applied.
Pressing the [P.ANALYZER] button while “Enhance” is selected also displays the area.
0
With the analysis screen displayed, selecting “Dynamic Contrast” displays the area in “yellow” where the
“Dynamic Contrast” effect is applied.
Pressing the [P.ANALYZER] button while “Dynamic Contrast” is selected also displays the area.
0
With
the analysis screen displayed,
selecting “Smoothing” or “NR” displays the area in “magenta” where the
“Smoothing” or “NR” effect is applied.
Pressing the [P.ANALYZER] button while “Smoothing” or “NR” is selected also displays the area.
* You can make adjustments with the analysis screen displayed.
Increasing the value enhances the effect and the color displayed is darker.
3
Press the [P.ANALYZER] to exit the analysis screen
40
Adjust/Set
 Loading...