38 EN
IN UTS/AV P
COPY
OFF
OFF
–
–
MDOESOUND
MDOE
12
BIT
ROSYNCH
ODEREC M
STEREO–
SOUND
1
SP
–
–
–
NRETUR
O.O
RE NEON SC LCD/ TV
UAOT
IMETDATE /
TIME CODE
–
–
– FFO
NRETUR
BEEP
MELODY
NO
TALLY
–
–
ID N MUBER
DEMO MODE
– 60
– NO
CAM ERSET
NRETUR
MSYSTE
AYDISPL
VIDEO SOUND MODE
MODE
MODE
12
BIT
SYNC ROH
REC
END
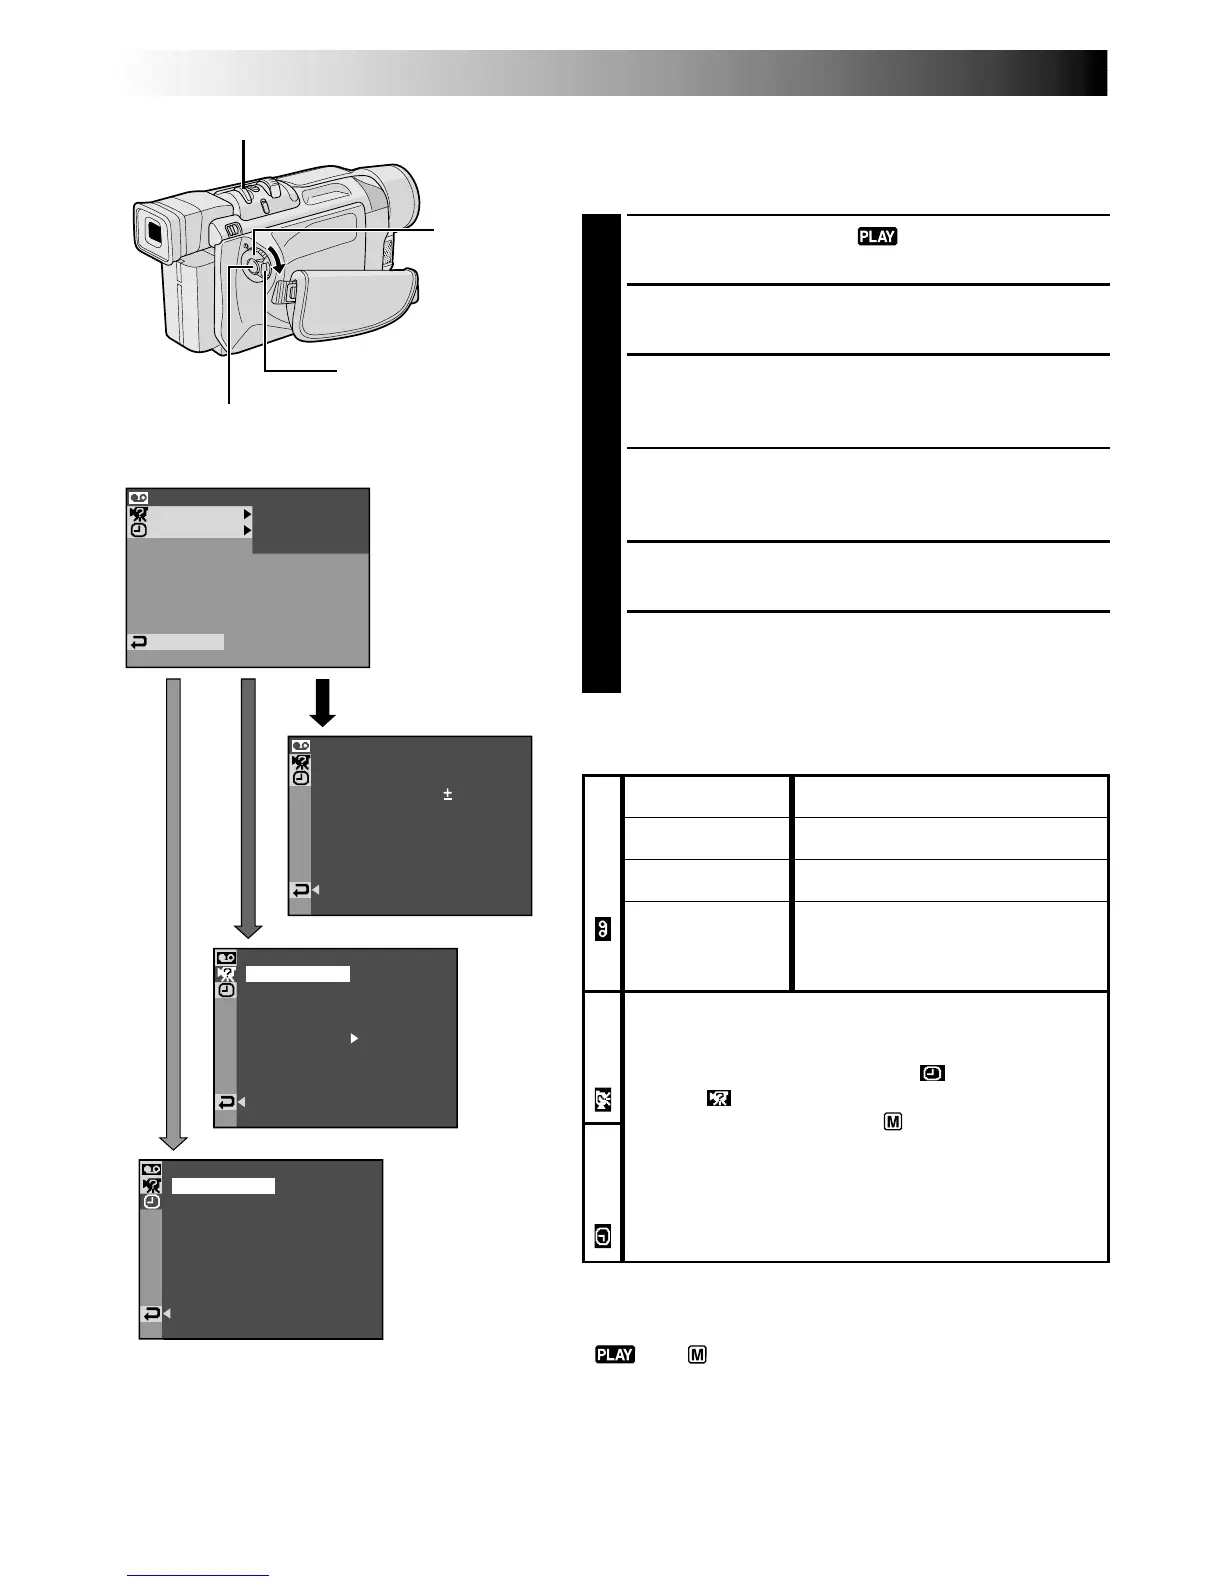
For Playback Menu
The following procedure applies to all except
Synchro
Comp (
墌
pg. 49).
1
Set the Power Switch to “ ” while pressing down
the Lock Button located on the switch.
2
Press the MENU/BRIGHT wheel in. The Menu
Screen appears.
3
Rotate the MENU/BRIGHT wheel to select the
desired function menu, and press it. The selected
function menu appears.
4
Rotate the MENU/BRIGHT wheel to select the
desired function, and press it to display the Sub
Menu.
5
Rotate the MENU/BRIGHT wheel to select the
desired parameter and press it. Selection is complete.
6
Rotate the MENU/BRIGHT wheel to select
“
1
RETURN” and press it twice to close the Menu
Screen.
Display
Power
Switch
MENU/BRIGHT Wheel
Lock Button
Recording Start/Stop Button
NOTE:
“REC MODE” can be set when the Power Switch is set to
“ ” or “ ” (
墌
pg. 14, 35).
Menu Screen Explanations
墌 pg. 39.
墌 pg. 39.
墌 pg. 49.
Allows you to set the recording
mode (SP or LP) depending on
your preference (墌 pg. 14).
SOUND MODE
12BIT MODE
SYNCHRO
REC MODE
VIDEO
Each setting is linked with “ DISPLAY”
or “ SYSTEM”, which appears when the
Power Switch is set to “ ” (墌 pg. 36, 37).
The parameters are the same as in the
description on pg. 36, 37.
USING MENUS FOR DETAILED ADJUSTMENT
(cont.)
DISPLAY
SYSTEM



 To Next Page