P2P Connection
You can access the web function of this camera
recorder from devices such as a smartphone,
tablet terminal, or PC.
1
[Wireless LAN] appears on the [Wizard]
screen.
.
Back Next
Wireless LAN
Available Adapter
2
Press the I button to display the
[Select
Connection Type] screen.
Select “P2P”.
Follow the screen instructions to complete
setting.
Perform setting for the following.
0
Mode of connection
0
Method of setting
* SSID and Passphrase in cases other than
WPS
.
2
Back Next
Connect with Access Point
P2P
Select Connection Type
Memo :
0
When “WPS
” is selected in the [Select Setup
Type] screen, the following steps 3 and 4 are not
required.
3
Set the camera recorder to the Camera
mode, and display the
[Network] (status)
screen.
0
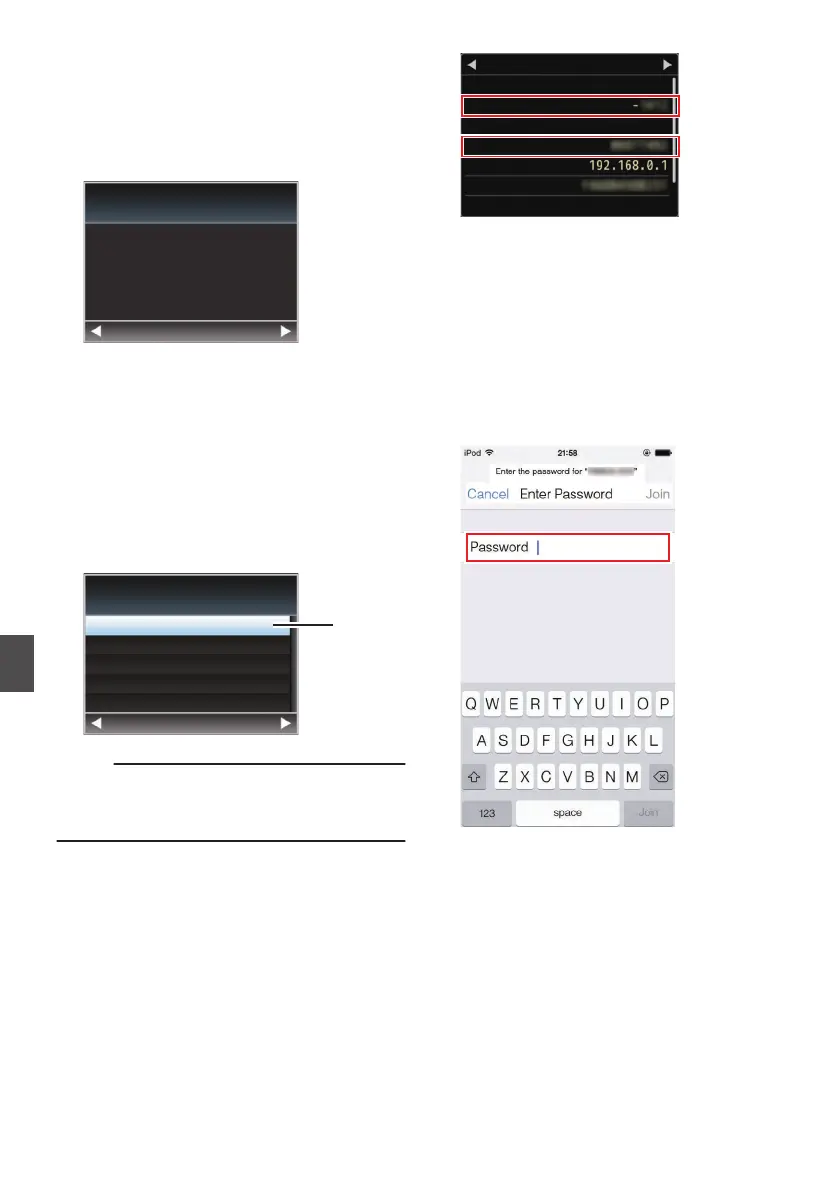
Press the [STATUS
] button on the camera
recorder to display the status screen.
Press the cross-shaped button (HI) to
display the [Network] screen.
0
Check to ensure that the
[SSID] and
[Passphrase] that you have set in the wizard
are displayed.
.
HM200
Network
WPA2
P2P
MAC Address
IP Address
Passphrase
Security Type
SSID
Ty p e
4
Select [SSID] from the list of access points
(smartphone,
tablet terminal, PC, etc.), and
enter [Passphrase].
0
Display the list of access points in the
wireless connection settings of the
smartphone, tablet terminal, or PC, and
select “HM200-*****
”. (***** are numbers that
vary with the device used.)
0
After the password confirmation screen
appears, enter the [Passphrase] displayed
on the [
Network] screen.
.
5
Setting is complete.
After setting is complete, you can access the
camera recorder via a web browser.
(A P150 [Connecting from a Web Browser
K] )
144
Preparing Network Connection K
Connecting to the Network
K

 Loading...