EasyManua.ls Logo

JVC HM700U - Camcorder - 1080p - User Manual

JVC HM700U - Camcorder - 1080p
128 pages
Print Icon
To Next Page IconTo Next Page
Loading...
HD MEMORY CARD CAMERA RECORDER
GY-HM700U
GY-HM700CHU
GY-HM700E
GY-HM700CHE
INSTRUCTIONS
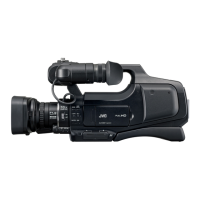
* The illustration shows the GY-HM700E with the supplied viewfinder, microphone and lens attached.
* GY-HM700CHU/GY-HM700CHE does not come with a lens.
For Customer Use:
Enter below the Serial No. which is located on the body.
Retain this information for future reference.
Model No. GY-HM700U/GY-HM700CHU
Serial No.
Please read the following before getting started:
Thank you for purchasing this JVC product.
Before operating this unit, please read the instructions
carefully to ensure the best possible performance.
In this manual, each model number is described without the last letter
(U/E) which means the shipping destination. (U: for USA and Canada,
E: for Europe)
Only “U”models (GY-HM700CHU/GY-HM700U) have been evaluated by
UL.
LST0904-001A

Table of Contents

Questions and Answers

  • L
    lindseyobrienAug 19, 2025
    How to fix JVC HM700U - - 1080p Camcorder if power does not turn on?
    • H
      Heather HarperAug 19, 2025
      If your JVC Camcorder does not turn on, please check: * If the AC adapter is properly connected. * If the battery is charged. * If you are trying to turn it on immediately after turning it off; wait at least 5 seconds before turning it on again.
  • J
    Jessica GordonAug 21, 2025
    What to do if JVC HM700U - - 1080p is unable to start recording?
    • C
      Collin SullivanAug 22, 2025
      If your JVC Camcorder is unable to start recording, check the following: * Ensure the record button lock switch on the handle is not engaged. * Verify that the write-protect switch of the SDHC card is turned off. * Confirm the camera recorder is set to Camera mode using the [CAM/MEDIA] selection button.
  • M
    Michael YorkAug 25, 2025
    Why are images on my JVC HM700U - - 1080p LCD monitor and viewfinder screens dark or blurred?
    • D
      Dillon CooperAug 25, 2025
      If the images on your JVC Camcorder's LCD monitor and viewfinder screens appear dark or blurred, try the following: * Readjust the brightness of the LCD monitor screen and viewfinder. * Check if the [ND FILTER] switch is set to [1/16]. * Ensure the iris isn't closed. * Verify the shutter speed setting isn't too high. * Check the connection of the viewfinder cable. * Adjust the peaking: use the [LCD PEAKING +/-] button for the LCD monitor screen and the [VF PEAKING] knob for the viewfinder screen.
  • O
    owensalexanderAug 26, 2025
    What to do if JVC HM700U - - 1080p SDHC card cannot be initialized (formatted)?
    • C
      Craig SpencerAug 27, 2025
      If your JVC Camcorder cannot initialize (format) the SDHC card, ensure that the write-protect switch on the SDHC card is turned off.
  • R
    Ryan JenkinsAug 28, 2025
    Why camera image is not output on JVC Camcorder LCD monitor and viewfinder screens?
    • H
      Heather FernandezAug 28, 2025
      If the camera image is not being output on the LCD monitor and viewfinder screens of your JVC Camcorder, ensure that the camera recorder is set to the Camera mode. If the operation mode indicator lights up in another color, camera images are not output. Use the [CAM/MEDIA] selection button to switch to the Camera mode.
  • R
    Robert SmithAug 30, 2025
    Why are the time code and user's bit not displayed on my JVC HM700U - - 1080p?
    • J
      Janice AnthonyAug 30, 2025
      The time code and user's bit may not be displayed on your JVC Camcorder for the following reasons: * They are not displayed in IEEE1394 input mode. * Even in Camera mode or SD Card mode, the time code and user's bit may not be displayed depending on the type of status display. * Check if [TC/UB] of [Status Display...] in the [LCD/VF] menu is set to AOffB. To display the time code and user’s bit, set it to AOnB.
  • R
    Ryan JohnsonSep 1, 2025
    What to do if JVC HM700U - - 1080p Camcorder playback does not start after selecting a clip?
    • B
      Bonnie MillerSep 1, 2025
      If playback doesn't start on your JVC Camcorder after selecting a clip thumbnail, ensure that the selected clip is a playable clip. Playback is not possible if the clip has a different video format setting.
  • S
    Sean GuerraSep 3, 2025
    Why does the battery alarm appear on my JVC HM700U - - 1080p even after loading a charged battery?
    • S
      Sandra HillSep 3, 2025
      If the battery alarm appears on your JVC Camcorder even after loading a charged battery, the battery might be too old.
  • W
    wmartinSep 5, 2025
    What to check if HD/DV signals cannot be input to JVC Camcorder?
    • J
      John Fleming Jr.Sep 5, 2025
      If HD/DV signals cannot be input to your JVC Camcorder, verify that the camera recorder is set to the IEEE1394 Input mode and that the [HD/DV] IEEE1394 terminal mode switch is correctly set.
  • N
    Nathan FrankSep 7, 2025
    Why doesn't the [CH1/CH2 AUDIO LEVEL] adjustment knob work on my JVC Camcorder?
    • K
      Katherine BallardSep 8, 2025
      If the [CH1/CH2 AUDIO LEVEL] adjustment knob on your JVC Camcorder does not work, check if the [CH1/CH2 AUDIO SELECT] switch is set to AAUTOB, and if the [FULL AUTO] switch is set to AONB.

Summary

Introduction

Important Safeguards

General safety precautions and warnings for appliance operation.

Safety Precautions

For USA and Canada

Specific safety advice and warnings for users in the USA and Canada.

Safety Precautions for Europe

Disposal of Old Equipment (European Union)

Instructions for environmentally responsible disposal of electrical and electronic equipment in the EU.

Operation Mode

Camera Mode

The primary mode for recording video images.

Media Mode (SD Card)

Allows playback and deletion of clips recorded on the SDHC card.

Media Mode (IEEE1394 Input)

Input mode for video images from IEEE1394-connected equipment.

USB Mode

Connects to a PC to transfer files from the SDHC card.

Main Features

Precautions for Proper Use

Storage and Usage Locations

Guidelines for optimal and safe storage and usage environments for the device.

Maintenance and Care

Procedures for device upkeep, battery use, and regular inspections.

SDHC Card Handling

Instructions for inserting, removing, and handling SDHC memory cards.

Names of Parts

Names of Parts (continued)

Side Control Panel Overview

Attaching Accessories

Attaching the Zoom Lens

Step-by-step guide for mounting the supplied zoom lens.

Attaching the Microphone

Instructions for mounting the supplied microphone and connecting it.

Power Supply Options

Power Supply Methods

Using AC Power

Detailed instructions for operating the camera recorder using an AC adapter.

Using a Battery Pack

Information on recommended batteries, operating times, and precautions.

Battery Attachment and Detachment

Attaching the Battery

Step-by-step instructions for attaching specific battery types to the camera.

Turning the Camera On and Off

Powering On the Camera

Steps to turn on the camera and its initial startup behavior.

Powering Off the Camera

Steps to safely turn off the camera recorder and disconnect power.

Setting the Clock (Initial Setting)

Initial Clock Setup Procedure

How to set the date and time during the initial setup process.

Adjusting Back Focus

SDHC Cards and Operations

SDHC Card Status and Handling

Understanding card status indicators and how to insert/remove cards.

Removing the SDHC Card

Step-by-step procedure for safely removing an SDHC card.

SDHC Card Management

Formatting SDHC Cards

Procedure for formatting SDHC cards for use with the camera.

SDHC Card Restoration and Recording Time

Restoring the SDHC Card

Procedure for restoring an SDHC card if an abnormality occurs.

Basic Shooting Procedures

Focus Assist Function

Using Focus Assist

How to activate and use the focus assist feature for easier focusing.

Selecting File and Video Formats

Adjusting Iris and Gain Settings

Iris Adjustment Modes

How to manually or automatically adjust the lens aperture (iris).

Gain Adjustment Modes

How to set video amplifier gain manually or automatically.

Setting the Electronic Shutter

Manual Shutter Control

How to select and switch between shutter modes and speeds manually.

Shutter Speed Settings

Tables detailing available shutter speeds for various video formats.

Adjusting White Balance

Manual White Balance Modes

Using preset, memory, or manual modes for white balance adjustment.

White Balance Error Messages and FAW Mode

Automatic White Balance (FAW)

Using the Fulltime Auto White balance function for automatic adjustment.

Audio Input and Recording Level Setup

Setting Audio Input Options

Selecting input terminals and reference levels for microphones and line inputs.

Adjusting Audio Recording Level

How to set recording levels manually or automatically for audio channels.

Recording Time Code Continuity

Recording Time Code Continuously

How the camera records time code in continuation of existing data on SDHC cards.

Viewing Recorded Videos (Clip Review)

Accessing Clip Review

How to quickly review the last recorded video clip on the camera.

Assigning Functions to User Buttons

Special Recording Modes

Pre REC Recording

How to record video starting a few seconds before the actual record button press.

Clip Continuous Recording

Variable Frame REC

Playing Back Recorded Clips

Thumbnail Screen Navigation

How to navigate and select clips from the thumbnail display.

Operation Buttons for Playback

Using buttons to play, pause, skip, and stop playback.

Deleting Clips

Deleting Clips via Thumbnail Screen

Step-by-step guide to delete clips from the thumbnail display.

Deleting Clips During Playback

How to delete clips while they are playing back or paused.

Basic Menu Operations

Using Menu Operation Buttons

How to navigate and operate the camera's menu system using buttons.

Main Menu Screen Overview

Record Set Menu Options

Record Format Settings

Selecting file format, camera resolution, and frame/bit rates.

Record Mode Settings

Choosing recording modes like Normal, Pre Rec, Clip Continuous, Variable Frame.

Camera Function Menu Settings

Exposure and Iris Controls

Settings for shutter, AE level, AE speed, ALC, and auto iris limits.

Image and Recording Settings

Settings for EEI, smooth trans, switch assignments, and full auto modes.

Camera Function Switch Settings

FULL AUTO Mode Settings

Camera Process Menu - Detail Adjustments

Camera Process Menu - Color and Image Settings

Camera Process Menu - White Balance and Shading

Camera Process Menu - Shading and Color Matrix

Shooting Assist Menu Options

A;V Out Menu Options

Media and Setup File Management

Status Screen in Camera Mode

Status Screens in Media Mode (SD Card)

Status Screens in IEEE1394 Mode

Marker and Safety Zone Displays

Smoothing Skin Color with Skin Detail

Color Matrix Adjustment

Configuring Setup Files

Saving Setup Files

Loading and Resetting Setup Files

Connecting an External Monitor

Composite;Component Output Connection

Connecting monitors via composite or component BNC terminals.

SDI Output Connection

Connecting monitors via HD-SDI or SD-SDI terminals.

IEEE1394 Connection and Phone Terminal

IEEE1394 Backup Recording

Stream Transmission to Non-linear Editing System

Managing and Editing Clips via PC (USB)

Remote Control Unit Connection

Remote Control Unit Functions

Error Displays and Actions

System and Media Errors

Troubleshooting steps for system errors, incorrect, invalid, and unformatted media.

Restore, No Media, and Clip Errors

Troubleshooting for restore media, no media, no clips, and write-protect errors.

Troubleshooting Common Issues

Power, Recording, and Display Issues

Solutions for problems like power not turning on, unable to record, or no image output.

Image, Playback, and Signal Input Issues

Solutions for dark/blurred images, playback failures, and HD/DV signal input problems.

Audio, SDHC, and Time Code Issues

Solutions for audio problems, SDHC card initialization, battery alarms, and time code display.

Troubleshooting Advanced Issues

Date;Time and Video Output Issues

Solutions for problems with date/time display and video signal output.

Viewfinder and IEEE1394 Connection Issues

Solutions for viewfinder display issues and IEEE1394 connection problems.

Technical Specifications

Storage and Video;Audio Specs

Details on supported media, recording time, codecs, and frame rates.

Camera, Lens, and Terminal Specs

Specifications for camera components, lens details, and terminal interfaces.

JVC HM700U - Camcorder - 1080p Specifications

General IconGeneral
BrandJVC
ModelHM700U - Camcorder - 1080p
CategoryCamcorder
LanguageEnglish

Related product manuals