EasyManua.ls Logo

JVC KD-R320J - User Manual

JVC KD-R320J
2 pages
Print Icon
To Next Page IconTo Next Page
Loading...
(1/2)
TP 8/12/11
JVC U.S.A.
Customer Care Center 1-800-252-5722
CUSTOMER PROCEDURE
“Chk Wiring then reset unit” message scrolls on display when unit is powered ON
KD-R320J KD-R420J KD-R520J KD-HDR44J KD-BPT30J KD-R328J
KD-R428J KD-R528J KD-BTP50J KD-A525J KD-A625J KD-R620J
KD-R628J KD-AHD79J KD-HDR70J KW-HDR720J
Cause
The wires were shorted during installation.
Cure
1. Remove the Radio and disconnect the Harness.
2. Verify the Units wiring and ensure there are no shorts.
Check for misconnection (for example; DC12V to Left speaker negative to
reverse signal)
Check for loose connections
Check for uncovered connections
3. Clear the error using the procedure below.
PROCEDURE
Apply this procedure after verifying the units wiring.
It is NOT possible to clear the error message if the wiring problem has not been
corrected.
1. Remove wiring harness from unit (remove all DC power).
2. Simultaneously press and hold the [MENU] and [UP arrow] button.
3. While holding [Menu] / [Up arrow] buttons, insert the unit’s wiring harness
(reapply DC power to the unit).
a. “DC ERR” will be displayed.
b. If “Chk wiring…” message reappear, retry steps 1-3 again.
Question and Answer IconNeed help?

Do you have a question about the JVC KD-R320J and is the answer not in the manual?

Overview

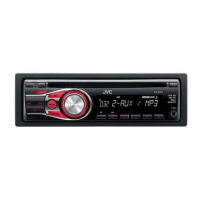
This document outlines a customer procedure for JVC U.S.A. car audio units, specifically addressing the "Chk Wiring then reset unit" error message that scrolls on the display when the unit is powered ON. The procedure is applicable to a range of JVC models including KD-R320J, KD-R420J, KD-R520J, KD-HDR44J, KD-BPT30J, KD-R328J, KD-R428J, KD-R528J, KD-BTP50J, KD-A525J, KD-A625J, KD-R620J, KD-R628J, KD-AHD79J, KD-HDR70J, and KW-HDR720J.

The primary function of this procedure is to diagnose and resolve an error condition caused by incorrect wiring during the installation of the car audio unit. The "Chk Wiring" message indicates a potential short circuit or misconnection in the power and speaker wiring, which can prevent the unit from operating correctly. The procedure guides the user through steps to clear this error and restore normal operation.

Usage features of the JVC car audio units, as implied by this document, include their reliance on proper electrical installation. The units are designed to detect wiring faults, such as shorts, misconnections (e.g., DC12V connected to a left speaker negative terminal), loose connections, or uncovered connections. This self-diagnostic capability is a safety and protective feature, preventing potential damage to the unit or the vehicle's electrical system due to faulty wiring. The units display a clear error message ("Chk Wiring then reset unit") to alert the user to the problem.

The maintenance features described in this document are focused on troubleshooting and error resolution rather than routine maintenance. The procedure for clearing the "Chk Wiring" error involves a specific sequence of actions:

  1. Initial Diagnosis: The first step in addressing the error is to remove the radio and disconnect its wiring harness. This isolates the unit from the vehicle's electrical system, allowing for a safe inspection of the wiring.
  2. Wiring Verification: Users are instructed to verify the unit's wiring for any shorts. This includes checking for misconnections (e.g., power lines connected to speaker lines), loose connections that could cause intermittent shorts, and uncovered connections where bare wires might touch other terminals or the vehicle chassis. This step is crucial because the error cannot be cleared if the underlying wiring problem persists.
  3. Error Clearing Procedure: Once the wiring issue is corrected, a specific button combination is used to clear the error memory:
    • The wiring harness must be removed from the unit (ensuring all DC power is off).
    • The [MENU] and [UP arrow] buttons must be simultaneously pressed and held.
    • While holding these buttons, the wiring harness is reinserted to reapply DC power to the unit.
    • The display will show "DC ERR," confirming the unit has entered the error clearing mode. If "Chk wiring..." reappears, the wiring issue has not been fully resolved, or the procedure needs to be retried.
    • Pressing the [Up arrow] again may display "DC1 ERR."
    • Pressing and holding the [Up arrow] will clear this specific error, and "DC1 OK" will be displayed.
    • Pressing the [Down arrow] will display "DC2 ," where "" is a number from 0 to 4, indicating another error state.
    • Pressing and holding the [Down arrow] will clear this error, displaying "DC2 0."
  4. Resetting the Unit: After clearing the error codes:
    • The wiring harness is removed again (all DC power off).
    • The unit's faceplate is removed.
    • The wiring harness is reinserted (DC power reapplied).
    • The [Reset] button on the unit is pressed to perform a full reset.
    • The faceplate is reinstalled, and the unit is powered ON.
  5. Outcome: Ideally, the unit's operation should be restored. If the "Chk wiring..." message reappears, it suggests that the unit itself might be defective, and the user is advised to contact a JVC authorized service center for assistance.

The document emphasizes that the error clearing procedure is ineffective if the underlying wiring problem has not been corrected, highlighting the importance of thorough wiring inspection. The contact information for the JVC U.S.A. Customer Care Center (1-800-252-5722) is provided for further support, indicating a robust customer service infrastructure for troubleshooting and repairs. The document is dated TP 8/12/11, suggesting it is a technical bulletin or service procedure from that time.

JVC KD-R320J Specifications

General IconGeneral
BrandJVC
ModelKD-R320J
CategoryCar Receiver
LanguageEnglish

Related product manuals