
I
ishahSep 23, 2025
What does “ERROR” mean on JVC KD-R856BT?
- RryanthompsonSep 23, 2025
If “ERROR” appears on your JVC Car Receiver, try the operation again. If the error persists, check if the device supports the function you have tried.
What does “ERROR” mean on JVC KD-R856BT?
If “ERROR” appears on your JVC Car Receiver, try the operation again. If the error persists, check if the device supports the function you have tried.
What to do if pairing cannot be made with JVC Car Receiver?
If pairing with a Bluetooth device fails on your JVC Car Receiver, first ensure that you've entered the same PIN code on both devices. If the problem continues, delete the pairing information from both the receiver and the Bluetooth device, and then try the pairing process again.
Why is sound interrupted during Bluetooth playback on JVC Car Receiver?
If the sound is interrupted or skipped during Bluetooth audio playback on your JVC Car Receiver, try reducing the distance between the unit and the Bluetooth audio player. You can also try turning the unit off and on, then attempt to connect again. Also, consider that other Bluetooth devices might be interfering by trying to connect to the unit.
Why can't I control the connected Bluetooth audio player on my JVC KD-R856BT Car Receiver?
If the connected Bluetooth audio player cannot be controlled via the JVC Car Receiver, first verify that the Bluetooth audio player supports Audio/Video Remote Control Profile (AVRCP). If it does, try disconnecting and reconnecting the Bluetooth player.
What to do if “READING” keeps flashing on JVC KD-R856BT Car Receiver?
To resolve the issue of “READING” keeps flashing on your JVC Car Receiver, avoid using too many hierarchical levels and folders. If the problem persists, reload the disc or reattach the USB device.
What to do if number of registered stations reached limit on JVC Car Receiver?
If the number of registered stations has reached its limit on your JVC Car Receiver, retry after deleting unnecessary stations from your device.
Why is new station creation unsuccessful on JVC KD-R856BT?
If new station creation is unsuccessful on your JVC Car Receiver, check the Pandora application on your device.
What to do if “NO STATIONS” found on JVC KD-R856BT?
If “NO STATIONS” is found on your JVC Car Receiver, check the Pandora application on your device.
How to fix echo or noise on JVC Car Receiver?
If echo or noise occurs with your JVC Car Receiver, adjust the microphone unit’s position. You may also want to check the [ECHO CANCEL] setting.
What does “PAIRING FULL” mean on JVC KD-R856BT Car Receiver?
If “PAIRING FULL” appears on your JVC Car Receiver, it means the number of registered devices has reached its limit. Try deleting an unnecessary device and retry.
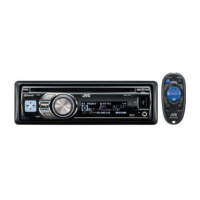
Overview of the unit's faceplate, remote control, and basic reset/battery procedures.
Guide to canceling demonstration mode, setting the clock, and configuring basic settings.
Instructions for playing CDs, USB devices, and iPod/iPhone devices.
Methods for finding, storing, and selecting radio stations, including PTY search.
Setting radio timers and connecting external audio players via the AUX input.
Setup, playback, and control of the Pandora music service.
Connecting Bluetooth devices, handling calls, and managing phone functions.
Accessing the phonebook, using voice recognition, and adjusting call settings.
Navigating Bluetooth modes, managing contacts, and adjusting call quality.
Using voice recognition, selecting contacts, and managing phonebook entries.
Storing, deleting, and recalling contacts, plus configuring Bluetooth mode settings.
Operating and controlling music playback from a connected Bluetooth audio device.
Adjusting equalizer settings, volume, and audio output for optimal sound.
Adjusting display brightness, dimmer, and information scrolling.
Information on playable discs, file formats, character limits, and device compatibility.
Details on USB devices, iPod/iPhone, Pandora, and Bluetooth connectivity.
How to cycle through different display modes for various sources.
Resolving problems with sound, wiring, source selection, and playback errors.
Troubleshooting Pandora service issues and playback order problems.
Resolving Bluetooth detection, pairing, connection, call, and audio playback issues.
Detailed technical specifications for Tuner, USB, Bluetooth, Audio, and General categories.
Safety warnings, basic installation steps, mounting, and unit removal.
Detailed diagram and instructions for connecting the unit's wiring harness.
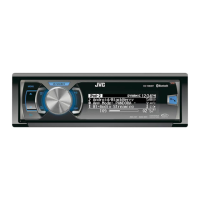
This document is an instruction manual for the JVC KD-R856BT CD Receiver, providing comprehensive details on its operation, features, and maintenance.
The manual emphasizes safety, cautioning users against operating functions that distract from safe driving. It advises adjusting the volume to hear external sounds and lowering it before playing digital sources to prevent speaker damage from sudden output level increases. Users should avoid using USB devices or iPod/iPhone if they might hinder safe driving and ensure all important data is backed up, as the manufacturer is not responsible for data loss. Metallic objects should never be placed inside the unit to prevent short circuits. In case of a disc error due to condensation, the disc should be ejected, and the unit allowed to dry. The USB rating is indicated on the main unit, visible by detaching the faceplate.
The remote control should not be left in hot places. The Lithium battery is at risk of explosion if replaced incorrectly; only the same or equivalent type should be used. Batteries should not be exposed to excessive heat, sunshine, fire, or similar conditions. They should be kept out of reach of children and in their original packaging when not in use, and used batteries disposed of promptly. If swallowed, a physician should be contacted immediately.
For cleaning the unit, a dry silicone or soft cloth should be used to wipe dirt off the faceplate. To clean the connector, detach the faceplate and gently clean it with a cotton swab, being careful not to damage it.
Users should avoid touching the recording surface of discs, sticking tape on them, or using discs with tape attached. No accessories should be used with discs. Discs should be cleaned from the center outwards with a dry silicone or soft cloth, avoiding solvents. When removing discs, pull them out horizontally. Burrs from the center hole and disc edge should be removed before insertion.
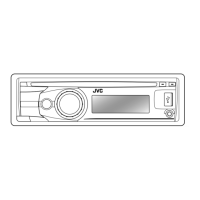
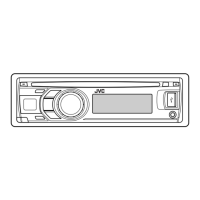
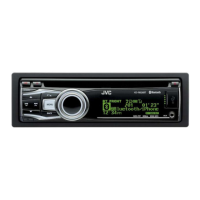
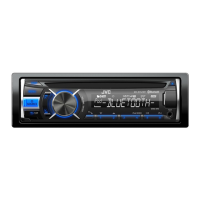
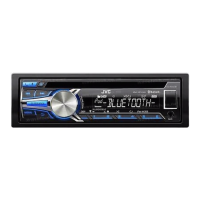
The faceplate includes a volume knob (turn/press), a loading slot, a detach button, and a display window. To turn on the power, press the /SOURCE button. To turn off, press and hold /SOURCE. Volume is adjusted by turning the volume knob. Sound can be muted or playback paused by pressing the volume knob; press again to cancel. Sources are selected by repeatedly pressing /SOURCE, or by pressing /SOURCE and then turning the volume knob within 2 seconds. Display information can be changed by repeatedly pressing DISP, or by pressing and holding DISP to scroll the current information.
The manual outlines steps to cancel the demonstration mode, set the clock, and configure basic settings. To cancel the demonstration, press and hold MENU, turn the volume knob to select [DEMO], press the knob, select [DEMO OFF], press the knob, and then press MENU to exit.
To set the clock, press and hold MENU, select [CLOCK], press the knob, select [CLOCK SET], press the knob, make time settings (Day, Hour, Minute), press the knob, select [24H/12H], press the knob, select [12 HOUR] or [24 HOUR], press the knob, and then press MENU to exit.
Basic settings are configured by pressing and hold MENU, turning the volume knob to select an item from the table (e.g., CLOCK ADJ, CLOCK DISP, BEEP, SRC SELECT options for AM, SW1, SW2, PANDORA, AUX), pressing the knob, and then pressing MENU to exit. The unit supports firmware updates, with details available on the JVC website.
Playback starts automatically when a CD, USB device, or iPod is connected. For CDs, the eject disc and label side are indicated. For USB, the USB input terminal and a USB 2.0 cable are used. For iPod/iPhone, the USB input terminal and an accessory cable are used.
To select a track/file, press or use the remote control. To select a folder (for MP3/WMA/WAV files only), press 1/2 or use the remote control. Reverse/fast-forward by pressing and holding or using the remote control. Repeat play options include TRACK RPT, FOLDER RPT, RPT OFF for MP3/WMA/WAV, and ONE RPT, ALL RPT, RPT OFF for iPod. Random play options include ALL RND, RND OFF for Audio CD, FOLDER RND, ALL RND, RND OFF for MP3/WMA/WAV/JPC/JMC files, and SONG RND, ALL RND, RND OFF for iPod.
When using an iPod/iPhone, the control mode can be selected between [HEAD MODE] (control from the unit) and [IPHONE MODE] (control from the iPod/iPhone) by repeatedly pressing 5 iPod MODE. The cable should not be left inside the car when not in use.
For iPod in [HEAD MODE], press MENU, turn the volume knob to select a desired folder/file/list (PLAYLISTS, ARTISTS, ALBUMS, SONGS, PODCASTS, GENRES, COMPOSERS, AUDIOBOOKS), and press the knob. Quick searching is possible by rapidly turning the volume knob.
When a smartphone (Mass Storage Class) is connected, internal or external memory can be selected for playback. For multiple drives, repeatedly press 5 iPod MODE to select the desired drive ([DRIVE 1] to [DRIVE 5]). Alternatively, press and hold MENU, select [USB/IPOD], then [USB], then [DRIVECHANGE].
For iPod in [HEAD MODE], press MENU, select the desired list, press the knob, press 1/2 ▲ or turn the volume knob quickly to select the first character (A-Z, 0-9, OTHERS), then turn the volume knob to select the desired folder/track/file, and press the knob.
For iPod in [HEAD MODE], press and hold MENU, select [USB/IPOD], then [IPOD], then turn the volume knob to select BOOK NORMAL, BOOK FASTER, or BOOK SLOWER.
The unit receives FM, AM, SW1, and SW2. "ST" lights up for strong FM stereo broadcasts. To search for a station, press /SOURCE to select the band, then press /►►I (or use remote) for automatic search. For manual search, press and hold /►►I (or use remote) until "M" flashes, then repeatedly press to search.
Up to 18 FM stations and 6 AM/SW1/SW2 stations can be stored. To store, press and hold a number button (1-6), or press and hold the volume knob until "PRESET MODE" flashes, select a preset number, and press the knob. To select a stored station, press a number button (1-6), or press MENU, select a preset number, and press the knob.
Press and hold, select a PTY code (NEWS, AFFAIRS, INFO, SPORT, etc.), and press the knob to search.
Press to activate Traffic Announcement (TA) standby. Press again to deactivate.
Press and hold MENU, select [TUNER], press the knob, make selections (RADIO TIMER, SSM, IF BAND, MONO, NEWS-STBY, REGIONAL, AF SET), press the knob, and press MENU to exit.
Connect a portable audio player to the 3.5 mm stereo mini plug auxiliary input jack. Select [ON] for [AUX] in [SRC SELECT], press /SOURCE to select AUX, and start playback on the portable player. A 3-core plug head stereo mini plug is recommended for optimum audio output.
Install the Pandora app, create an account, log in, and select [ON] for [PANDORA] in [SRC SELECT]. Open the app, connect the device to the USB input terminal. The source changes to PANDORA. Pause/resume playback by pressing the volume knob (or remote). Thumbs up/down by pressing 26/19 (or remote); thumbs down skips the track. Skip a track by pressing (or remote).
To create a new station, press MENU, select [NEW STATION], press the knob, select [FROM TRACK] or [FROM ARTIST], and press the knob. To search for a registered station, press MENU, select a search method ([BY DATE], [A-Z]), press the knob, select the desired station, and press the knob. To bookmark a song or artist, press and hold the volume knob, select [THIS TRACK] or [THIS ARTIST], and press the knob.
Connect the supplied microphone to the rear panel, adjusting its angle. If the unit is turned off or the control panel detached during a call, the Bluetooth connection disconnects, and the conversation continues on the mobile phone. Supported profiles include HFP1.5, A2DP, AVRCP1.3, OPP, PBAP, SPP.
Turn on the unit by pressing /SOURCE. Search for "JVC UNIT" on the Bluetooth device. "BT PAIRING" flashes. Enter a PIN code if prompted. Follow on-screen instructions to confirm pairing, which may involve a 6-digit passkey or a default "0000" PIN. Up to five devices can be registered, with a maximum of two phones and one audio device connected simultaneously.
Ensure no Bluetooth device is connected. Press and hold /. "BLUETOOTH" ↔ "CHECK MODE" appears. Search for "JVC UNIT" on the Bluetooth device within 3 minutes. Follow on-screen instructions to confirm pairing and check compatibility.
To receive a call, press or the volume knob (or remote). To reject/end a call, press and hold / or the volume knob (or remote). To activate/deactivate hands-free mode, press the volume knob during a call. Adjust phone volume by turning the volume knob during a call. To switch between two connected phones, repeatedly press.
While on a call, press and hold MENU, select [MIC LEVEL] (-20 to +08), [NOISE RDCT] (-05 to -20), or [ECHO CANCEL] (1-10), adjust the setting, and press MENU to exit.
When a text message is received, the unit rings and "RCV MESSAGE" appears. Messages cannot be read, edited, or sent. Press any button to clear the message.
Press / to enter Bluetooth mode. Turn the volume knob to select an item (RECENT CALL, PHONEBOOK, DIAL NUMBER, PHONE, AUDIO, APPLICATION, DELETE PAIR, PRIORITY, P.BOOK WAIT, SET PINCODE), press the knob, and press MENU to exit.
Press and hold /. The connected phone's voice recognition is activated. Speak the contact name or voice command. Supported features vary by phone. The unit supports iPhone's intelligent personal assistant.
Press / to enter Bluetooth mode, select [PHONEBOOK], press the knob, press 1/2 to select the first letter, turn the volume knob to select a name, and then select a phone number to call.
Press / to enter Bluetooth mode. Select [RECENT CALL], [PHONEBOOK], or [DIAL NUMBER], press the knob, select a contact or enter a number, and press and hold a number button (1-6).
Press / to enter Bluetooth mode, press a number button (1-6), and press the volume knob to call.
Press / to enter Bluetooth mode. Select [RECENT CALL] or [PHONEBOOK], press the knob, select a contact or number, press and hold, select [DELETE] or [DELETE ALL], press the knob, select [YES] or [NO], and press the knob.
Press and hold MENU, select [BLUETOOTH], press the knob, select an item (PHONE, AUDIO, APPLICATION, DELETE PAIR, PRIORITY, P.BOOK WAIT, SET PINCODE), press the knob, and press MENU to exit.
Select [ON] for [PANDORA] in [SRC SELECT]. Open the Pandora app, connect to the Bluetooth audio player, and press /SOURCE to select PANDORA. Operations are similar to Pandora for iPod/iPhone.
Press /SOURCE to select BT AUDIO. Operate the Bluetooth audio player to start playback. Pause/resume by pressing MENU (or remote). Select group/folder by pressing 1/2 (or remote). Reverse/forward skip by pressing (or remote). Reverse/fast-forward by pressing and holding (or remote). Repeat play options include TRACK RPT, ALL RPT, RPT OFF. Random play options include GROUP RND, ALL RND, RND OFF.
The display includes a BUTTON ZONE and DISP ZONE. Press and hold MENU, turn the volume knob to select an item (DIMMER, BRIGHTNESS, SCROLL), press the knob, and press MENU to exit. DIMMER adjusts display and button illumination (AUTO, ON, OFF). BRIGHTNESS sets brightness for day and night (00-31). SCROLL scrolls display information (ONCE, AUTO, OFF).
The manual provides a comprehensive troubleshooting guide for various symptoms, including sound issues, wiring errors, source selection problems, radio reception, incorrect character display, disc errors, playback order, and Bluetooth connectivity issues. Solutions range from adjusting volume and checking connections to resetting the unit, reattaching devices, and updating firmware or applications.
The manual provides detailed instructions for installation and wiring. It warns against using the unit with anything other than a 12V DC power supply, negative ground. The battery's negative terminal should be disconnected before wiring and mounting. Battery and Ignition wires should not be connected to the car chassis or Ground wire. Unconnected wires should be insulated. The unit must be grounded to the car's chassis after installation.
For safety, wiring and mounting should be done by professionals. The unit should be installed in the vehicle's console, and metal parts should not be touched during or shortly after use as they can become hot. Speaker wires should not be connected to the car chassis or Ground wire, or in parallel. Speakers with a maximum power of more than 50W should be used; if lower, the [AMP GAIN] setting should be changed to avoid damage. The unit should be mounted at an angle of less than 30°. If the vehicle wiring harness lacks an ignition terminal, the Ignition wire should be connected to the fuse box terminal that provides 12V DC power and is controlled by the ignition key. After installation, brake lamps, blinkers, and wipers should be checked. If a fuse blows, wires should be checked for contact with the car chassis before replacing the fuse.
The basic procedure involves removing the key, disconnecting the car battery, connecting wires (refer to wiring connection diagram), installing the unit (refer to in-dash mounting instructions), connecting the car battery, and resetting the unit.
The manual includes diagrams for in-dash mounting, showing how to attach and detach the unit, reset it, and replace the battery. It also details installation without the mounting sleeve, using specified screws. Instructions for removing the unit are also provided.
The wiring connection diagram illustrates connections for the signal cord, fuse (10A), remote wire, microphone input jack, antenna terminal, and factory wiring harness. It specifies connections for power antenna, amplifier, illumination, battery 12V, ignition 12V, ground, and front/rear speakers (left/right). It also includes information for connecting to a steering wheel remote control adapter.
The manual concludes with a part list for installation, including the faceplate, trim plate, mounting sleeve, wiring harness, and extraction key.
| Type | Car Receiver |
|---|---|
| Brand | JVC |
| Model | KD-R856BT |
| Maximum Power Output | 50W x 4 |
| RMS Power Output | 22W x 4 |
| Bluetooth | Yes |
| USB Port | Yes |
| CD Playback | Yes |
| AUX Input | Yes |
| Radio Tuner | AM/FM |
| Subwoofer Control | Yes |
| Display Type | LCD |
| Detachable Faceplate | Yes |
| Pandora Control | Yes |
| iHeartRadio Control | Yes |
| Spotify Control | Yes |
| SiriusXM Ready | No |
| FLAC Playback | Yes |
| MP3 Playback | Yes |
| WMA Playback | Yes |
| AAC Playback | Yes |
| Remote Control | Optional |
| Built-in Microphone | Yes |
| Pre-amp Outputs | 3 (Front, Rear, Subwoofer) |
| Steering Wheel Control | Yes |
| Display Color | Variable Color Illumination |
| EQ Settings | 13-band |