(No.YA180)1-11
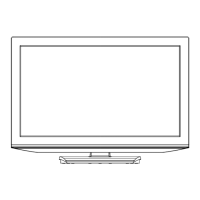
3.2.1 REMOVING THE STAND
(1) Remove the 2 screws [A], Then remove the STAND
COVER.
(2) Remove the 4 screws [B], Then remove the STAND.
3.2.2 REMOVING THE REAR COVER
• Remove the STAND.
(1) Remove the JACK COVER (L/R).
(2) Remove the 7 screws [C], 4 screws [D], and 1 screws [E] .
(3) Remove the REAR COVER.
CAUTION:
• Prior to starting the work, be sure to read the following
written instructions on the CAUTION LABEL attached to the
REAR COVER.
3.2.3 REMOVING THE POWER PWB / REGULATOR PWB
• Remove the STAND.
• Remove the REAR COVER.
(1) Remove the 5 screws [F], Then remove the FAN
BRACKET.
(2) Remove the 1 screw [G], Then remove the POWER CORD
HOLDER.
(3) Remove the POWER CORD from the POWER PWB.
(4) Remove the REGULATOR PWB.
(5) Remove the 5 screw [H], Then remove the POWER PWB.
3.2.4 REMOVING THE ANALOG SYGNAL PWB
• Remove the STAND.
• Remove the REAR COVER.
• Remove the FAN BRACKET.
(1) Remove the 6 screws [J] Then remove the TERMINAL
BASE.
(2) Remove the 6 screws [K] Then remove the ANALOG
SYGNAL PWB.
3.2.5 REMOVING THE FRONT CONTROL PWB CONTROL /
FRONT SENSOR PWB
• Remove the STAND.
• Remove the REAR COVER.
(1) Remove the 2 screws [L], Then remove the CONTROL
KNOB ASSY.
(2) Remove the 2 screws [M], Then remove the FRONT
CONTROL PWB.
(3) Remove the FRONT SENSOR PWB.
3.2.6 REMOVING THE RECEIVER PWB / CONNECTOR
PWB
• Remove the STAND.
• Remove the REAR COVER.
(1) Remove the 4 screws [O] Then remove the RECEIVER
PWB.
(2) Remove the 4 screws [P] Then remove the RECEIVER
PWB BRACKET.
(3) Remove the 2 screws [Q] Then remove the CONNECTOR
PWB.
3.2.7 REMOVING THE DIGITAL SIGNAL PWB
• Remove the STAND.
• Remove the REAR COVER.
(1) Remove the 3 screws [R] and 1 screw [S], Then remove
the TUNER BASE.
(2) Remove the 5 screws [T], Then remove the DIGITAL
SIGNAL PWB.
CAUTION:
Make sure to perform the "SYSTEM SETTING" on page 1-10,
when DIGITAL SIGNAL PWB is replaced.
3.2.8 REMOVING THE SPEAKER
• Remove the STAND.
• Remove the REAR COVER.
(1) Remove the 5 screws [a], Then remove the SPEAKER
BOX.
(2) Remove the 4 screws [b], Then remove the SPEAKER (L /R).
(3) Remove the 4 screws [c], Then remove the DUCT(L/R).
NOTE:
Since the speaker is attached in a certain direction, attach the
speaker in the same correct direction as it has been attached.
3.2.9 REMOVING THE LCD PANEL UNIT
• Remove the STAND.
• Remove the REAR COVER.
(1) Remove the 6 screws [d] and 4 screws [e].
(2) Remove the LCD PANEL UNIT.
(3) Remove the 7 screws [f]. Then, remove the MAIN BASE.
(4) Remove the 2 screws [g]. Then, remove the TOP FRAME.
(5) Remove the 2 screws [h]. Then, remove the BOTTOM
FRAME.
 Loading...