Do you have a question about the JVC TD-X321 and is the answer not in the manual?
Procedure for cleaning audio heads, pinch roller, and capstan to maintain sound quality and performance.
Procedures for routine electrical adjustments, including checks and confirmations for various circuit functions.
Diagram indicating the physical locations of adjustment points on the circuit boards for fine-tuning.
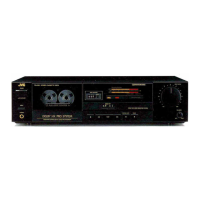
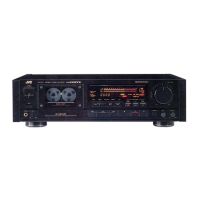
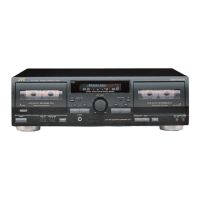
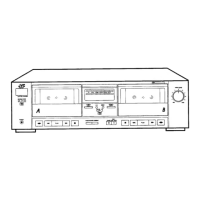
The JVC TD-X321 is a stereo cassette deck designed for high-quality audio playback and recording. This service manual provides comprehensive details for its operation, maintenance, and repair, catering to both users and service technicians.
The TD-X321 functions primarily as a stereo cassette deck, enabling users to play back pre-recorded cassette tapes and record audio onto blank cassette tapes. It incorporates a range of features to ensure optimal sound quality and user convenience. The deck is equipped with a magnetic tape head system, including an erase head and a record/playback (R/P) head, which are crucial for its recording and playback capabilities. The mechanism features supply and take-up reel disks, a capstan, a pinch roller assembly, a flywheel assembly, and a motor, all working in concert to ensure smooth and stable tape transport.
A key feature of the TD-X321 is its integration with the JVC COMPU LINK CONTROL SYSTEM. This system offers enhanced convenience by allowing the deck to interact with other JVC components equipped with COMPU LINK-1/SYNCHRO terminals. When connected, the system enables automatic source selection, meaning that selecting the cassette deck as the audio source on a JVC amplifier or receiver will automatically start playback on the TD-X321. Conversely, switching to another component will cause the cassette deck to stop within five seconds, streamlining the user experience.
Another significant function is Synchronized Recording. This feature allows the TD-X321 to synchronize its recording start with a connected CD player, facilitating seamless recording of CD tracks onto cassette tapes. To initiate synchronized recording, the user sets the cassette deck to record-pause mode, programs the desired tracks on the CD player, and then presses the PLAY/PAUSE button on the CD player. The cassette deck will then automatically enter record mode and begin recording in sync with the CD player. This function automatically stops when the CD player stops playing and locks the source to the CD position to prevent accidental interruptions or source changes during recording.
The deck also includes DOLBY NR (Noise Reduction) technology, which helps to reduce tape hiss and improve the signal-to-noise ratio during both recording and playback, resulting in clearer and more dynamic audio. The DOLBY NR board is a critical component in achieving this enhanced sound quality.
The TD-X321 is designed for straightforward operation, with clearly labeled controls and indicators. The front panel houses various buttons for tape transport (play, record, fast forward, rewind, stop, pause), as well as controls for volume and balance. An LED indicator board provides visual feedback on the deck's operational status and audio levels.
The COMPU LINK CONTROL SYSTEM simplifies the process of integrating the cassette deck into a larger audio setup. Users can control the TD-X321 through their JVC amplifier's source selector or a remote control unit, eliminating the need to manually operate the deck for basic functions.
For recording, the deck supports different tape types, including Normal (SF), Chroma (SA), and Metal tapes, allowing users to choose the appropriate tape for their recording needs and desired sound quality. The manual provides guidance on setting the deck to record-pause mode and initiating synchronized recording, making it easy for users to capture audio from their CD collection.
Regular maintenance is crucial for preserving the performance and sound quality of the TD-X321. The service manual emphasizes the importance of cleaning the tape path components, including the heads (erase and record/playback), capstan, and pinch roller. Magnetic powder and dust naturally accumulate on these parts during tape movement, which can lead to deteriorated tone quality, reduced output sound level, unsatisfactory erasure, and poor recordings.
The recommended cleaning procedure involves wiping these components with a cotton swab dipped in alcohol every 10 hours of use. For more effective cleaning, the use of a dedicated cleaning kit available from audio stores is suggested. After cleaning, it is essential to ensure that the cleaning fluid has completely dried before loading a cassette to prevent damage to the tape or the deck.
In addition to routine cleaning, the manual outlines a series of main adjustments that can be performed by service technicians to ensure the deck operates within specifications. These adjustments include:
The manual also provides detailed diagrams for the location of main parts, P.C. board components, and wiring connections, which are invaluable for troubleshooting and repair. This comprehensive approach to maintenance ensures that the JVC TD-X321 can deliver consistent, high-quality audio performance throughout its lifespan.
| Track System | 4-track, 2-channel stereo |
|---|---|
| Heads | 1 x record/playback, 1 x erase |
| Total Harmonic Distortion | 0.8% |
| Type | Cassette Deck |
| Tape Type | Metal |
| Wow and Flutter | WRMS |
| Signal to Noise Ratio (Chrome) | 56dB |
| Signal to Noise Ratio (Normal) | 56dB |