EasyManua.ls Logo

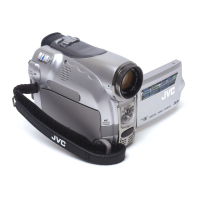
JVC VideoMovie GR-A30 - Playback Operations; Playback Setup and Connection; Basic Playback and Tracking

JVC VideoMovie GR-A30
29 pages
To Next Page IconTo Next Page
To Previous Page IconTo Previous Page
Loading...
15
PLAYBACK
The
GR-A30U
permits
playback
of
recorded
VHS-C video cassettes.
For
connections
refer
to
pages
17
and
18.
Preparations 3
1
•With
a television
equipped
with
audio/video
input
connectors,
set
the
television's
TV I
VIDEO
switch
to
VIDEO
.
•With
a regular television receiver, set
the
anten-
na select switch
of
the
R F-V3U RF
unit
to
VIDEO
and
the
TV
receiver's
channel
selector
to
your
video
channel
(3
or
4).
•Connect
a
power
supply
unit
.
(Battery
or
AC
operation:
see page 5.)
Set
the
control
panel
cover
to
DECK.
2
SI
ide
the
POWER
switch
to
on
and
then
press
the
EJECT switch.
4
Insert a
pre-recorded
cassette.
First remove
tape
slack,
then
insert
the
cassette
correctly
. See page 3.
Press
the
PLAY
button
. Playback will
start.
Tracking adjustment
If
noise bars
appear
on
the
screen,
adjust
the
TRACKING
control.
Turn
it slowly
in
either
direction
to
minimize
noise bars.
After
playing
a
particular
tape,
return
the
TRACK
I
NG
control
to
the
center
position.

Related product manuals