© SAFLOK, all rights reserved.
INS_MTRFID_2_12
MT
TM
RFID Installation Instructions Pg 3 of 8
Preparing the door and door frame (continued)
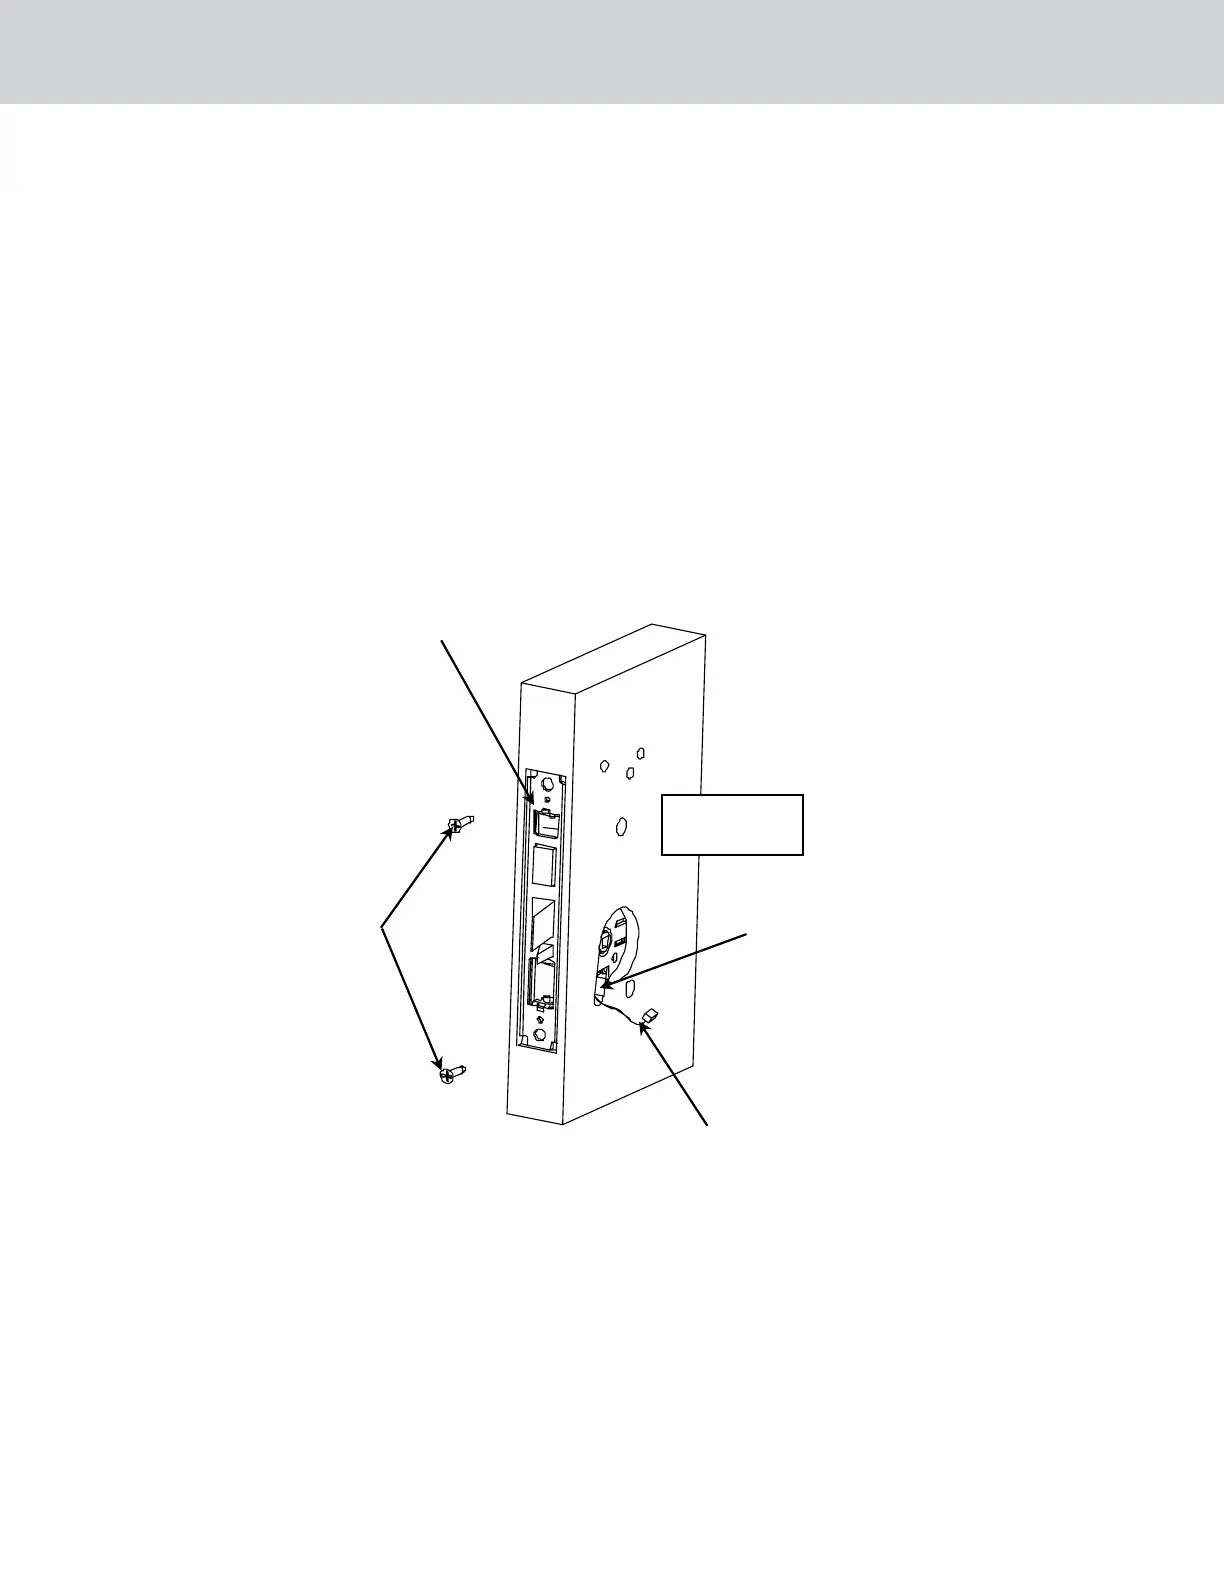
3. The mortise plate has an adjustable bevel. Align the mortise front plate with the bevel of the door edge and tighten
the two bevel adjustment screws at the top and bottom of the mortise case. Position the mortise case in the door
edge with the motor wire routed through the notch (see Fig. 3).
Note: Use care to ensure that the wires do not get pinched or pulled as the mortise is inserted into the pocket.
4. Attach the mortise front plate to the door using the two mortise screws (12 x 1-1/4 screws for wood doors,
12-24 x 3/8 screws for metal doors). Be sure that the screws are fully tightened.
Important: DO NOT leave the mortise screws loose. The screws must be fully tightened before the trim is installed.
If you must leave the mortise loose to install the trim, the door preparation is incorrect.
5. Install the scalp plates with the 8-32 x 1/4 screws provided and test for proper mechanical latch engagement
into the strike plate.
Mortise Front Plate
Mortise
Screws
Fig. 3
Notch for routing
the motor wire
(inside only)
Motor
Wire
Inside Door
Surface
 Loading...