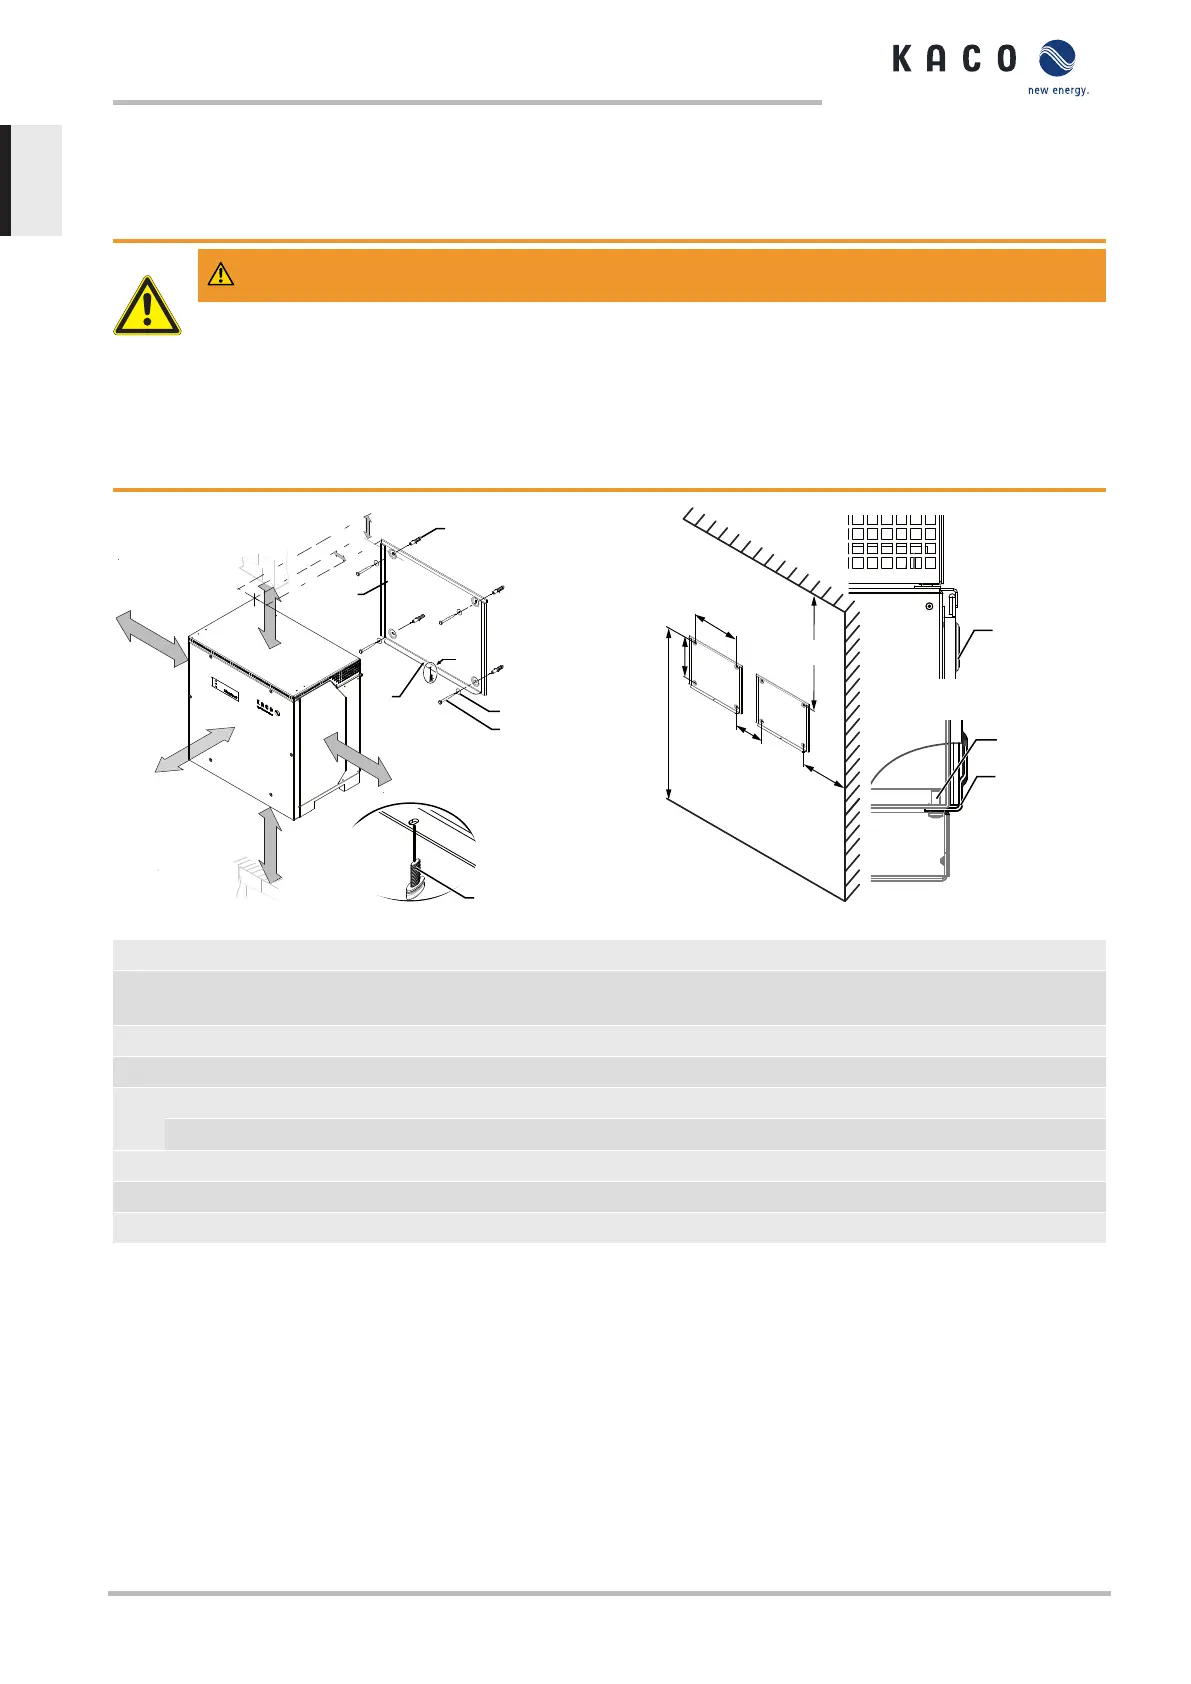
5. Remove the top side section and base from the device.
ð If the unit is in the correct installation position: Proceed with the installation of the mount.
6.3 Fastening the mount
WARNING
Hazard when using unsuitable fixing materials!
If unsuitable fixing materials are used, the device could fall and persons in front of the device may be seriously
injured.
1. Use only fixing materials that are suitable for the mounting base. The fastening materials supplied are only
to be used for masonry and concrete.
2. Only install the device in an upright position.
153 mm
A
A
B
C
D
1
2
3
4
5
6
75 mm
A
Detail A
Fig.11: Minimum clearances for wall mounting
1
6
5
270 mm
475 mm
475 mm
270 mm
1)
1)
1066 mm
458 mm
550 mm
453 mm
1543 mm
2)
1)
1)
Fig.12: Wall mounting
Key
1 Mount 4 Screw for mounting (4x) [SW 13 / [See sec-
tion6.3}Page16]]
2 Fixings for mounting [S12 – Ø 12mm/ 90mm]* 5 Screw for securing purposes (1x)
3 Lock washer 6 Bracket to store the device
A Minimum clearance: 120 mm
1)
Minimum clearance excluding device:270 mm
Recommended clearance: 400 mm
1)
Recommended clearance excluding device:475 mm
B Minimum clearance: 300 mm - -
C Minimum clearance: 500 mm - -
D Recommended clearance: 1000 mm ²) Recommended clearance with DC breaker:1543 mm
↻ Cardboard packaging with mount and mounting kit removed from the packaging and opened.
1. Mark the mounting position on the wall surface according to the position of the mount by drawing a line.
2. Mark the positions of the drill holes using the slot in the mount.
. NOTE:The minimum clearances between two devices, or the device and the ceiling or floor have
already been taken into account in the diagram.
3. Fix the mount to the wall using suitable mounting fixtures from the mounting kit.
. NOTE:Make sure that the mount is oriented correctly.
ð Proceed with the installation of the device.
6 | Assembly and preparation Manual
KACO blueplanet gridsave 92.0 TL3
Page 16
EN
 Loading...