20
→ Use the lifting point to remove the
device from the pallet.
→ Remove the chocks in front of and next
to the wheels.
Unloading
** optional
Before Startup
→ Push down the device holding the push
handle and push it forwards up to the pallet
edge.
→ Lift (remove) the device off the pallet
and set it on the floor.
WARNING
Damage risk!
– Do not connect the charger to the battery
socket at the device side.
– Use a charger that matches with the
battery type installed:
Warning: Please read the charger
manufacturer’s instruction manual,
especially the safety warnings!
→ Connect the charger to the battery
socket at the battery side.
→ Connect the charger plug to the socket
to turn it on.
→ Perform the charging process according
to the instructions in the charger’s
instruction manual.
Installing Batteries
Recommended charger for
each battery.
Low Maintenance (Lead-Acid) Batteries
Charging Process
Using Batteries Made by
Other Manufacturers
Mount the batteries (see “Care and
Maintenance/Mounting and Connecting the
Batteries”). Optional battery*.
*Check with one of our resellers.
We recommend using our batteries
as described in chapter “Care and
Maintenance/Recommended Batteries.”
Warning:
The device is equipped with a total
discharge protection, that is, if the minimum
admissible capacity is reached, the brush
motor and the turbine are switched off.
→ Take the device directly to the charging
station, avoiding any unnecessary
steep gradients.
Average charging time is approx. 10 to 15
hours. The device must not be used during
the charging process.
DANGER
Danger of injury due to electric shock.
Observe the mains voltage and fuse
protection on the device type plate.
DANGER
Explosion risk
Before starting to charge low-
maintenance batteries, remove the
waste water tank (see the chapter “Care
and Maintenance/Maintenance Work/
Removing the Waste Water Tank”). This
prevents the accumulation of hazardous
gases underneath the tank during the
charging process.
WARNING
Damage risk. Do not clean the device with
water while the tank is removed.
ATTENTION
Risk of burns!
- Adding water to discharged
battery can cause the acid to leak.
- Use safety glasses while handling
battery acid and follow the current safety
instructions to avoid personal injury or
damage to clothes.
- Should the acid spray on to the skin or
clothes, rinse immediately with plenty of
running water.
WARNING
Damage risk!
- Use only distilled or desalinated water in
the batteries.
- Do not add any unknown additives (the
so-called performance improving agents)
or the warranty will be deemed void.
- Replace batteries with the same battery
type only.
→ Insert the vacuum bars into the
suspension in such a manner that
the profiled sheet is positioned above
the suspension.
→ Tighten the wing bolts.
Mounting the Suction Bar
ATTENTION
Risk of injuries!
In dangerous situations, release
the safety switch/drive lever.
Clean Water
→ Open the clean water tank cover.
→ Fill with clean water (maximum 60 °C)
to the lower edge of the filling nozzle.
→ Close the clean water tank cover.
Operation
Filling Consumption Products
Detergent
Oblique Position
WARNING
NOTE: The Suction hose must be
mounted outside of the suction
bar lift lever bracket. The hose must not
be twisted.
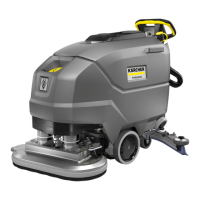
1 - Battery socket, device side
2 - Battery socket, battery side
→ Remove the battery socket from the
device side.
Battery Type Charger
9.385-084.0 9.385-230.0
9.385-268.0 9.385-230.0
9.385-565.0 9.385-230.0
→ Insert the suction hose.
ATTENTION
Damage risk.
Only use the recommended detergents.
With other detergents, the operator has
increased risk regarding operational safety
and risk of accidents. Only use detergents
that are free from solvents, hydrochloric
acid, and hydrofluoric acid. Pay attention
to the detergent safety warnings.
Warning:
Do not use highly foaming detergents.
Recommended Detergents:
For any type of application, the
recommended detergent is:
Kärcher’s RM755.
→ Add the cleaning detergent to the clean
water tank.
Warning:
If the clean water tank is empty, the
cleaning head continues working without
liquid supply.
Setting the Water Quantity
→ With the water adjustment knob, adjust
according to the dirt on oor.
Warning:
Perform the rst cleaning test with a small
amount of water. Increase water volume
step-by-step until the desired cleaning
result is achieved.
Setting the Suction Bar
To improve the vacuuming result on tiled
oors, the suction bar can be turned to an
oblique position of up to 5°.
→ Loosen the wing bolt.
→ Turn the suction bar.
→Tighten the wing bolts.
Setting the Suction Bar
If the vacuum result is unsatisfactory, the
suction bar tilting can be changed.
→ Adjust the rotary handle to tilt the
vacuum bar.
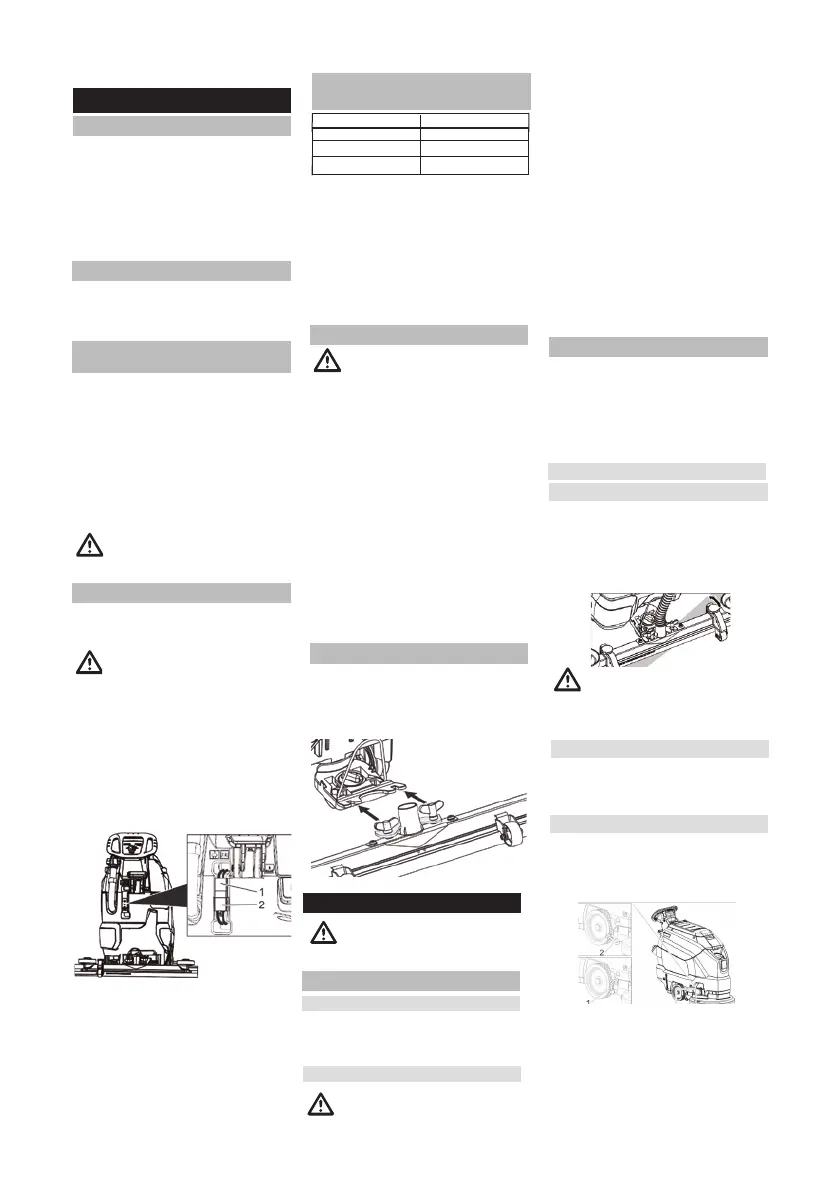
1 - Transport caster in the “Transport”
position
2 - Transport caster in the “Cleaning/
operation” position
→ Select the desired caster position with
your foot.
* If equipped.
Tilting
Transport Caster
The transport caster* lifts the cleaning
head until it no longer contacts the ground.
The equipment is transported with the lifted
cleaning head.