4 English
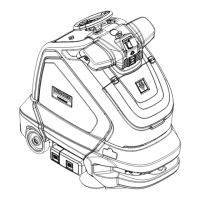
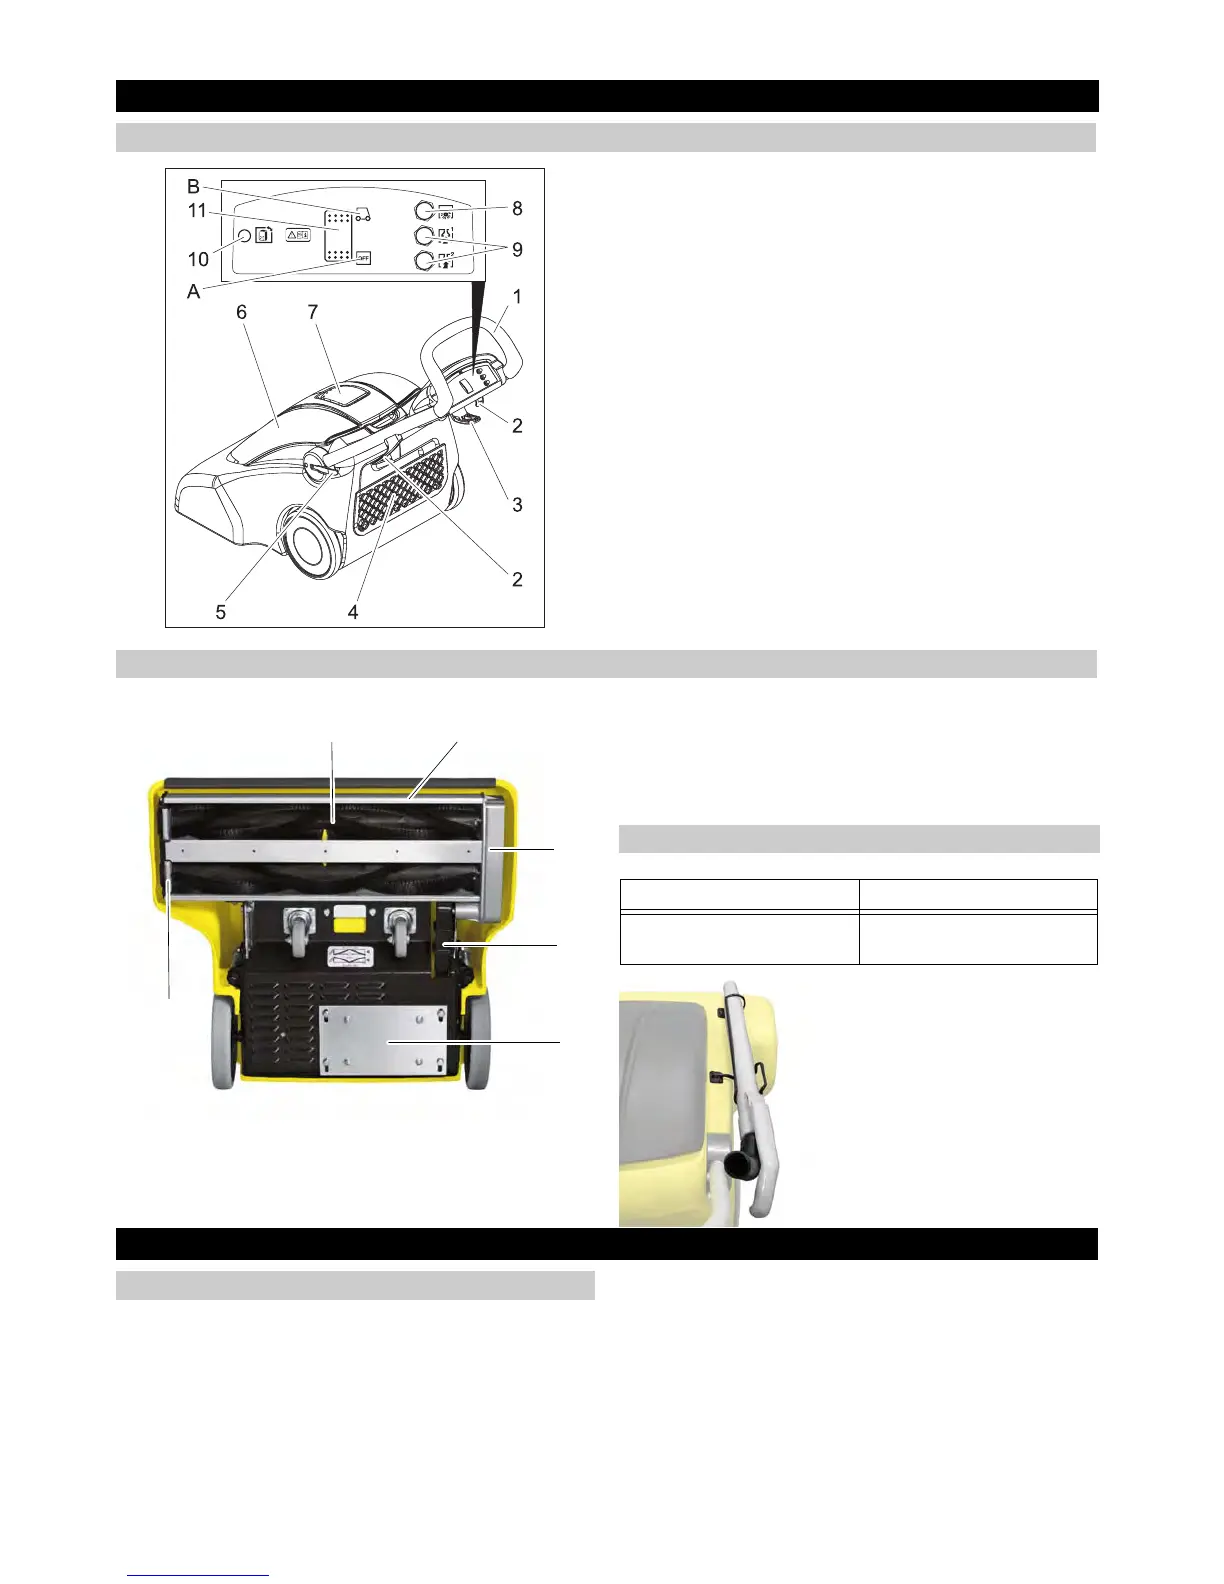
1 Pushing handle, adjustable
2 Cable clamp
3 Cable holder, rotating
4 Storage compartment
5 Lock of pushing handle
6 Lid of filter chamber
7 Suction hose connection (for optional suction set)
8 Fuse for brush drive
9 Fuse for suction turbine
10 Display 'Filter bag is full'
11 Power switch
1 Brush roller
2 Brush head
3 Brush head gear
4 Drive belt cover
5 Brush motor support plate
6 Safety sheet metal plates, brush roller removal
Î There are sharp edges in the appliance! Wear gloves during
the disassembly.
Î The cables are secured by cable ties. If a cable tie is re-
moved, it must replaced with a new one.
Î Watch for cable connections during removal and installation.
If connectors or lines are damaged, they must be replaced.
Î Some of the plastic parts cannot be removed without being
damaged and must be replaced.
Î Increased force is required for the hood.
Î The appliance is very heavy! 2 persons are required for lifting
and tilting.
Î Perform the function test after the work is completed
4 Setup and function
4.1 Appliance view
4.2 View from below