13
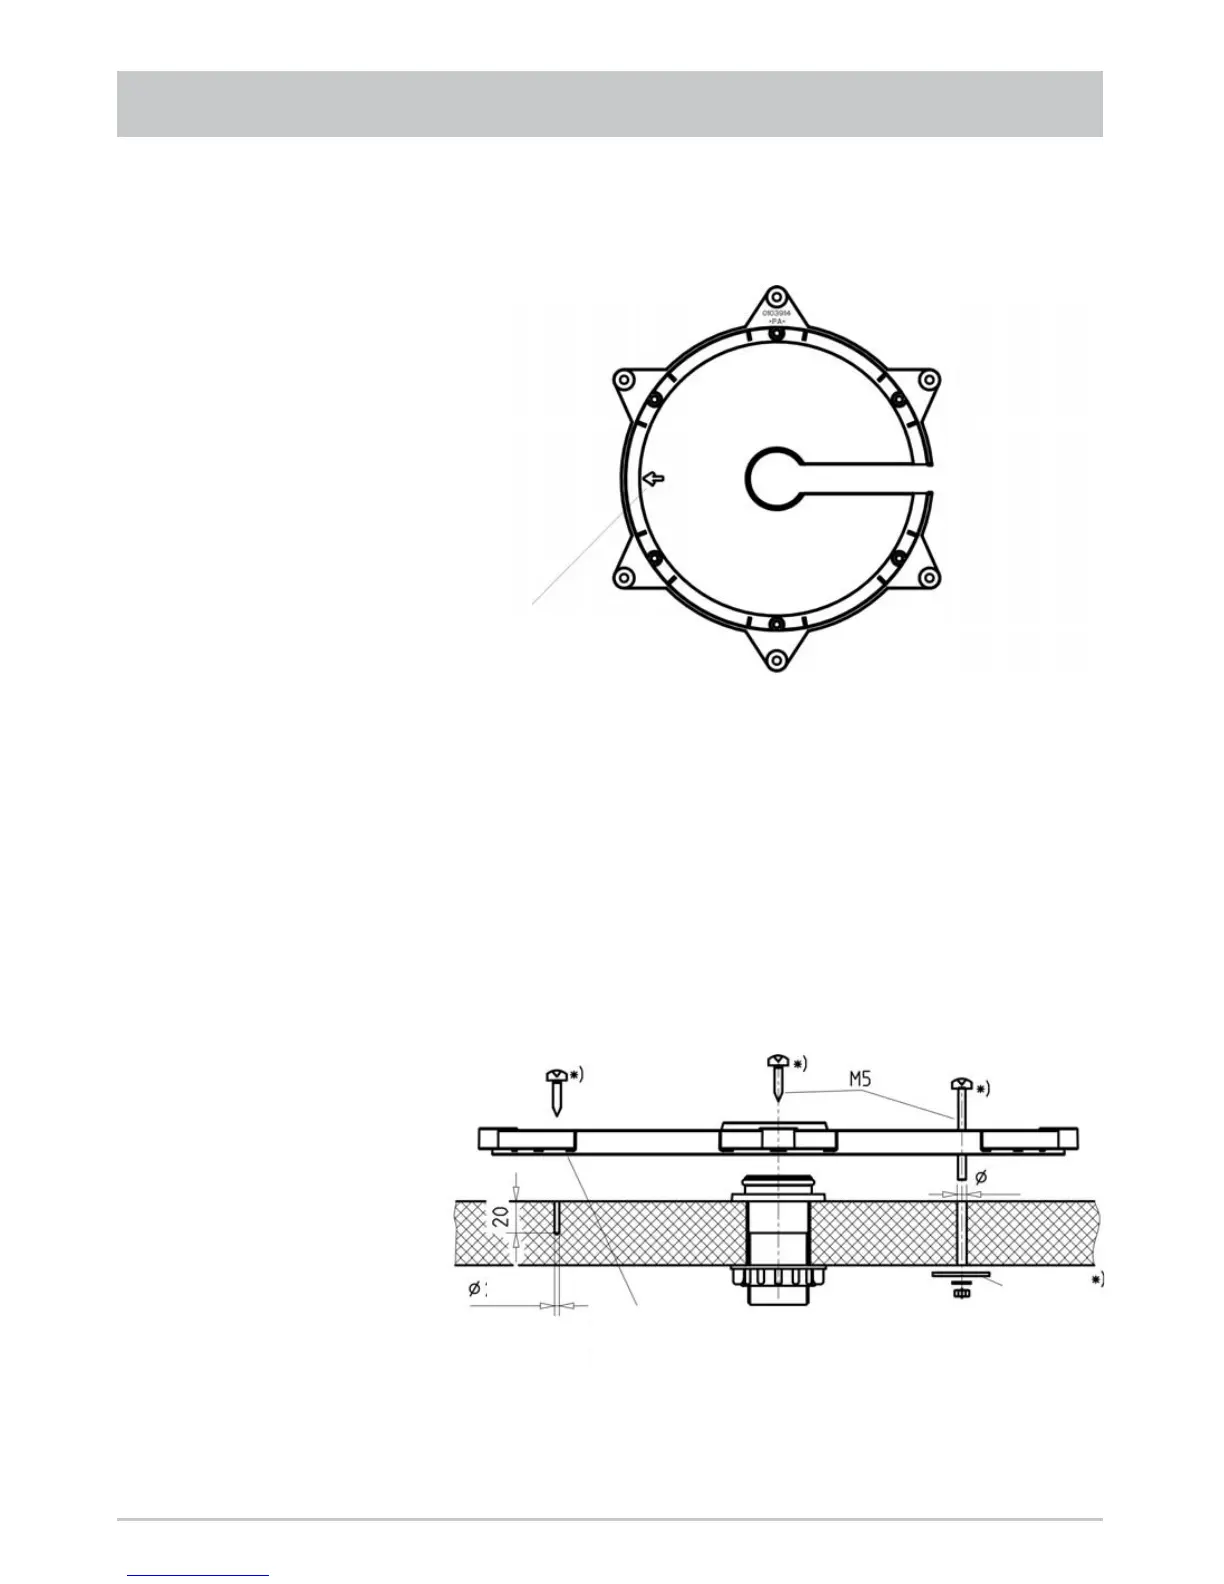
• Mark out the positions of the six fastening holes on the roof of the vehicle in a circular pattern.
Note: The size of the holes and the choice of fastening screws to be used (not supplied) depend
on the type and thickness of the materials used in the roof structure. If the roof panelling
(plastic roofs) is suffi ciently strong, it is recommended that round head screws, plain
washers and self-locking nuts are always used to secure the glued mounting plate.
Figure: B
INSTALLATION AND CONNECTION
• For very thin roof panel materials and insuffi cient support in the insulating material, through holes
(Ø: 5.5 mm) into the interior of the vehicle are necessary; galvanised M5 round head screws of
suffi cient length should then be used.
Make sure that you use a suffi ciently strong support that can accept the screw tensile forces (large
plain washers or a complete reinforcing plate).
Figure: C
*) Not included
• Place the mounting plate on the roof of the vehicle, such that the centre hole is positioned centrally to
the cable gland. The arrow symbol must be visible from above and point forwards in the direction of
travel (Fig. B).
Arrow in the
direction of travel
Alternative
roof attachment
Adhesive area
between the
two grooves
Washer
5.5
2.5–3