© 2019 KCodes Corporation. All rights reserved. 6 Series User’s Manual V1.0
After the driver is installed as described in section 4.4, you can see a newly created printer in the Control
Panel’s “Printers and Faxes”. Follow the steps below to do a NetUSB auto-connect printing.
1. In the Control Center, click the USB device server that has the desired printer (or MFP) attached.
2. Click the desired printer (or MFP).
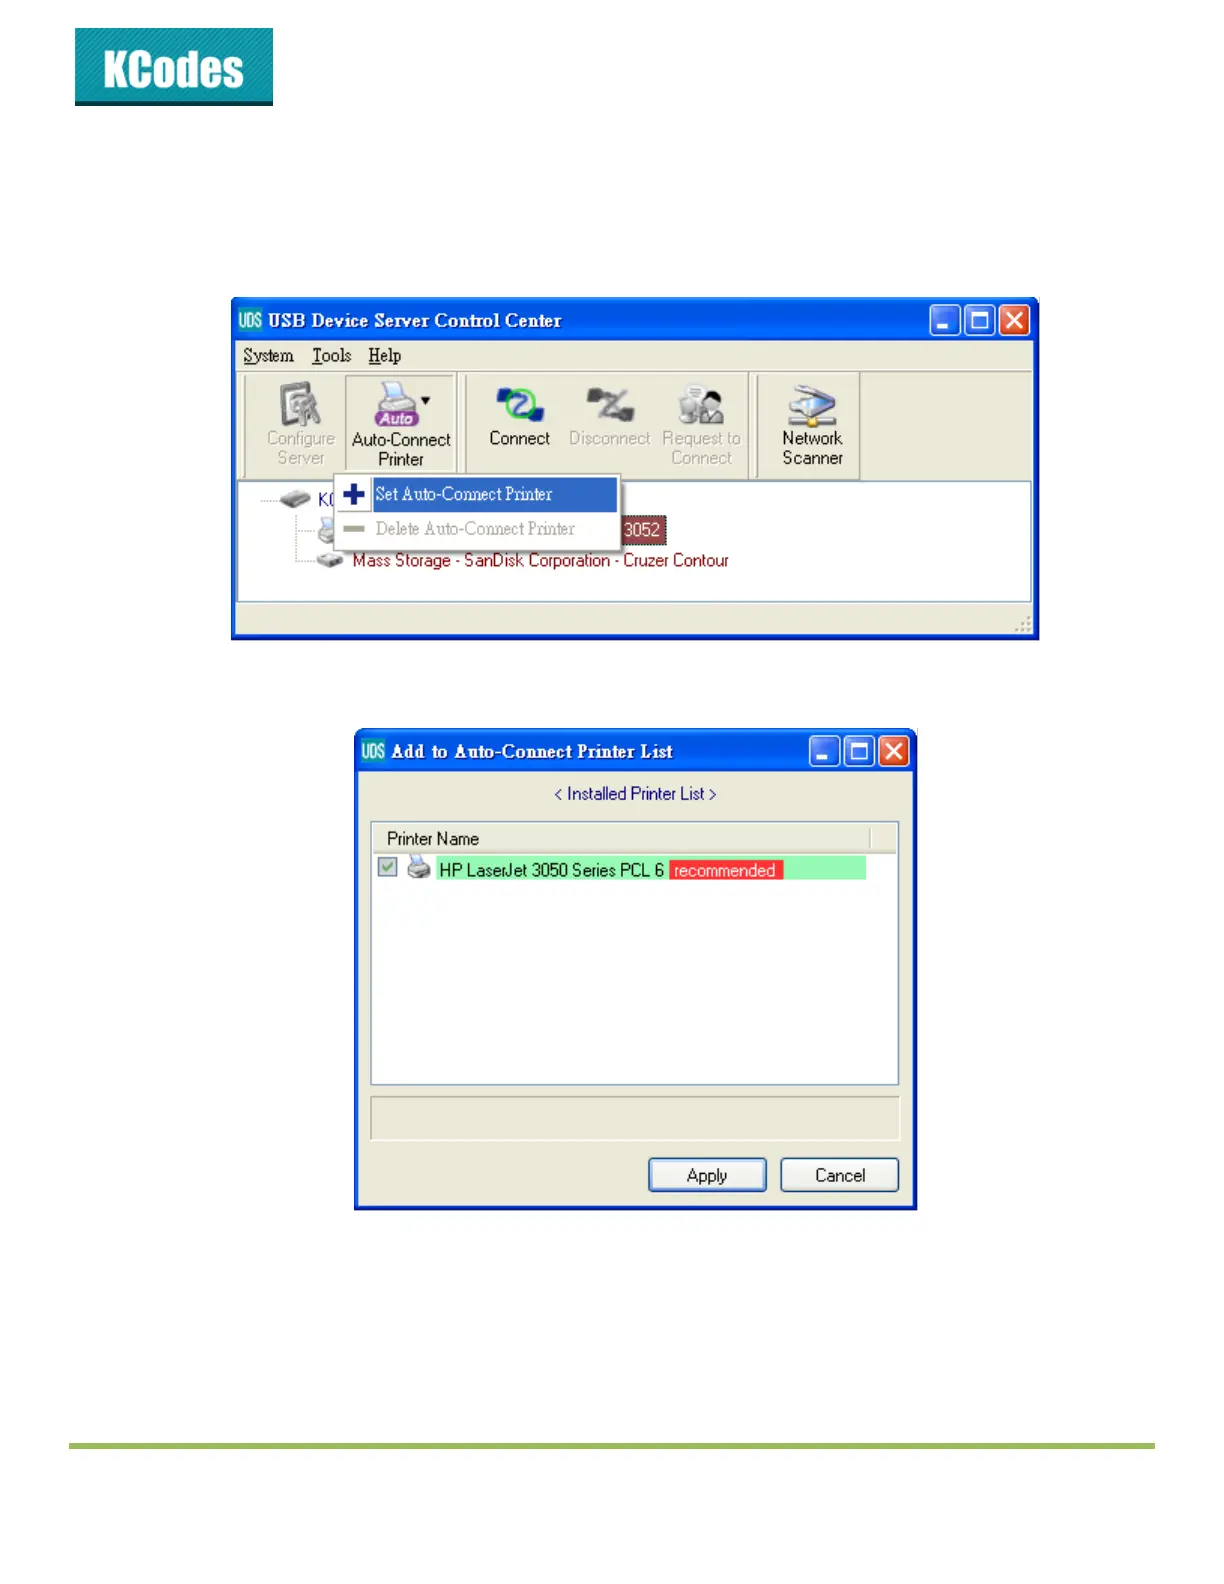
3. Click the “Auto Connect Printer” button and choose “Set Auto-Connect Printer”.
The following figure will appear.
4. Choose the desired printer. The desired printer must be the Windows printer (this is a logical
printer) that matches the printer attached on the USB device server (this is a physical printer).
Then click the “Apply” button.
5. Then, the printer will be marked as an “Auto-Connected Printer” in red. If you choose “Auto-
Connected Printer List” in the “Tools” menu, you can see a newly created item that describes the
association between the Windows printer and the physical printer on the server.