1
2
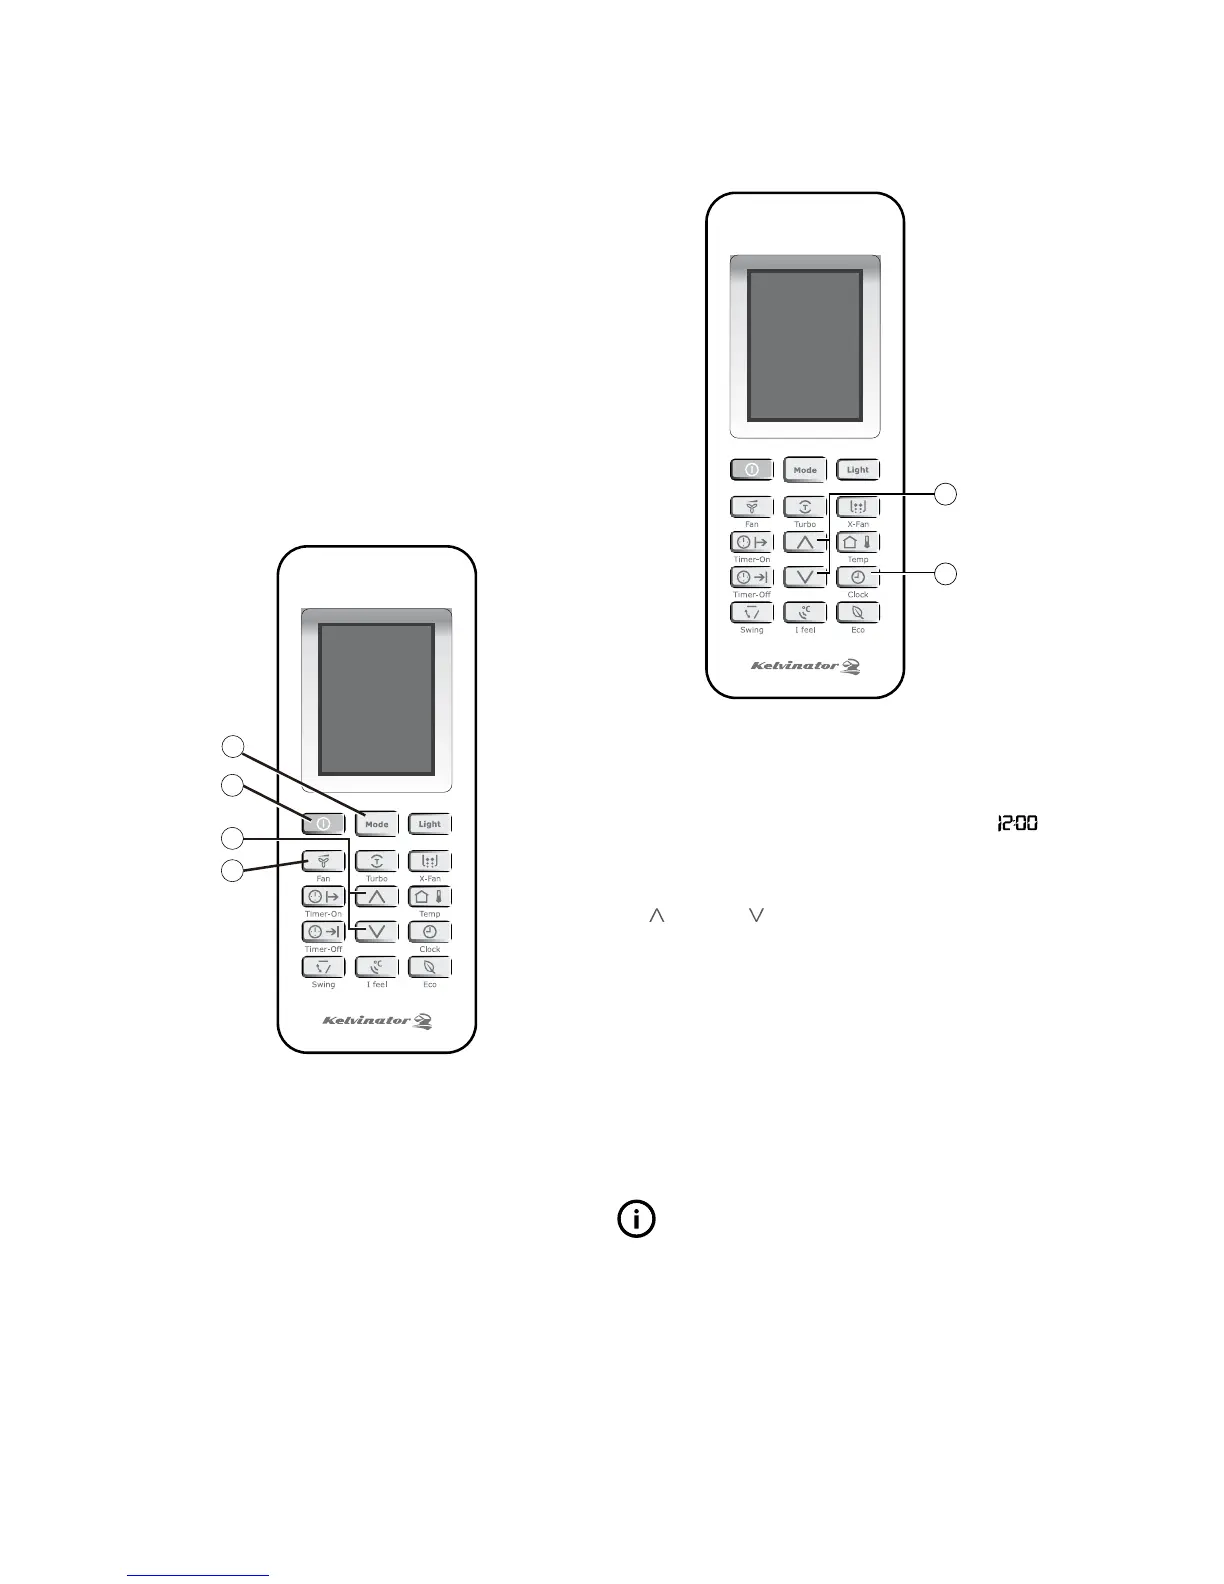
Before you start operating the air conditioner, set the clock on
the remote control using the following instructions. The clock
panel on the remote control will display the time regardless of
whether the air conditioner is in operation or not.
After batteries are inserted in the remote control,
will
display and begin to flash.
1 CONTROL buttons
Set the desired time by pressing the CONTROL
Forward Backward
Each time you press the buttons the time will move
forward or backward by 1 minute. Holding the button
down will scroll more rapidly through the time display.
2 CLOCK Button
When the desired time is achieved, press the CLOCK
button again or after 5 seconds with no operation, the
clock time stops flashing and the clock is set.
3 Re-set the Clock
Press the CLOCK button and the clock display will start
to flash.
Follow step 1 and 2 to set the new time.
tips and information
• Theclocktimerusesa24hourclockmode.
• Thedefaulttimeforremotecontrolis12:00PMandit
will revert to this when the batteries are changed.
Start
Ensure the unit is plugged in and power is available.
The OPERATION indicator on the display panel of the indoor
unit starts flashing.
1 ON/OFF Button
Press this button to turn the air conditioner on. The
temperature indicator on the indoor display unit lights up.
2 Button
Press to select to COOL or HEAT (where applicable).
3 CONTROL Buttons
Set the desired temperature (normally, set between
21ºC to 28ºC).
4 FAN Button
AUTO, LOW,
and . The default fan speed is AUTO.
 Loading...