Do you have a question about the Kemppi KEMPACT 251A and is the answer not in the manual?
General overview of the operating manual and its purpose.
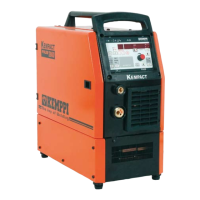
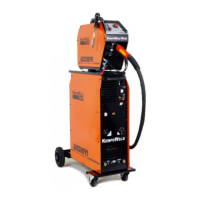
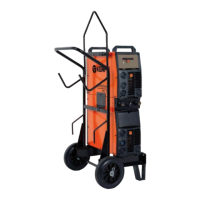
Information about the Kempact RA welding machines and their design.
Details the features and capabilities of the Kempact RA welding equipment.
Instructions for unpacking the machine and checking its contents.
Guidelines for safely placing and positioning the welding machine for optimal use.
Information on electrical distribution network requirements for machine operation.
Details where to find the unit's serial number and its importance.
Illustrates and labels the main components of the welding machine.
Explains how to connect the mains power and welding gun cables correctly.
Steps for installing the correct filler wire into the welding machine.
Guide on how to properly mount and secure the filler wire spool.
How to adjust the spool brake force to prevent wire uncoiling.
Step-by-step instructions for feeding the welding wire into the mechanism.
How to connect the welding gun to the machine and important notes on its use.
Guidance on adjusting feed roll pressure for optimal wire feeding.
Details on selecting and installing wire guide tubes and feed rolls for different wires.
Procedure for replacing feed rolls to suit different wire sizes.
Instructions on how to reverse the welding polarity for specific wire types.
Detailed explanation of the functions and controls on the regular control panel.
Overview of the adaptive control panel, its functions, and features.
How to use the HOT SPOT function for localized spot heating and stress relieving.
Routine daily tasks to keep the welding machine in good working order.
List of spare parts for the welding gun, including part codes and specifications.
Guidance on identifying and rectifying common welding malfunctions and issues.
Instructions for storing the welding unit safely and correctly.
Guidelines for environmentally responsible disposal of electrical equipment.
| Wire Spool Weight Max. | 15 kg |
|---|---|
| Wire Spool Diameter Max. | 300 mm |
| Wire Diameter (Ss) | 0.8 - 1.2 mm |
| Degree of Protection | IP23S |
| Input Voltage | 400 V |
| Connection Voltage | 3 x 400 V AC |
| Wire Diameter (Fe) | 0.6 - 1.2 mm |
| Wire Diameter (Al) | 1.0 - 1.2 mm |
| Standards | IEC 60974-1, -5, -10 |
| Power Supply | 3~ |
| Operating Temperature Range | -20°C to +40°C |